#61 Sending Email (revised)
- Download:
- source codeProject Files in Zip (88.7 KB)
- mp4Full Size H.264 Video (18.7 MB)
- m4vSmaller H.264 Video (9.63 MB)
- webmFull Size VP8 Video (11.8 MB)
- ogvFull Size Theora Video (20.9 MB)
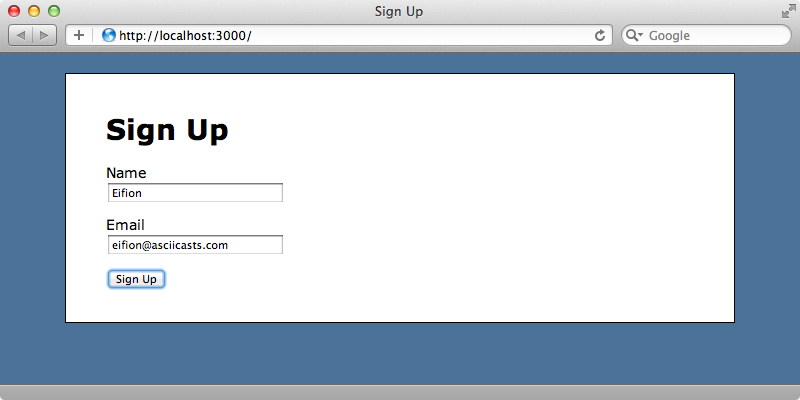
Sending email from Rails applications is easy thanks to ActionMailer but there are a few issues we can run into when using it. In this episode we’ll show you how it works and how to avoid some common problems. To demonstrate it we’ll use a simple application with name and email address fields (to keep this example simple there aren’t the usual password fields).

Filling in both fields and submitting the form creates a new User record and when this happens we want to send an email to the user thanking them for signing up. The form submits to the UsersController’s create action and this currently just saves the new User. We’ll have to modify it to send an email as well.
def create
  @user = User.new(params[:user])
  if @user.save
    redirect_to @user, notice: "Signed up successfully."
  else
    render :new
  end
end
Creating a Mailer
To send email in Rails we first need to create a mailer. Rails includes a generator to make this easy; we just need to pass it the name of the mailer we want to create and a name for the email we want to send.
$ rails g mailer user_mailer signup_confirmation
      create  app/mailers/user_mailer.rb
      invoke  erb
      create    app/views/user_mailer
      create    app/views/user_mailer/signup_confirmation.text.erb
      invoke  test_unit
      create    test/functional/user_mailer_test.rb
This command creates an app/mailers directory with a user_mailer.rb file in it and we can use this to send out our signup confirmation email. The generator also creates a view for the message which contains some default text.
UserMailer#signup_confirmation

<%= @greeting %>, find me in app/views/app/views/user_mailer/signup_confirmation.text.erb
Note that we can share instance variables between the view and the mailer itself much like we can with a controller.
It’s important that the signup_confirmation method ends with a call to mail as this will generate the email and return it. We can pass a variety of options to this method including who we send it to and the message’s subject. A comment near the top of the class shows us that we can also set the subject in the internationalization file but we’ll set it directly here as we don’t need to support multiple languages.
class UserMailer < ActionMailer::Base
  default from: "from@example.com"

  # Subject can be set in your I18n file at config/locales/en.yml
  # with the following lookup:
  #
  #   en.user_mailer.signup_confirmation.subject
  #
  def signup_confirmation
    @greeting = "Hi"

    mail to: "to@example.org", subject: "Sign Up Confirmation"
  end
end
The API documentation shows us a list of all the options we can pass in to the mail method.
If we have multiple methods defined in a mailer class and we want to share options between them we can make a call to default. Any options defined here will automatically be applied to each call to mail. We’ll use to define who the emails are sent from.
class UserMailer < ActionMailer::Base
  default from: "railscasts@example.com"

  # Subject can be set in your I18n file at config/locales/en.yml
  # with the following lookup:
  #
  #   en.user_mailer.signup_confirmation.subject
  #
  def signup_confirmation
    @greeting = "Hi"

    mail to: "to@example.org", subject: "Sign Up Confirmation"
  end
end
We still need to specify who to send the email to; this should be the email specified in the form. By design mailer classes don’t have access to request parameters so we’ll have to pass in the User model in different way. We’ll alter the signup_confirmation method so that it takes a user argument and pass the user in that way. We can then call user.email to get their email address. We’ll also set an instance variable to that user so that we can use it in the view.
def signup_confirmation(user)
  @user = user

  mail to: user.email, subject: "Sign Up Confirmation"
end
We can use that instance variable in the view to add the user’s name in the email.
<%= @user.name %>,

Thank you for signing up.
Our email is now pretty much complete and we just need to send it from our controller. We could send email through a model observer or a callback but we’ll send the email in the controller so that we don’t unintentionally send any email when we’re interacting with the model in other ways.
def create
  @user = User.new(params[:user])
  if @user.save
    UserMailer.signup_confirmation(@user).deliver
    redirect_to @user, notice: "Signed up successfully."
  else
    render :new
  end
end
To send the email we call UserMailer.signup_confirmation and pass in our user and call deliver on that. You might have noticed that we call signup_confirmation as a class method while in the UserMailer class it’s an instance method. How does this work? The answer is in the Rails source code for ActionMailer. This uses method_missing to create a new instance of the mailer and calls the missing method on that.
We can try this out now. Once we’ve restarted the server to pick up the changes we’ll submit the form and see if the email is sent. It doesn’t seem to work, however, and by default Rails will silently ignore any errors that occur when it’s trying to send email. This makes trying to debug this problem difficult. To make it easier we can modify the development config file and set raise_delivery_errors to true.
# Don't care if the mailer can't send
config.action_mailer.raise_delivery_errors = true
An exception will now be raised if an email fails to be delivered. After restarting the server and submitting the form again this time we get a “Connection refused” exception. This error isn’t useful either but essentially it means that Rails can’t connect to the SMTP server which by default is specified as localhost. We can change how mail is sent by specifying the delivery_method. We can set this to smtp, sendmail, file or test.
config.action_mailer.delivery_method = :smtpIf want to use a different server we can set the smtp_settings setting, like this:
config.action_mailer.smtp_settings = {
  address: "smtp.gmail.com",
  port: 587,
  domain: "asciicasts.com",
  authentication: "plain",
  enable_starttls_auto: true,
  user_name: ENV["GMAIL_USERNAME"],
  password: ENV["GMAIL_PASSWORD"]
}
Obviously you’ll need to put your own username and password settings in here. Note that we’re reading ours from environment variables. We’ll need to restart our application for these changes to be picked up but when we do this time our application successfully sends the email out.
An alternative way to test email delivery in development mode is to use Ryan Bates’ Letter Opener gem. To use it we need to add the gem to our gemfile then run bundle.
gem "letter_opener", :group => :development
Next we need to change the delivery_method in the config file.
config.action_mailer.delivery_method = :letter_openerThis will open any emails in a browser instead of sending them.
Using Links in Emails
Next we’ll show some common problems that we might run in to when sending email. One of these has to do with URLs. Let’s say that we want to add a link to the user’s profile at the bottom of their email. We might try to do that like this:
<%= @user.name %>,

Thank you for signing up.

<%= user_url(@user) %>
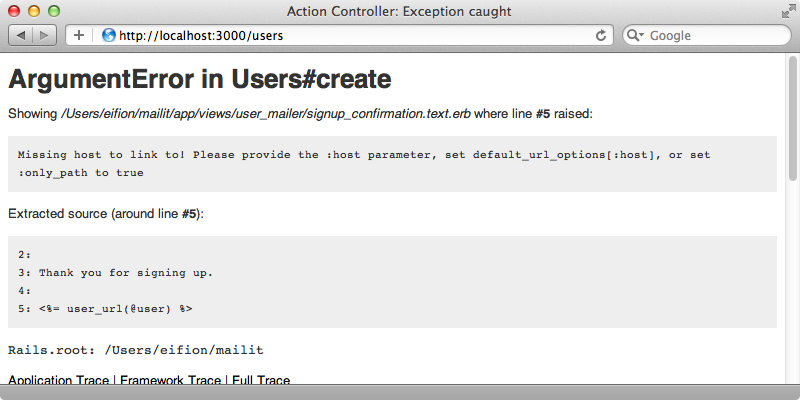
When we try submitting the signup form, however, this doesn’t work.

The page throws an error saying that it can’t generate the URL as there’s no host set. This is because the mailer doesn’t know which domain to use for the URL. To fix this we need to go back to our development config file and add the following setting.
# specify what domain to use for mailer URLs
config.action_mailer.default_url_options = { host: "localhost:3000" }
This is necessary as our mailer doesn’t have access to the request information and therefore doesn’t know which host to use. With this setting in place the form will submit correctly and include the host option in the message’s URL.
Generating HTML Emails
So far we’ve been generating plain text emails but we can make an HTML version of this message as well. To do so we need to make a new view file called signup_confirmation.html.erb and add the HTML version of the email in there.
<p><%= @user.name %>,</p>

<p>Thank you for signing up.</p>

<p><%=link_to "User Profile", @user %>
One thing to note here is that we can use helper methods here just like in any other Rails view. Now when the email is delivered it will include the HTML version with the “User Profile” link.
We need to take care when styling HTML email and there’s more information on how to do this in episode 312. Take a look also at episode 275 which covers writing automated tests for a mailer and the episodes on background jobs as it’s a good idea to move sending email into a background process. When we send an email we’re communicating with an external service which could be slow to respond or even unavailable and we don’t want to show these errors to the user. This isn’t as much of an issue if we’re using sendmail or postfix in production as these have their own queue but it’s a good idea to be aware of this.
Throughout this episode we’ve set various configuration options in our development config file. The chances are that we’ll want to add options to our production configuration file too but with different values to suit the application when it’s in production.


