#383 Uploading to Amazon S3 pro
- Download:
- source codeProject Files in Zip (2.11 MB)
- mp4Full Size H.264 Video (35.2 MB)
- m4vSmaller H.264 Video (17.1 MB)
- webmFull Size VP8 Video (21.6 MB)
- ogvFull Size Theora Video (41 MB)
In the past we’ve covered uploading files in a number of episodes, but we haven’t talked about where the files are stored once they’ve been uploaded to the server. Files are often stored on the application server’s file system but there are several disadvantages to this. The server may have limited disk space or bandwidth and if the app runs on a cluster of servers this can add complications, too. There are also several potential security issues with allowing users to upload files to the server.
Storing Images on S3
So, given that there are good reasons for storing uploaded files elsewhere that’s what we’ll cover in this episode. We already have a Rails application set up with CarrierWave to handle file uploads like we covered in episode 253. The ImageUploader class in this application is set up to store uploaded files on the local file system but we can easily change this by changing the storage engine to fog and CarrierWave will use this to then upload files to a cloud-based system.
class ImageUploader < CarrierWave::Uploader::Base
  include CarrierWave::RMagick

  # Include the Sprockets helpers for Rails 3.1+ asset pipeline compatibility:
  include Sprockets::Helpers::RailsHelper
  include Sprockets::Helpers::IsolatedHelper

  storage :fog

  def store_dir
    "uploads/#{model.class.to_s.underscore}/#{mounted_as}/#{model.id}"
  end

  version :thumb do
    process resize_to_fill: [200, 200]
  end
end
Fog is a Ruby gem that provides a standardized interface for interacting with a variety of cloud services. It can do much more than just manage file storage but that’s the part of it we’ll cover here. With it we can store our uploaded files on Amazon S3, Rackspace’s CloudFiles or Google’s Cloud Storage. We’ll use Amazon S3 here but Fog gives us the option to change this easily should be want to. This tutorial does a nice job of walking you through how to use Fog but we won’t need to go through it as CarrierWave handles the Fog interaction for us.
What we do need to do is set up an Amazon Web Services account so that we can provide an access key and secret. Setting up an AWS account is free and easy to do, although we will need to pay for the bandwidth that we use. Once we’ve signed up we can go to the Security Credentials page and then scroll down to the Access Keys section. Here we can create a new access key if we need to and then copy that and the associated secret to use in our application. We’ll also need an S3 bucket to store the created files in and we can create this in the management console. We’ll create an asciicasts-example bucket here for storing the images.
We now have a bucket that we can tell CarrierWave to upload the files to and if we look at CarrierWave’s README we’ll find some documentation on how set it up with Amazon S3. We need to add Fog to our gemfile and add an initializer file with various configuration options including the credentials we set up for our bucket. First we’ll add the gem then run bundle to install it.
gem 'fog'Next we’ll create an initializer file to set Fog’s credentials. We’ll use environment variables to store these so that we don’t have to store them in the application.
CarrierWave.configure do |config|
  config.fog_credentials = {
    provider: "AWS",
    aws_access_key_id: ENV["AWS_ACCESS_KEY_ID"],
    aws_secret_access_key: ENV["AWS_SECRET_ACCESS_KEY"]
  }
  config.fog_directory = ENV["AWS_S3_BUCKET"]
end
We’ve already set ImageUploader to use Fog for storage but it’s recommended that we add another couple of lines to this file to include the MimeTypes module and to process the image through set_content_type. This will set the MIME type for the image in case it’s incorrect.
include CarrierWave::MimeTypes
process :set_content_type
When we visit our Rails application now any existing attachments will be broken and their images aren’t stored on S3. If we upload a new file now it will take a while to respond and that’s because it’s processing the image and uploading it to S3.

Uploading Files in The Background
While this works it isn’t very efficient because our entire Rails process is tied up while it uploads the file to S3. There are a couple of CarrierWave add-ons that can help us to resolve this problem. One is carrierwave_backgrounder which moves the processing and uploading into a background process. Another is carrierwave_direct which handles uploading the file from the client-side directly up to S3 and which we’ll use here. To set it up we add it to the Gemfile. We’ll also need to add another gem to handle the background jobs and we’ll use Sidekiq here although we could use any similar gem. We’ll need to run bundle again to install them both. Sidekiq is covered further in episode 366.
gem 'carrierwave_direct'
gem 'sidekiq'
Next we’ll modify the ImageUploader class by including a module called CarrierWaveDirect::Uploader.
include CarrierWaveDirect::Uploader
Adding this sets the default storage to Fog so we can remove the storage :fog line from the class and also the store_dir method which sets the directory where the files are stored. To get this to work we’ll need to change the way the file upload works in our application. We currently have a form with a text field and a file upload field but this won’t work now as the file needs to be uploaded directly to S3 which means that it will need to be in a separate form from the one that’s submitted to our Rails application.
We’ll move the upload form into the index template and let the user enter the painting’s name after it’s been uploaded. Creating a form that uploads directly to S3 can be a little tricky but thankfully the gem provides a helper method called direct_upload_form_for that will do just what we want. We pass this an instance of an uploader and tell it what URL to redirect to after it has successfully uploaded a file. Next in the index template we’ll replace the link to the new painting page with a form for directly uploading an image.
<h1>Painting Gallery</h1>

<div id="paintings">
  <%= render @paintings %>
</div>
<div class="clear"></div>

<%= direct_upload_form_for @uploader do |f| %>
  <p><%= f.file_field :image %></p>
  <p><%= f.submit "Upload Image" %></p>
<% end %>
We pass this form an uploader (which we still need to set in the controller) and it contains a file upload field and a submit button. We’ll add the uploader now and set the action that it redirects to after a successful upload.
def index
  @paintings = Painting.all
  @uploader = Painting.new.image
  @uploader.success_action_redirect = new_painting_url
end
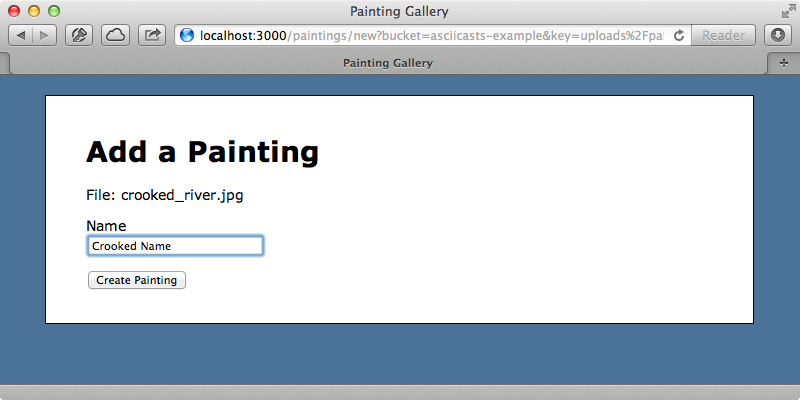
When we reload the index page now the form is there and we can upload an image. When we do this we’ll be redirected to Amazon S3 where the image is uploaded then redirected back to the new painting form where we can fill in the rest of the details about the painting. When we’re redirected to the form the path to the uploaded image is stored in a key parameter in the query string. This is important and we’ll need to remember it when we submit the second form. We’ll pass it in to the Painting model that we create in the new action. This is an attribute that the CarrierWave Direct gem provides when we mount the uploader and the gem makes it accessible in the model.
def new
  @painting = Painting.new(key: params[:key])
end
In the form template for the painting we need to pass that key in through a hidden field so that it persists when the form is submitted. We can remove the file field from the form too now as we’ve already uploaded the image but it would be nice to have something that displays the name of the file we’ve uploaded so we’ll replace the file field with that. There isn’t a consistent way to get the name so we’ll add this logic to the Painting model in a new image_name method.
<%= form_for @painting do |f| %>
  <!-- Validation code omitted -->

  <%= f.hidden_field :key %>

  <p>File: <%= @painting.image_name %></p>

  <div class="field">
    <%= f.label :name %><br />
    <%= f.text_field :name %>
  </div>
  <div class="actions">
    <%= f.submit %>
  </div>
<% end %>
Next we’ll add this new image_name method in the model.
def image_name
  File.basename(image.path || image.filename) if image
end
Here we call image.path || image.filename. One of these will be set depending on whether the record was created with the file. We then call File.basename on this and return it, but only if an image has been uploaded. When we reload the page now we see the filename and we can give the image a name and add the painting.

This partly works: the record is created but our thumbnail image is broken. Clicking the thumbnail to show the full image works, however, as this references the same image that we uploaded, not the thumbnail version. CarrierWave Direct disables the processing of the images so it’s up to us to manually trigger creating the thumbnails in a background job. We’ll do this within the Painting model.
class Painting < ActiveRecord::Base
  attr_accessible :image, :name
  mount_uploader :image, ImageUploader

  after_save :enqueue_image

  def image_name
    File.basename(image.path || image.filename) if image
  end

  def enqueue_image
    ImageWorker.perform_async(id, key) if key.present?
  end

  class ImageWorker
    include Sidekiq::Worker

    def perform(id, key)
      painting = Painting.find(id)
      painting.key = key
      painting.remote_image_url = painting.image.direct_fog_url(with_path: true)
      painting.save!
    end
  end
end
We now have an after_save callback that queues up the image processing. This will only take place if the key is present which will be the case if we’ve uploaded the image through S3. We call perform_async on the ImageWorker class. This is defined in the same file, and includes Sidekiq::Worker which we use to handle the background job. (While we’re including this class directly inline in the model we could move it into a workers directory.) This class will find the matching Painting record and set its key and its remote_image_url to the file on S3. This will retrigger the image processing so that the thumbnail is generated.
We already have Redis set up and running so all we need to do is startup Sidekiq so that it can process the background jobs.
$ bundle exec sidekiq
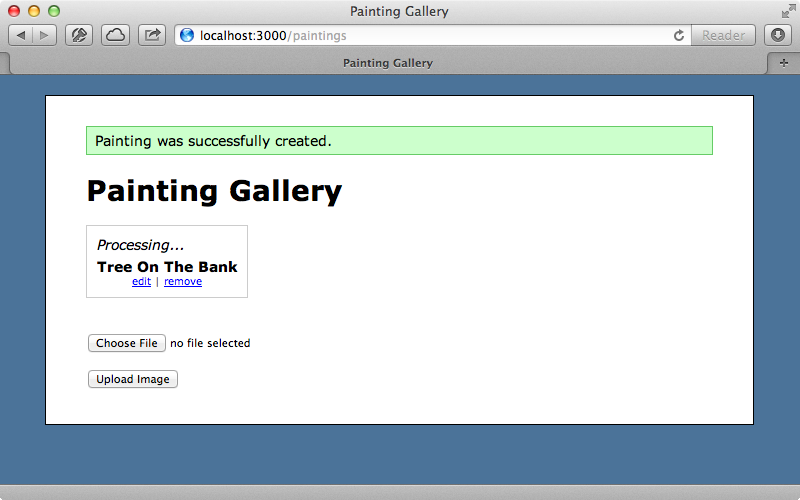
When we try uploading another image now the thumbnail image is still broken. If we wait a little while until the image has been processed in the background then reload the page the image will appear. It would be nice to have something displaying to show that the image is being processed instead of a broken image and the first step to implementing this is to add a boolean column to the paintings table that will say whether the image has been processed or not. We’ll then migrate the database to add that column.
$ rails g migration add_image_processed_to_paintings image_processed:boolean
$ rake db:migrate
Now, in the ImageWorker model we’ll set this attribute to true for each painting when it has finished being processed.
def perform(id, key)
  painting = Painting.find(id)
  painting.key = key
  painting.remote_image_url = painting.image.direct_fog_url(with_path: true)
  painting.save!
  painting.update_column(:image_processed, true)
end
Next we’ll change in the partial that displays each image so that it shows some placeholder text if the image hasn’t yet been processed.
<div class="painting">
  <% if painting.image_processed? %>
    <%= link_to image_tag(painting.image_url(:thumb)), painting if painting.image? %>
  <% else %>
    <em>Processing...</em>
  <% end %>
  <div class="name"><%= painting.name %></div>
  <div class="actions">
    <%= link_to "edit", edit_painting_path(painting) %> |
    <%= link_to "remove", painting, :confirm => 'Are you sure?', :method => :delete %>
  </div>
</div>
When we upload a painting now we see the placeholder instead of a broken image.

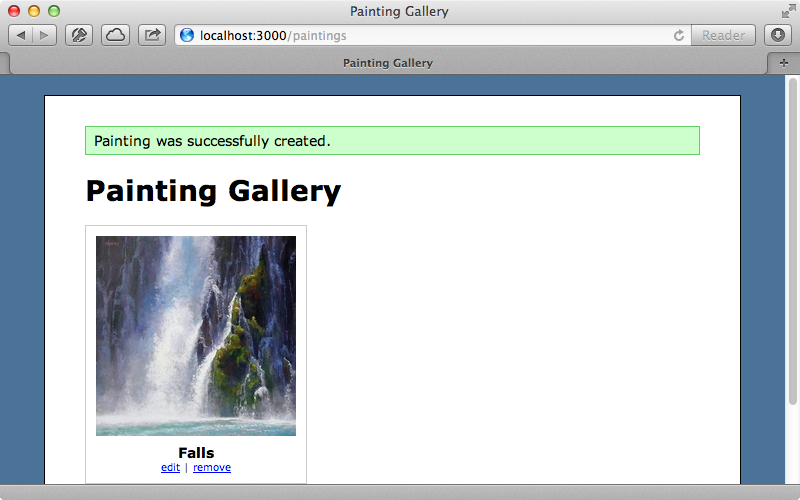
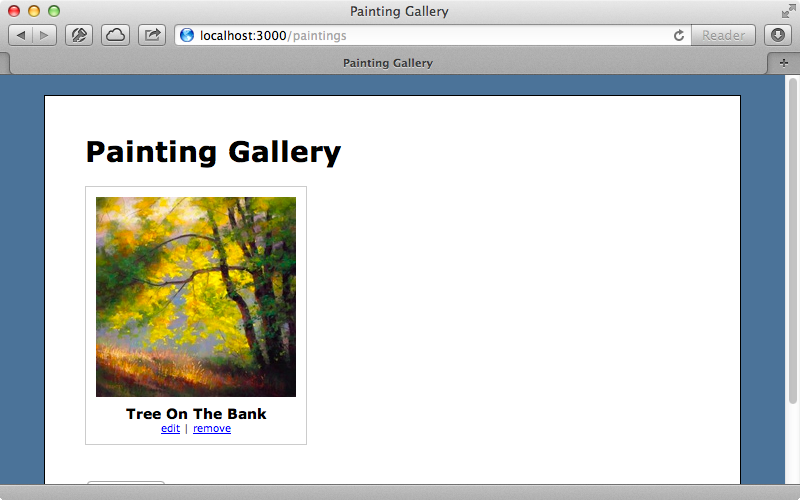
If we wait until the image has been processed then reload the page we’ll see the thumbnail image instead.

Uploading Directly to S3
Our image uploading works well now but we can only upload one image at a time. Episode 381 covered jQuery File Upload and while we could integrate that into our application with CarrierWave direct we’ll take a different approach that doesn’t use CarrierWave at all but which just uploads directly to S3. What we want to end up with a a page with a file upload control that accepts multiple files and which shows progress bars while each file uploads followed by the images themselves once they’ve uploaded and have finished being processed.
To do this we have a form on our index page that uploads directly to S3. We use a custom helper method called s3_uploader_form to generate the form which submits to the PaintingsController’s submit action and which passes in the uploaded file’s URL as a parameter.
<h1>Painting Gallery</h1>

<div id="paintings">
  <%= render @paintings %>
</div>
<div class="clear"></div>

<%= s3_uploader_form post: paintings_url, as: "painting[image_url]" do %>
  <%= file_field_tag :file, multiple: true %>
<% end %>

<script id="template-upload" type="text/x-tmpl">
<div class="upload">
  {%=o.name%}
  <div class="progress"><div class="bar" style="width: 0%"></div></div>
</div>
</script>
The s3_uploader_form method is defined in the UploadHelper module. The logic in it is fairly complex so most of it is delegated to an S3Uploader class.
def s3_uploader_form(options = {}, &block)
  uploader = S3Uploader.new(options)
  form_tag(uploader.url, uploader.form_options) do
    uploader.fields.map do |name, value|
    hidden_field_tag(name, value)
    end.join.html_safe + capture(&block)
  end
end
The S3Uploader class is too long to be shown in full here, but can be found on Github. Its initialize method shows the options that can be passed in and sets some default values for them. These include the S3 access key and secret, the name of the bucket and so on.
def initialize(options)
  @options = options.reverse_merge(
    id: "fileupload",
    aws_access_key_id: ENV["AWS_ACCESS_KEY_ID"],
    aws_secret_access_key: ENV["AWS_SECRET_ACCESS_KEY"],
    bucket: ENV["AWS_S3_BUCKET"],
    acl: "public-read",
    expiration: 10.hours.from_now,
    max_file_size: 500.megabytes,
    as: "file"
  )
end
Most of the rest of the class is fairly straightforward apart from the methods where we set the policy and signature that Amazon S3 expects. This needs to be encoded properly and S3 also expects the various attributes that we have in the policy_data method to be passed in.
def policy
  Base64.encode64(policy_data.to_json).gsub("\n", "")
 end

def policy_data
  {
    expiration: @options[:expiration],
    conditions: [
      ["starts-with", "$utf8", ""],
      ["starts-with", "$key", ""],
      ["content-length-range", 0, @options[:max_file_size]],
      {bucket: @options[:bucket]},
      {acl: @options[:acl]}
    ]
  }
end

 def signature
  Base64.encode64(
    OpenSSL::HMAC.digest(
      OpenSSL::Digest::Digest.new('sha1'),
      @options[:aws_secret_access_key], policy
    )
  ).gsub("\n", "")
end
Finally we have a CoffeeScript file which works in a similar way to the code we wrote in episode 381 with add and progress callback functions. The main difference is the done callback which handles posting the data to the URL that is supplied by the form.
jQuery ->
  $('#fileupload').fileupload
    add: (e, data) ->
      types = /(\.|\/)(gif|jpe?g|png)$/i
      file = data.files[0]
      if types.test(file.type) || types.test(file.name)
        data.context = $(tmpl("template-upload", file))
        $('#fileupload').append(data.context)
        data.submit()
      else
        alert("#{file.name} is not a gif, jpeg, or png image file")

    progress: (e, data) ->
      if data.context
        progress = parseInt(data.loaded / data.total * 100, 10)
        data.context.find('.bar').css('width', progress + '%')

    done: (e, data) ->
      file = data.files[0]
      domain = $('#fileupload').attr('action')
      path = $('#fileupload input[name=key]').val().replace('${filename}', file.name)
      to = $('#fileupload').data('post')
      content = {}
      content[$('#fileupload').data('as')] = domain + path
      $.post(to, content)
      data.context.remove() if data.context # remove progress bar

    fail: (e, data) ->
      alert("#{data.files[0].name} failed to upload.")
      console.log("Upload failed:")
      console.log(data)
Another important piece of the puzzle is configuring our S3 buckets. We can set its CORS configuration file to determine which other domains access its files.
<?xml version="1.0" encoding="UTF-8"?>
<CORSConfiguration xmlns="http://s3.amazon.com/doc/2006-03-01/">
    <CORSRule>
        <AllowedOrigin>http://localhost:3000</AllowedOrigin>
        <AllowedMethod>GET</AllowedMethod>
        <AllowedMethod>POST</AllowedMethod>
        <AllowedMethod>PUT</AllowedMethod>
        <MaxAgeSeconds>3000</MaxAgeSeconds>
        <AllowedHeader>*</AllowedHeader>
    </CORSRule>
</CORSConfiguration>
This configuration allows us to upload files to our bucket using JavaScript and to check their progress. This configuration will need to change once our application is put into production, if only to change the AllowedOrigin from localhost to our application’s domain name.
One thing that this version of the application does not do is generate thumbnail versions of each image. Instead the full version of each image is shown scaled down. There are a variety of ways that we could add this functionality. We could set up an EC2 instance and have that process the images, or we could stick with CarrierWave Direct and have this process the thumbnail within our application. We could even do the processing on the client-side before we upload the images.


