#381 jQuery File Upload pro
- Download:
- source codeProject Files in Zip (431 KB)
- mp4Full Size H.264 Video (41.7 MB)
- m4vSmaller H.264 Video (16.9 MB)
- webmFull Size VP8 Video (19.8 MB)
- ogvFull Size Theora Video (42.1 MB)
Let’s say that we have a Rails application designed to display a gallery of paintings. To add a painting to the gallery we have a form with a text field to give the painting a name and a standard file upload field.
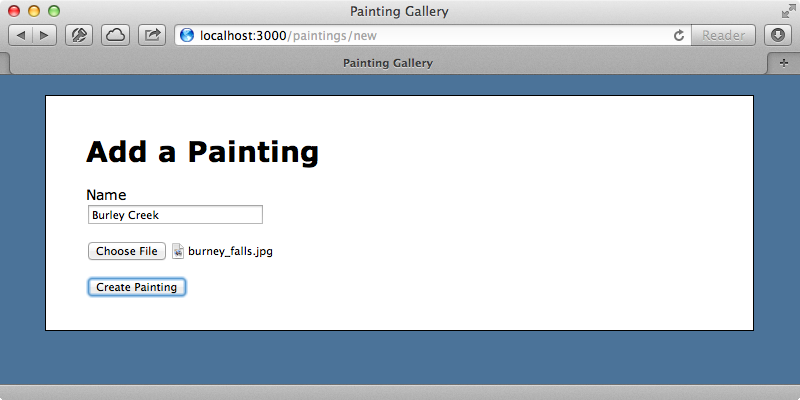
When we submit this form our image is resized, cropped and added to the gallery. The file upload is handled by CarrierWave which we covered in detail in episode 253. We have a Painting model with a call to mount_uploader and which is passed an ImageUploader class, a subclass of CarrierWave::Uploader::Base.
class Painting < ActiveRecord::Base
  attr_accessible :image, :name
  mount_uploader :image, ImageUploader
end
The uploader class is a fairly standard uploader. It creates a thumbnail version that resizes the image using RMagick and this version is displayed on the gallery page.
class ImageUploader < CarrierWave::Uploader::Base
  include CarrierWave::RMagick

  # Include the Sprockets helpers for Rails 3.1+ asset pipeline compatibility:
  include Sprockets::Helpers::RailsHelper
  include Sprockets::Helpers::IsolatedHelper

  storage :file

  def store_dir
    "uploads/#{model.class.to_s.underscore}/#{mounted_as}/#{model.id}"
  end

  def extension_white_list
    %w(jpg jpeg gif png)
  end

  version :thumb do
    process resize_to_fill: [200, 200]
  end
end
Improving The Uploader
The issue with our application is that we can only upload one painting at a time. It would be better if we could upload multiple images at once from the main gallery page so we’ll implement this. We want a file upload button on the gallery page that allows us to select multiple images so to start we’ll replace the link to the new painting page with a form where we can upload multiple images at once.
<h1>Painting Gallery</h1>

<div id="paintings">
  <%= render @paintings %>
</div>
<div class="clear"></div>

<%= form_for Painting.new do |f| %>
  <%= f.label :image, "Upload paintings:" %>
  <%= f.file_field :image %>
<% end %>
If we reload the gallery page now we’ll see the form but its file upload field will only allow us to select a single painting. We can fix this by passing the multiple option to our file_field and setting it to true.
<%= f.file_field :image, multiple: true %>Now, in some browsers at least, we can select multiple images in the file upload dialog. There is an issue with this, however. If we view the source for the form field we’ll see that the name of the file input field has a pair of square brackets at the end. This means that the images are submitted as an array to our Rails application.
<input id="painting_image" multiple="multiple" name="painting[image][]" type="file" />
Unfortunately this causes some issues with CarrierWave and we’ll need to fix it. There are a number of different ways that we can handle this situation, the simplest is to hard-code the name of the field.
<%= f.file_field :image, multiple: true, name: "painting[image]" %>If we change the name of the Painting model or its image attribute we’ll need to remember to change the name of this attribute, too but with this change in place there’ll no longer be square brackets at the end of the file field’s name and any images we upload won’t be sent in an array. We now have another problem, however, in that if we do upload multiple files only one of them will be used to create a painting. This is where a JavaScript library can come to our aid and allow us to upload multiple files at once. We’ll use the jQuery File Upload which is a polished solution that allows us to upload multiple files at once. With it we can select a number of files then click a ‘start upload’ button to upload the files and it will even show upload progress bars while the files are uploading.
There are a couple of different ways that we can set this up. The first option is known as the UI version and this works well if we just need a quick way to get a file upload, although it works best with Twitter Bootstrap and makes a lot of decisions for us. The other option is a minimal setup which uses the basic upload functionality and which leaves the user interface up to us. This way we can customize it further and make it fit and integrate with our existing interface and it’s what we’ll using in this episode.
We need to integrate this library into the Rails asset pipeline and for this we’ll be using the jQuery FileUpload Rails gem. This gives us several files that we we can require to add its functionality to our application. To use it we’ll add it to the assets group of our Rails application then run bundle to install it.
group :assets do
  gem 'sass-rails',   '~> 3.2.3'
  gem 'coffee-rails', '~> 3.2.1'

  # See https://github.com/sstephenson/execjs#readme for more supported runtimes
  # gem 'therubyracer', :platforms => :ruby

  gem 'uglifier', '>= 1.0.3'
  gem 'jquery-fileupload-rails'
end
Next we’ll modify the application’s JavaScript manifest file to add the jquery-fileupload/basic as demonstrated in the README.
//= require jquery-fileupload/basicWe still need to add this functionality to the file upload form on the paintings page and we’ll do this inside the paintings CoffeeScript file.
jQuery ->
  $('#new_painting').fileupload()
All we need to do here is call fileupload() on the new paintings form after the DOM has loaded. When we reload the page now our file upload form has some extra functionality, although it looks the same. If we use the file control to select several files nothing appears to happen, although if we refresh the page afterwards we’ll see that the images we selected have been uploaded.
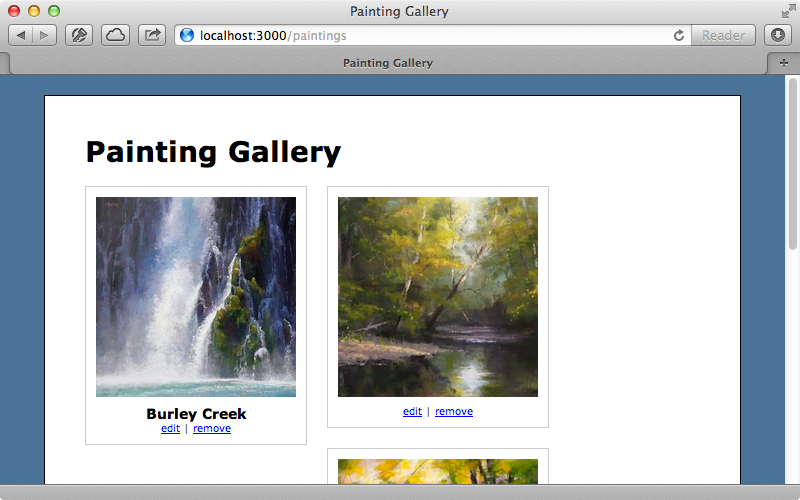
It’s important to understand that when we select multiple files the form is submitted once for each file. This triggers the PaintingsController’s create action for each file, creating a new Painting record each time. We’d like the new paintings to be shown in the gallery as soon as they’re uploaded without the user needing to upload the page. To accomplish this we first need to customize the file uploader. This accepts various options and we’ll use the dataType option here.
jQuery ->
  $('#new_painting').fileupload
    dataType: "script"
The dataType option determines the type of data that the uploader expects back from the server. Most examples will return JSON but this means that our Rails application will need to generate some JSON and that we’d also need to write some JavaScript code to render the new paintings in the gallery. This approach usually leads to duplication on the client and server and it can be easier in these situations to work with JavaScript instead. Using script as the data type means that we can return a script from the server and it will be executed after the file uploads. This means that we need to change the PaintingsController’s create action so that it returns some JavaScript. While we could support both HTML and JavaScript formats we’ll keep things simple and just use a JavaScript template. First we’ll change the controller so that it just creates a new Painting record.
def create
  @painting = Painting.create(params[:painting])
end
Next we’ll create a new JavaScript template for this action.
<% if @painting.new_record? %>
  alert("Failed to upload painting: <%= j @painting.errors.full_messages.join(', ').html_safe %>");
<% else %>
  $("#paintings").append("<%= j render(@painting) %>");
<% end %>
This template is fairly simple. First we check to see if the painting is a new record. If this is the case then the validations have failed and so we’ll display an alert that shows the validation error messages. If the painting is saved successfully we’ll append the rendered partial for the painting to the paintings div so that it’s added to the gallery. We can try this out now by reloading the page then adding a couple of files. We’ll use another feature of jQuery File Upload to do this and drag and drop the images instead of using the file upload dialog. When we do so the new images automatically appear in the gallery without us having to reload the page.
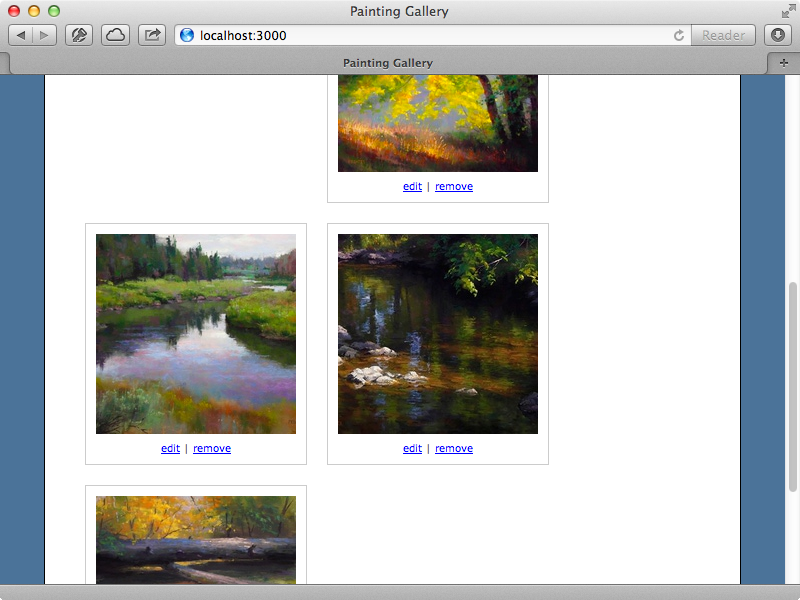
There are some layout issues on the page and these are primarily because the paintings that we’ve just uploaded don’t have names. This is a common problem when dealing with multiple file uploads as the user isn’t entering any other data about the uploaded files. To work around this we can set some default values based on the files that are uploaded. We’ll add a before_create callback which will set a default name for each file based on its filename.
class Painting < ActiveRecord::Base
  attr_accessible :image, :name
  mount_uploader :image, ImageUploader

  before_create :default_name

  def default_name
    self.name ||= File.basename(image.filename, '.*').titleize if image
  end
end
Now when we upload a file its name is set automatically.
Adding Progress Bars
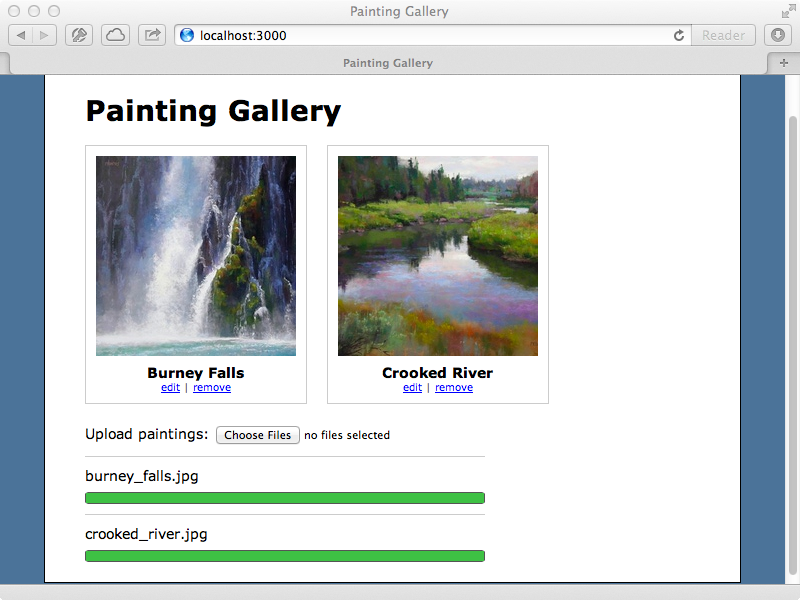
So far the files we’ve been uploading appear almost instantly as we’re running our application on the local machine. If we were running it across a slow connection then it could be minutes before the files appear in the gallery so we should provide some feedback to the user during this time. We’ll do this by showing a progress bar for each image immediately after the user chooses the files to upload. This will need to be all on the client which means that for convenience it would be nice if we had some way to render a client-side template. To do this we’ll go back to the JavaScript manifest file and add another require statement to it.
//= require jquery-fileupload/vendor/tmplThis library is included within the jQuery File Upload gem and it will easily allow us to render out a template which is embedded inside the HTML. We’ll paste the code for the template at the bottom of our index action.
<script id="template-upload" type="text/x-tmpl">
<div class="upload">
  {%=o.name%}
  <div class="progress"><div class="bar" style="width: 0%;"></div></div>
</div>
</script>
We’ve added a script element here with a type of text/x-tmpl. We can add some HTML inside this element that we can render on command through JavaScript and use special tags to reference an object that’s passed in and add dynamic content. The rest of the code in here is just some divs to handle displaying the progress bar. Next we’ll add add and progress options to fileupload to render the template.
jQuery ->
  $('#new_painting').fileupload
    dataType: "script"
    add: (e, data) ->
      data.context = $(tmpl("template-upload", data.files[0]))
      $('#new_painting').append(data.context)
      data.submit()
    progress: (e, data) ->
      if data.context
        progress = parseInt(data.loaded / data.total * 100, 10)
        data.context.find('.bar').css('width', progress + '%')
The add option is passed a function and this is triggered when a new file is added. Each separate file that is uploaded will trigger this function and it’s passed a data object that we can use to fetch various information such as the file object that we can pass to the template which we reference by the id we gave it. Calling tmpl will render this template and we pass this to the jQuery function, $. We set the data.context to the result of this so that we can reference it later. We then append the template to the new_painting form then call data.submit to trigger the uploading of the file.
The progress callback updates a the progress bar. First we check that the data context that we set in add exists; if it does then we find the progress bar and set its width depending on the current progress of the uploaded file.
We can try this out now. We’ve removed all the pictures from the gallery so that we’ve got a clean slate to start from. If we drag and drop a couple of pictures into the browser window we’ll see a progress bar for each one.
If we upload a file that isn’t a valid image file, say a zip file, we’ll see an alert message after the file has uploaded and it isn’t a valid file type. It would be better if we did the validation on the client before it was uploaded to save the time and bandwidth it takes to upload. We can do this quite easily by changing the add callback function to this:
jQuery ->
  $('#new_painting').fileupload
    dataType: "script"
    add: (e, data) ->
      types = /(\.|\/)(gif|jpe?g|png)$/i
      file = data.files[0]
      if types.test(file.type) || types.test(file.name)
        data.context = $(tmpl("template-upload", file))
        $('#new_painting').append(data.context)
        data.submit()
      else
        alert("#{file.name} is not a gif, jpeg, or png image file")
    progress: (e, data) ->
      if data.context
        progress = parseInt(data.loaded / data.total * 100, 10)
        data.context.find('.bar').css('width', progress + '%')
Now we check that file’s type or name matches a regular expression that matches a number of common image types before we upload it. If it doesn’t match we’ll show an error message instead of uploading the file. Now if we try to upload something like a zip file it won’t be uploaded and we’ll see a validation error message straight away.
Our example is pretty much complete now. We have a gallery where we can upload files by drag-and-drop and we have a progress bar that shows the progress of each file as it uploads. To learn more about jQuery File Upload it’s worth taking a look at its wiki4, especially the options page which includes a lot of information about the options that we pass in to the uploader. There’s also some information about setting Rails up with the UI version of jQuery File Upload.


