#335 Deploying to a VPS pro
- Download:
- source codeProject Files in Zip (98 KB)
- mp4Full Size H.264 Video (48.2 MB)
- m4vSmaller H.264 Video (22.3 MB)
- webmFull Size VP8 Video (21.7 MB)
- ogvFull Size Theora Video (51.3 MB)
We all know how easy it is to create a Rails application but when it’s time to share it with the world is it as easy to deploy one? The deployment page on the official Rails site says “Deploying Ruby on Rails is easy” and it’s certainly become easier over the years but the process can be rather overwhelming as there are so many techniques and methods to choose from. One option is to deploy to our application to the cloud with a service like Heroku and while these services are great sometimes we need more control over how the server is set up. In these cases it’s better to deploy to a Virtual Private Server through a service such as Linode or Webbynode. For a reasonable monthly amount these services give us a decently-sized server that should be perfectly adequate for hosting a small to medium-sized Rails application. The tricky part with these services is that you’re pretty much on your own. You’re provided with a blank server and it’s up to you to set it up from scratch. In this episode we’ll show you how to do just that.
Our Production Stack
First we’ll go over the production stack that our application will run on. For the operating system we’ll be using Ubuntu 10.04. While you can choose a different Linux distribution if you prefer some of the commands we’ll be using in this episode will be different if you do. We’ll use Nginx as the web server but alternatively you could use Apache instead. To serve the Rails application we’ll use Unicorn, although you could use Phusion Passenger. Both Unicorn and Nginx were covered in more details in episode 293. Our application will store its data in a PostgreSQL database. This has had a lot of attention recently in the Rails world, but MySQL is also an option. To manage and install Ruby on the server we’ll use rbenv but we could instead use rvm or compile Ruby from source. We’ll be hosting our application on a Linode VPS, although any VPS service should serve as well. Note that although Railscasts is sponsored by Linode, this isn’t a factor in choosing to use them here.
Creating an Application to Deploy
Before we can deploy a Rails application we need to create one so we’ll create an app called blog and use the -d option to configure to use PostgreSQL as its database.
$ rails new blog -d postgresql
If we have an existing Rails app that uses Sqlite that we want to switch over to MySQL or PostgreSQL we just need to alter the database.yml file to use the appropriate database settings then modify the gemfile to include the relevant gem.
We’ll generate some scaffolding for this application so that we have some dynamic content to test our application after we’ve deployed it. We’ll create an article scaffold with name and content fields.
$ rails g scaffold article name content:text
Now that we have our basic application set up it’s time to set up our server so that we can deploy it.
Configuring a Linode VPS
We’ve already purchased a Linode server and signed in to the website. We’ll start by rebuilding our server, selecting the default Ubuntu 10.04 LTS distribution and entering a root password.
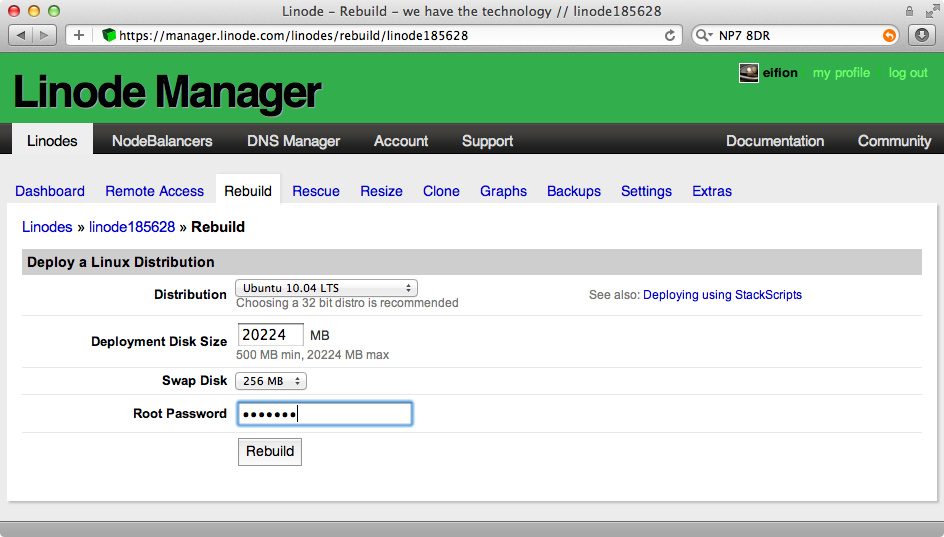
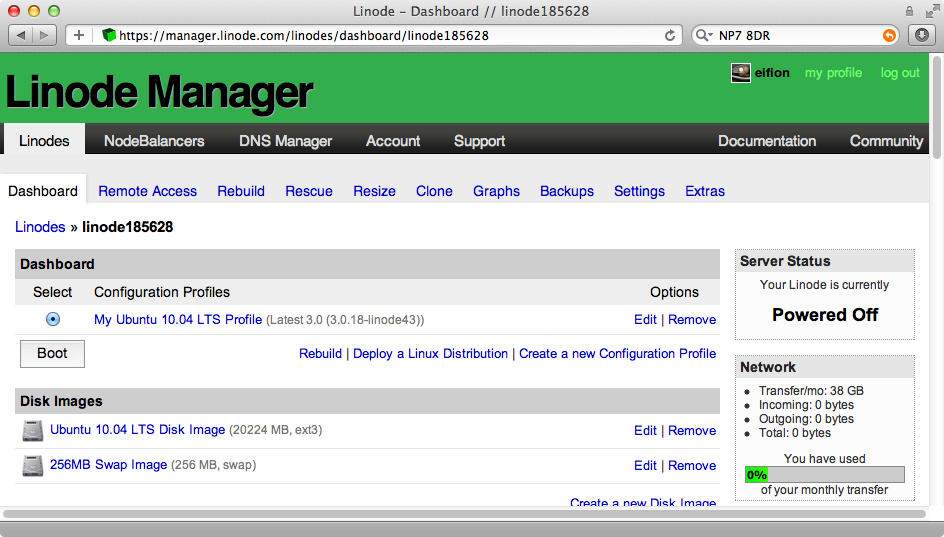
When we click on the “Remote Access” tab we’ll see an ssh command for logging into our server. Once our server has booted we can use this to log in.
$ ssh root@178.xxx.xxx.xxx
We’ll need to type in the root password we entered when we set our server up. Once we’ve done so we’ll be logged in to our VPS. The first command we should run on our new server is apt-get update. This will update all the packages on the server to the latest version.
root@li349-144:~# apt-get update
Once this has finished we’ll install a few packages that will come in useful later.
root@li349-144:~# apt-get -y install curl git-core python-software-properties
The last of these packages is installed so that we can easily add new repositories to Apt. Next we’ll install Nginx. We could use apt-get to do this but this will install quite an old version. One way of getting a more recent version is to add a new repository and we can do that by running this command:
root@li349-144:~# add-apt-repository ppa:nginx/stable
After this new repository has been added we’ll need to run apt-get update again. When that command has finished we can install Nginx.
root@li349-144:~# apt-get update
root@li349-144:~# apt-get -y install nginx
We can now start Nginx up.
root@li349-144:~# service nginx start
Starting nginx: nginx.
We can check that this is working by opening up a browser and visit our server’s IP address.
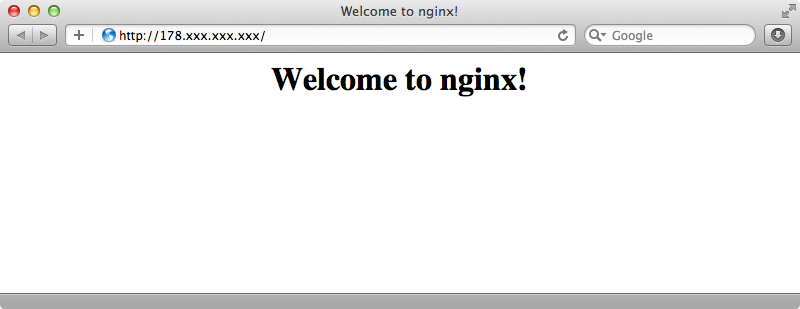
If we see “Welcome to nginx!” then our server is working.
Installing PostgreSQL
We’ll install PostgreSQL next. We want the latest version of this, too, so we’ll add another repository first.
root@li349-144:~# add-apt-repository ppa:pitti/postgresql
We’ll need to run apt-get update again and then we can install PostgreSQL along with the libpq-dev package which will help us to build the Postgres gem.
root@li349-144:~# apt-get update
root@li349-144:~# apt-get install postgresql libpq-dev
This may take a minute to install but once it’s finished we’ll have Postgres set up under a separate user account. To access Postgres through the command line we run the psql command which we need to do through sudo.
root@li349-144:~# sudo -u postgres psql
It’s a good idea to set a password for the postgres user and we can do so with the \password command.
postgres=# \password
Enter new password:
Enter it again:
While we’re in the Postgres command line we’ll create a user and database for our Rails application.
postgres=# create user blog with password 'secret';
CREATE ROLE
postgres=# create database blog_production owner blog;
CREATE DATABASE
Postgres is now set up on our server. We quit out of psql of it by running \quit.
Postfix and Node.js
If we want to send email from our application we can install Postfix.
root@li349-144:~# apt-get install postfix
As this installs it will bring up a dialog box that let’s us choose the configuration type. We’ll stick with the default of “Internet Site” and keep the default “System mail name” on the next page.
There’s one more thing we want to install through Apt: node.js. You might wonder why we need this but it includes a great way to execute JavaScript and this will help us with the asset pipeline in our application. We need to add another repository before we can do this.
root@li349-144:~# add-apt-repository ppa:chris-lea/node.js
root@li349-144:~# apt-get update
root@li349-144:~# apt-get -y install nodejs
Installing Ruby
We’re more than half way through setting up our VPS now. The main thing left to do is to install Ruby. Before we do that we’ll set up a new user account. We’ve been running everything as root so we’ll create a new user called deployer.
root@li349-144:~# adduser deployer --ingroup admin
Adding user `deployer' ...
Adding new user `deployer' (1000) with group `admin' ...
Creating home directory `/home/deployer' ...
Copying files from `/etc/skel' ...
Enter new UNIX password:
Retype new UNIX password:
passwd: password updated successfully
Changing the user information for deployer
Enter the new value, or press ENTER for the default
        Full Name []:
        Room Number []:
        Work Phone []:
        Home Phone []:
        Other []:
Is the information correct? [Y/n] Y
We add this user to the admin group so that they have sudo privileges. We’ll need to give this user a password but we can leave all the other fields at their defaults. We can now switch to that user then move to its home directory.
root@li349-144:~# su deployer
To run a command as administrator (user "root"), use "sudo <command>".
See "man sudo_root" for details.

deployer@li349-144:/root$ cd ~
Next we’ll install Ruby with rbenv. To make this easier we’ll use a script called rbenv-installer which is much more convenient than running all the commands by hand. We need to have Git and Curl installed to run it but as we did that earlier we’re ready to go.
deployer@li349-144:~$ curl -L https://raw.github.com/fesplugas/rbenv-installer/master/bin/rbenv-installer | bash
When this command finishes it will tell us us add some lines to load rbenv. To do this we’ll add them to the .bashrc file.
if [ -d \$HOME/.rbenv ]; then
  export PATH="$HOME/.rbenv/bin:$PATH"
  eval "$(rbenv init -)"
fi
To edit the file we’ll use Vim.
$ vim ~/.bashrc
There’s already quite a lot in this file but we need to pay attention to this line:
# If not running interactively, don't do anything
[ -z "$PS1" ] && return
This tells the file to stop running if it’s not in an interactive shell. It’s important to load rbenv before this line so that it will work with Capistrano deployments, like this:
if [ -d $HOME/.rbenv ]; then
  export PATH="$HOME/.rbenv/bin:$PATH"
  eval "$(rbenv init -)"
fi

# If not running interactively, don't do anything
[ -z "$PS1" ] && return
Once we’ve saved .bashrc we’ll need to reload it.
deployer@li349-144:~$ . ~/.bashrc
We now have the rbenv command available but before we use it to install Ruby it’s important to run this command first.
deployer@li349-144:~$ rbenv bootstrap-ubuntu-10-04
This installs some packages that Ruby depends on. We’re ready to install Ruby itself now and we’ll install the latest version, currently 1.9.3-p125.
deployer@li349-144:~$ rbenv install 1.9.3-p125
This command will take a good while to run so it’s a good time now to go and make a cup of tea. When it finally does finish we can make it the default Ruby version with rbenv global.
deployer@li349-144:~$ rbenv global 1.9.3-p125
deployer@li349-144:~$ ruby -v
ruby 1.9.3p125 (2012-02-16 revision 34643) [i686-linux]
Next we’ll install Bundler, then run rbenv rehash so that we can access the bundle executable.
deployer@li349-144:~$ gem install bundler --no-ri --no-rdoc
deployer@li349-144:~$ rbenv rehash
deployer@li349-144:~$ bundle -v
Bundler version 1.1.3
Preparing Our Application
Now that our VPS is set up it’s time to prepare our Rails application for deployment. We’ll need to publish its source code somewhere so that our local development machine and the server can both access it. We’ll use Github for this so we’ll attempt an ssh connection to github.com on our server so that it’s known as a host.
deployer@li349-144:~$ ssh git@github.com
The authenticity of host 'github.com (207.97.227.239)' can't be established.
RSA key fingerprint is 16:27:ac:a5:76:28:2d:36:63:1b:56:4d:eb:df:a6:48.
Are you sure you want to continue connecting (yes/no)? yes
Warning: Permanently added 'github.com,207.97.227.239' (RSA) to the list of known hosts.
Permission denied (publickey).
Now when we deploy through Capistrano we won’t run any snags with it being unknown. We haven’t yet added our application to Github. To do so we just need to visit github.com, sign in, click “New Repository” then enter a name for our project. We’ll call it “blog” and make it private.
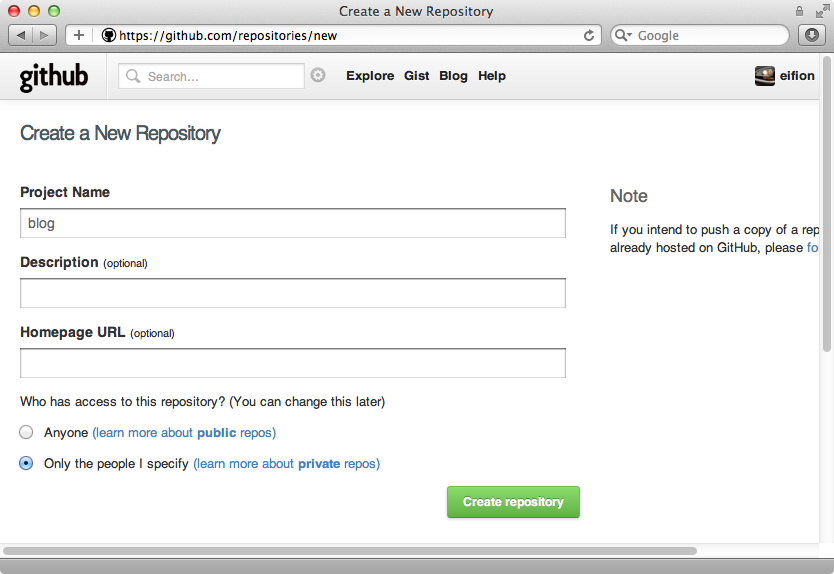
When we click “Create repository” we’ll see instructions for setting our application up with Github. Our application’s source code isn’t get in a Git repository so we’ll need to do this first. Even though our application isn’t in a Git repository a .gitignore file will have been created when we created our app. We’ll edit this now and add the database.yml file to the list of ignored files. We want to configure this file manually on the server and we don’t want to put the database’s password in the repository.
# See http://help.github.com/ignore-files/ for more about ignoring files.
#
# If you find yourself ignoring temporary files generated by your text editor
# or operating system, you probably want to add a global ignore instead:
#   git config --global core.excludesfile ~/.gitignore_global

# Ignore bundler config
/.bundle

# Ignore the default SQLite database.
/db/*.sqlite3

# Ignore all logfiles and tempfiles.
/log/*.log
/tmp

/config/database.yml
To make it easier to configure the database.yml file on the server we’ll create an example configuration file that we can edit.
$ cp config/database.yml config/database.example.yml
We’re ready to create our repository now. We’ll add all the application’s files to it and then commit them.
$ git init
Initialized empty Git repository in /Users/eifion/blog/.git/
$ git add .
$ git commit -m "Initial commit"
Now we can follow the instructions that Github provided to push our application to it.
$ git remote add origin git@github.com:eifion/blog.git
$ git push origin master
Counting objects: 86, done.
Delta compression using up to 2 threads.
Compressing objects: 100% (74/74), done.
Writing objects: 100% (86/86), 30.02 KiB, done.
Total 86 (delta 2), reused 0 (delta 0)
To git@github.com:eifion/blog.git
 * [new branch]      master -> master
Our project is now hosted on Github.
Deploying With Capistrano
We’ll use Capistrano to handle the deployment. We’ll need to add its gem to our gemfile and as it’s already included in the file, but commented out, we’ll just need to uncomment the relevant line. As we’ll be using Unicorn too we’ll uncomment the line that references that gem too. As ever we’ll need to run bundle to install the gems afterwards.
# Use unicorn as the app server
gem 'unicorn'

# Deploy with Capistrano
gem 'capistrano'
Next we’ll run the capify command to set up Capistrano in our application.
$ capify .
[add] writing './Capfile'
[add] writing './config/deploy.rb'
[done] capified!
This command creates a Capfile and a config/deploy.rb file. We’ll need to edit both of these. We’ll start with the Capfile.
load 'deploy'
# Uncomment if you are using Rails' asset pipeline
load 'deploy/assets'
Dir['vendor/gems/*/recipes/*.rb','vendor/plugins/*/recipes/*.rb'].each { |plugin| load(plugin) }
load 'config/deploy' # remove this line to skip loading any of the default tasks
The second line in this file tells us to uncomment the line below if we’re using the asset pipeline. We are and so we’ve made that change. Next we’ll paste our Capistrano recipe in to deploy.rb. This is rather long, but we’ll briefly walk through what it does.
require "bundler/capistrano"

server "178.xxx.xxx.xxx", :web, :app, :db, primary: true

set :application, "blog"
set :user, "deployer"
set :deploy_to, "/home/#{user}/apps/#{application}"
set :deploy_via, :remote_cache
set :use_sudo, false

set :scm, "git"
set :repository, "git@github.com:eifion/#{application}.git"
set :branch, "master"

default_run_options[:pty] = true
ssh_options[:forward_agent] = true

after "deploy", "deploy:cleanup" # keep only the last 5 releases

namespace :deploy do
  %w[start stop restart].each do |command|
    desc "#{command} unicorn server"
    task command, roles: :app, except: {no_release: true} do
      run "/etc/init.d/unicorn_#{application} #{command}"
    end
  end

  task :setup_config, roles: :app do
    sudo "ln -nfs #{current_path}/config/nginx.conf /etc/nginx/sites-enabled/#{application}"
    sudo "ln -nfs #{current_path}/config/unicorn_init.sh /etc/init.d/unicorn_#{application}"
    run "mkdir -p #{shared_path}/config"
    put File.read("config/database.example.yml"), "#{shared_path}/config/database.yml"
    puts "Now edit the config files in #{shared_path}."
  end
  after "deploy:setup", "deploy:setup_config"

  task :symlink_config, roles: :app do
    run "ln -nfs #{shared_path}/config/database.yml #{release_path}/config/database.yml"
  end
  after "deploy:finalize_update", "deploy:symlink_config"

  desc "Make sure local git is in sync with remote."
  task :check_revision, roles: :web do
    unless `git rev-parse HEAD` == `git rev-parse origin/master`
      puts "WARNING: HEAD is not the same as origin/master"
      puts "Run `git push` to sync changes."
      exit
    end
  end
  before "deploy", "deploy:check_revision"
end
At the top of this file we set our server up with roles for the web app and database. We then set the deployer user as the user that Capistrano will use and then set the directory that the application will be deployed to. Below that we configure the settings for Git and Github. Further down the file, in the deploy namespace are a number of commands for stopping and starting the server and also for setting up the server and configuring it. There are also a task for setting symlinks when the application is deployed and one for checking that we didn’t forget to push changes up to Github when we deployed.
We’ve run through this file pretty quickly but there’ll be a future episode on Capistrano that will explain all this in better detail. However, we’re not done yet. We still need to set up and configure Nginx and Unicorn for our Rails application. To do this we’ll create a new file called nginx.conf in the config directory.
upstream unicorn {
  server unix:/tmp/unicorn.blog.sock fail_timeout=0;
}

server {
  listen 80 default deferred;
  # server_name example.com;
  root /home/deployer/apps/blog/current/public;

  location ^~ /assets/ {
    gzip_static on;
    expires max;
    add_header Cache-Control public;
  }

  try_files $uri/index.html $uri @unicorn;
  location @unicorn {
    proxy_set_header X-Forwarded-For $proxy_add_x_forwarded_for;
    proxy_set_header Host $http_host;
    proxy_redirect off;
    proxy_pass http://unicorn;
  }

  error_page 500 502 503 504 /500.html;
  client_max_body_size 4G;
  keepalive_timeout 10;
}
The code in this file is similar to what we used in episode 293 and there are further details on what this code does there. The only difference here is that we we’re using gzip for the files under the assets directory. Next we’ll add a file for configuring Unicorn.
root = "/home/deployer/apps/blog/current"
working_directory root
pid "#{root}/tmp/pids/unicorn.pid"
stderr_path "#{root}/log/unicorn.log"
stdout_path "#{root}/log/unicorn.log"

listen "/tmp/unicorn.blog.sock"
worker_processes 2
timeout 30
This file sets various paths and the number of worker processes to use. You’ll probably want to change these values for your own applications. We need to add one more new file which will start up Unicorn with a shell script. This is another long file but all the variables that we might need to change are defined at the top of this file so these should be the only parts of the file that need to be changed if you use this on your own applications.
#!/bin/sh
set -e

# Feel free to change any of the following variables for your app:
TIMEOUT=${TIMEOUT-60}
APP_ROOT=/home/deployer/apps/blog/current
PID=$APP_ROOT/tmp/pids/unicorn.pid
CMD="cd $APP_ROOT; bundle exec unicorn -D -c $APP_ROOT/config/unicorn.rb -E production"
AS_USER=deployer
set -u

OLD_PIN="$PID.oldbin"

sig () {
  test -s "$PID" && kill -$1 `cat $PID`
}

oldsig () {
  test -s $OLD_PIN && kill -$1 `cat $OLD_PIN`
}

run () {
  if [ "$(id -un)" = "$AS_USER" ]; then
    eval $1
  else
    su -c "$1" - $AS_USER
  fi
}

case "$1" in
start)
  sig 0 && echo >&2 "Already running" && exit 0
  run "$CMD"
  ;;
stop)
  sig QUIT && exit 0
  echo >&2 "Not running"
  ;;
force-stop)
  sig TERM && exit 0
  echo >&2 "Not running"
  ;;
restart|reload)
  sig HUP && echo reloaded OK && exit 0
  echo >&2 "Couldn't reload, starting '$CMD' instead"
  run "$CMD"
  ;;
upgrade)
  if sig USR2 && sleep 2 && sig 0 && oldsig QUIT
  then
    n=$TIMEOUT
    while test -s $OLD_PIN && test $n -ge 0
    do
      printf '.' && sleep 1 && n=$(( $n - 1 ))
    done
    echo

    if test $n -lt 0 && test -s $OLD_PIN
    then
      echo >&2 "$OLD_PIN still exists after $TIMEOUT seconds"
      exit 1
    fi
    exit 0
  fi
  echo >&2 "Couldn't upgrade, starting '$CMD' instead"
  run "$CMD"
  ;;
reopen-logs)
  sig USR1
  ;;
*)
  echo >&2 "Usage: $0 <start|stop|restart|upgrade|force-stop|reopen-logs>"
  exit 1
  ;;
esac
This script will need to be marked as executable and we can use chmod to do this.
$ chmod +x config/unicorn_init.sh
With all these new files in place we’ll add them now to our Git repository and commit then push them.
$ git add .
$ git commit -m "Deployment config files"
$ git push origin master
Now we can cross our fingers and run cap deploy:setup to deploy our application. You might need to prefix this command with bundle exec, depending on how your shell is set up. This command will log in to the server as the deployer user.
$ cap deploy:setup
This setup script did a number of things. First it created a few directories on the server for the application to do into. Our recipe then links a few files for the Nginx and Unicorn configuration to place them in the proper locations on the server. It then uploads the database.yml file so that we can edit the configuration on the server. We’ll do that now by logging in to the server again as the deployer user.
$ ssh deployer@178.xxx.xxx.xxx
Now on the server we’ll edit our database.yml file.
deployer@li349-144:~$ cd apps/blog/shared/config/
deployer@li349-144:~/apps/blog/shared/config$ vim database.yml
We only need the production environment configuration in this file so we’ll delete everything else. We’ll need to set the password option to the password we created for our database user earlier. With PostgreSQL it’s necessary to set the host option to localhost too so that we don’t get any errors when logging in through the Postgres adapter.
production:
  adapter: postgresql
  encoding: unicode
  database: blog_production
  pool: 5
  host: localhost
  username: blog
  password: secret
The database file was the only thing we needed to configure on the server so we can log out from it now.
Logging Into The Server Automatically
Each time we use ssh to log in to the server we need to enter a password and it can become annoying to have to do this each time we deploy our application. The command below will copy the contents of the public RSA file into the deployers authorized keys. You’ll have this public key already if you’ve set Github up.
cat ~/.ssh/id_rsa.pub | ssh deployer@178.xxx.xxx.xxx 'cat >> ~/.ssh/authorized_keys'
After we’ve run this command and entered the password for the last time we can now ssh into the server without entering a password. Another thing we have to run regarding ssh is ssh-add. This will get SSH Agent working. In the Capistrano deployment file one line we didn’t mention was this:
ssh_options[:forward_agent] = true
This line tells Capistrano to use the local keys instead of the keys on the server. Using it with ssh-add means that we give our server access to our Github repository when we’re SSH’d into it. This means that we don’t have to set up a deploy key on Github to authorize the server.
On Mac OSX we can run this command with a -K option which will add the passphrase to our keychain.
$ ssh-add -K
We’re ready to deploy our application now.
$ cap deploy:cold
A cold deploy like this will run the database migrations and perform a server start instead of a restart. This has worked successfully for this application but we’ll often see errors the first time to run it. Fixing these means reading through the output to find out what the error is. Running the failed command directly on the server can often help in working out what has failed and how to fix it.
Configuring Nginx
If we visit our server’s IP address in a web browser we still just see the “Welcome to nginx” message. This is because the default site is still enabled. To fix this we can SSH into the server, remove the default site then restart Nginx.
deployer@li349-144:~$ sudo rm /etc/nginx/sites-enabled/default
[sudo] password for deployer:
deployer@li349-144:~$ sudo service nginx restart
Restarting nginx: nginx.
The first line only removed a symbolic link so there’s no need to worry that we might be deleting something important. While we’re on the server there’s one more command we’ll run so that Unicorn starts up properly when our server restarts.
sudo update-rc.d unicorn_blog defaults
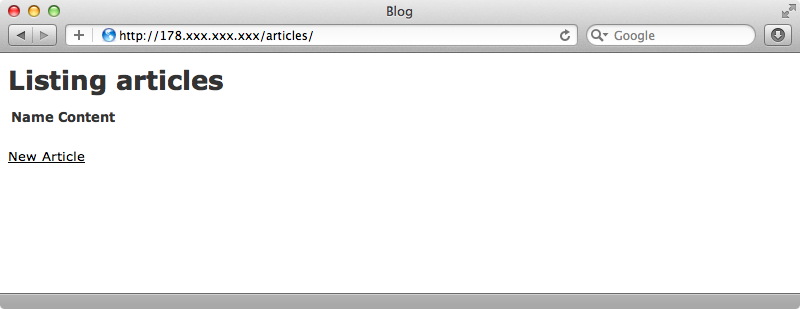
We pass this command the name of the service, which in our case is unicorn_blog, then pass defaults as the next argument to get this all set up. Now for the moment of truth. When we browse to our server now we see the Rails welcome page and if we visit the articles page we’ll see that the dynamic content works too.
To deploy a change to our site we just need to make our changes, commit them, push them up to Github and then run cap deploy again.
$ git commit -am “Fixing a typo”
$ git push
$ cap deploy
When we reload the page now our changes will show.


