#331 A/B Testing with Split pro
- Download:
- source codeProject Files in Zip (88 KB)
- mp4Full Size H.264 Video (25.3 MB)
- m4vSmaller H.264 Video (12.4 MB)
- webmFull Size VP8 Video (14.4 MB)
- ogvFull Size Theora Video (29.8 MB)
Below is a signup form from an application. We want to experiment with alternative designs for this page and track the number of signups for each variation. This is commonly known as A/B testing and it’s a great way to determine which of a number of designs is the most effective.
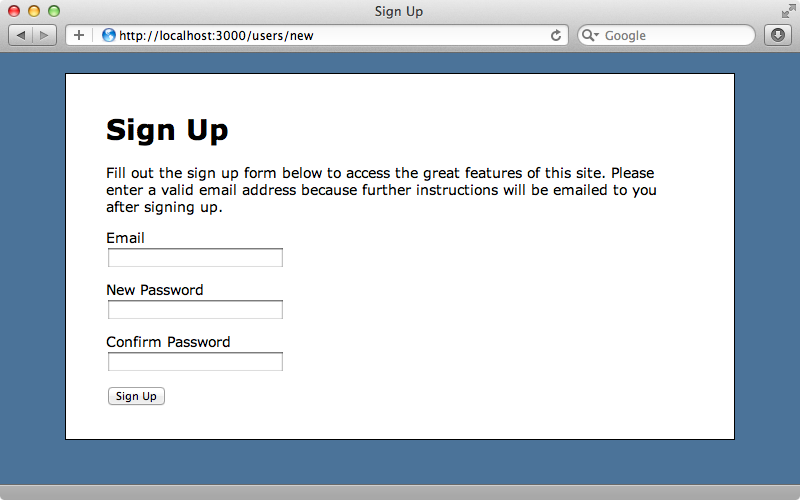
There are many different ways to do A/B testing in a Rails application; in this episode we’re going to use a gem called Split. This uses a Redis back end to store the experiments’ results so we’ll need to have that installed too. Split works by providing an ab_test method which we can pass variations to create experiments. One of these variations will be chosen randomly by Split for each user who visits the site. We can mark a successful conversion and end an experiment by calling finished. Split also provides a web interface for showing the results.
Installing Split and Redis
If you don’t have Redis on your computer you’ll need to install that first. If you’re running OS X the easiest way to do this is through Homebrew. In this case all you need to do is run this command:
$ brew install redis
Once this has installed it will give you some instructions on how to launch it. The easiest way to do this is to launch it manually by running
$ redis-server /usr/local/etc/redis.conf
Now we can install Split. We do this by adding it to the gemfile and then running bundle.
gem 'split'Adding Variations
Now it’s time for the fun part, adding variations to the sign up form. We’ll start with something simple and change the “Sign Up” text at the top of the page. Here’s the page’s view template.
<h1>Sign Up</h1>

<p>Fill out the sign up form below to access the great features of this site. Please enter a valid email address because further instructions will be emailed to you after signing up.</p>

<%= form_for @user do |f| %>
  <% if @user.errors.any? %>
    <ul class="errors">
    <% @user.errors.full_messages.each do |msg| %>
      <li><%= msg %></li>
    <% end %>
    </ul>
  <% end %>

  <div class="field">
    <%= f.label :email %>
    <%= f.text_field :email %>
  </div>
  <div class="field">
    <%= f.label :password, "New Password" %>
    <%= f.password_field :password %>
  </div>
  <div class="field">
    <%= f.label :password_confirmation, "Confirm Password" %>
    <%= f.password_field :password_confirmation %>
  </div>
  <div class="actions">
    <%= f.submit "Sign Up" %>
  </div>
<% end %>
We’ll use the ab_test method to generate variations for the header text.
<h1><%= ab_test "signup_title", "Sign Up", "Sign Up for FREE", "Sign up in seconds..." %></h1>
The first argument we pass is the name we want to give the experiment. We can then pass in as many variations as we want and we’ve added three variations to the header text here. Split will now choose a random variation and return it for each different user that comes to the site. We can see this by reloading the page.
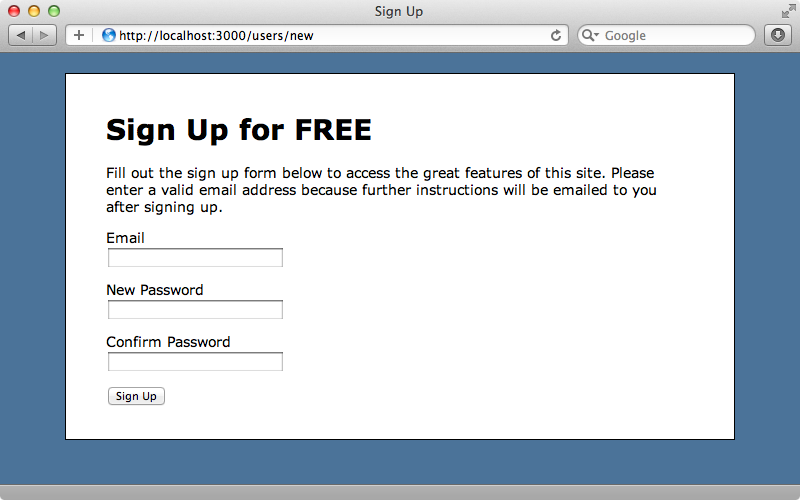
We now have a different title but no matter how often we reload the page now we’ll still see the same variation. This is because once a variation has been chosen it remains for that user’s session. This is generally the behaviour we want so that the user doesn’t see inconsistent design.
When the form is submitted successfully our experiment is over and we want to track this. We do this by calling finished. Our form submits to the UsersController’s create action and so we’ll call it when the user is saved.
def create
  @user = User.new(params[:user])
  if @user.save
    finished("signup_title")
    redirect_to root_url, notice: "Thank you for signing up."
  else
    render "new"
  end
end
All we need to pass to finished is the name of the experiment we want to terminate. Now, when we sign up Split will track the results for us. If we go back to the sign up page now we’ll see a different sign up title and this is because when an experiment finishes it is reset for that user. Therefore next time they visit the experiment’s page they will probably see a different variation. If we don’t want this behaviour we can use finished’s reset option to disable it.
finished("signup_title", reset: false)
The experiment will now persist after it has finished so that the user will always see the same variation.
Looking at The Experiments’ Results
After we’ve gathered enough data from our test we can take a look at the results. We can use the included web interface to do this. This is built with Sinatra but we can mount it in our Rails application by adding it as a route.
Social::Application.routes.draw do
  root to: 'users#index'
  resources :users
  mount Split::Dashboard, :at => 'split'
end
We’ll need to require split/dashboard in the gemfile as well.
gem 'split', :require => 'split/dashboard'
We’ll need to restart the server for this change to be picked up. After doing so we can view the dashboard at http://localhost:3000/split.
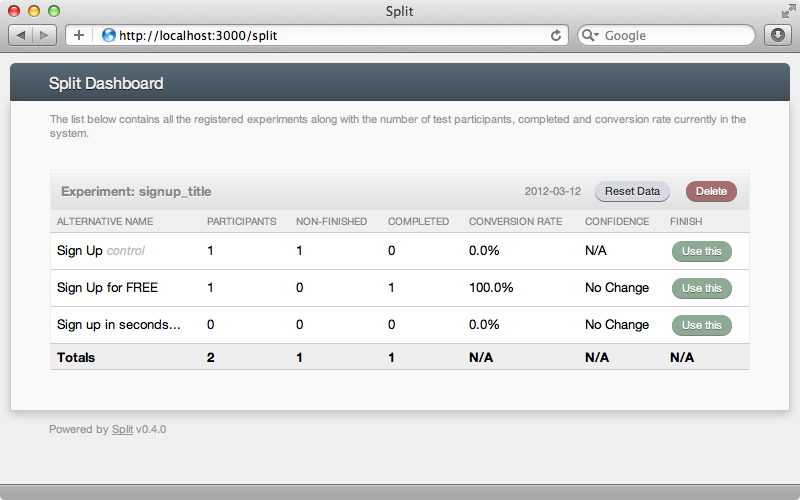
The Split dashboard shows a nice representation of the results that our app has generated. We can see our experiment’s three variations, the number of participants for each one and also the number of unfinished and completed results. As well as being able to view the data we can perform a number of actions here. We can reset the data or we can select a specific variation that we’ve decided is the best so that it is shown to all users. If we choose “Sign Up for Free” here we’ll always see that title.
Making Bigger Changes
Let’s say that we want to change more than just the title. Maybe there are other parts of the design that we want to experiment with. We could go back to our template and add some more calls to ab_test to add more experiments to the page, but generally this isn’t a good idea. If we have too many experiments going on at once it can become difficult to determine the results and the experiments can interfere with each other. Indeed it looks as if the next release of this gem will restrict an application to one experiment per user at once.
So if it’s best to have just one experiment running at once what do we do if we want to change multiple parts of the page? Well, the ab_test method can accept a block and the chosen variation is passed into it. This means that we can pass the entire template into this block and then make as many changes to it as we want as part of the same experiment.
<% ab_test "signup", "long", "short", "bold" do |style| %>
<div class="signup_<%= style %>">
  <h1>Sign Up<%= " for FREE"  if style == "bold" %></h1>

  <% if style == "long" %>
  <p>Fill out the sign up form below to access the great features of this site. Please enter a valid email address because further instructions will be emailed to you after signing up.</p>
  <% end %>
    <%= form_for @user do |f| %>
    <% if @user.errors.any? %>
        <ul class="errors">
        <% @user.errors.full_messages.each do |msg| %>
          <li><%= msg %></li>
        <% end %>
        </ul>
      <% end %>

      <div class="field">
        <%= f.label :email %>
        <%= f.text_field :email %>
      </div>
      <div class="field">
        <%= f.label :password, "New Password" %>
        <%= f.password_field :password %>
      </div>
      <% unless style == "short" %>
      <div class="field">
        <%= f.label :password_confirmation, "Confirm Password" %>
        <%= f.password_field :password_confirmation %>
      </div>
      <% end %>
      <div class="actions">
        <%= f.submit "Sign Up" %>
      </div>
    <% end %>
  </div>
<% end %>
We’ve renamed our experiment to signup now as it affects the entire signup form and instead of providing three different header texts as variations we’ve created three names that reflect the three designs that we’re going to use. These names are passed to the block and we can use them in the template to change it depending on the chosen variation name. Now we only show “for FREE” as part of the header for the bold style; we only show the paragraph of text at the top of the page for the long style and we hide the Password Confirmation field for the short style. We want to make the CSS dependent on the style, too, so we’ve wrapped the page in a div and set its class depending on the style. Now we can make some changes to the users stylesheet to change the appearance of the form.
.signup_short {
  form label {
    float: left;
    width: 130px;
    margin: 2px 10px;
    text-align: right;
  }
  h1, form .actions {
    margin-left: 150px;
  }
}

.signup_bold {
  .actions input {
    -webkit-appearance: caret;
    padding: 5px 10px 6px 10px;
    font-weight: bold;
    border: 1px solid #16670D;
    border-radius: 4px;
    -webkit-border-radius: 4px;
    -moz-border-radius: 4px;
    color: #FFF;
    font-size: 13px;
    background: #1B7912;
    background: -webkit-gradient(linear, left top, left bottom, from(#40D143), to(#1B7912));
    background: -moz-linear-gradient(top,  #40D143,  #1B7912);
    filter: progid:DXImageTransform.Microsoft.gradient(startColorstr='#40D143', endColorstr='#1B7912');
    text-decoration: none;
    text-shadow: 0 -1px 0 #036;
  }
}
If the short style is chosen the form fields will be displayed horizontally, while the bold version will have a styled “Sign Up” button.
When we reload the page now Split has chosen the bold version. There’s no text at the top of the page and we see the differently-styled “Sign Up” button.
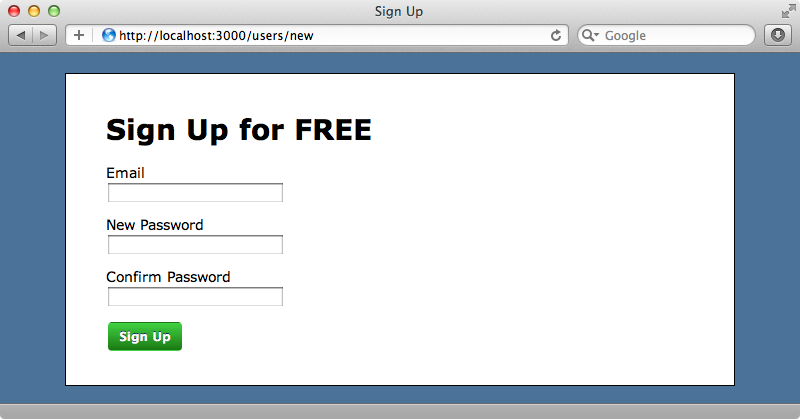
If we want to look at a different variation, and we’re in development mode, we can do so by specifying it in the querystring. We just need to add a parameter with a name that’s the value of the experiment and a value that’s the variation we want to see. We’ll use this now to take a look at the short variation.
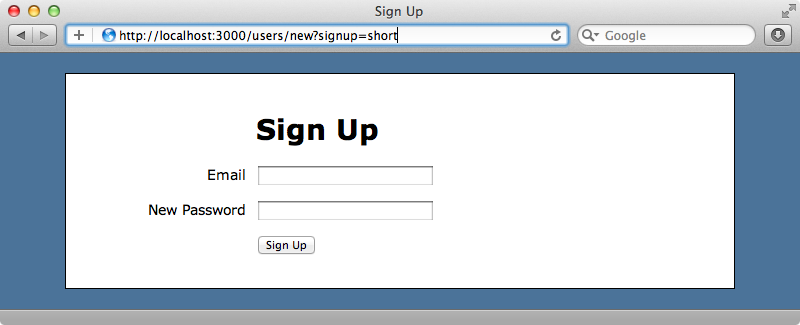
This is a useful way to test the different variations before they’re put into production.
Configuring Split
Split has a number of configuration options that we can specify and there are listed in the documentation. These options can be set inside an initializer file so we’ll create one now called split_config.
Split.configure do |config|
  config.db_failover = true # handle redis errors gracefully
  config.db_failover_on_db_error = proc{|error| Rails.logger.error(error.message) }
  config.allow_multiple_experiments = true
end
The db_failover option is very useful. If, for some reason, Split can’t communicate with Redis we don’t want this to bring the whole application down. With this option set Split will default to the first variation in the experiment. We can also tell Split to use Rails logger to log the error when Redis isn’t available. The allow_multiple_experiments option isn’t available in the current version but it will be available in the next one. We can also password protect the dashboard in this file which is a good idea. Obviously we’d want to change the user name and password to something a little more secure than those chosen here.
Split::Dashboard.use Rack::Auth::Basic do |username, password|
  username == 'admin' && password == 'secret'
end
If we try to visit the dashboard now we’ll be prompted to type in a user name and password before we can access it.
Note that as we’ve changed an initializer file we’ll have to restart the server for any of the changes to be picked up.
We haven’t covered everything that Split can do in this episode and it’s worth reading through the documentation before using it in an application. One feature that we haven’t covered is the ability to weigh certain variations so that they show up more frequently relatively to the others. If we look at the extensions section it shows a couple of other projects that will allow us to export the data or send it to Google Analytics.
Speaking of Google an alternative solution for A/B testing is their Website Optimizer. This has many features, including A/B testing. Another alternative is Optimizely. The demo video on their home page is worth watching to see how this works.
For a Rails-specific solution there’s A/Bingo, which was covered back in episode 214. This is an older gem but still worth considering. Finally there’s Vanity if you’re looking for an alternative to Split.


