#408 Ember Part 1 pro
- Download:
- source codeProject Files in Zip (36.3 KB)
- mp4Full Size H.264 Video (29.3 MB)
- m4vSmaller H.264 Video (16.5 MB)
- webmFull Size VP8 Video (22.5 MB)
- ogvFull Size Theora Video (32.9 MB)
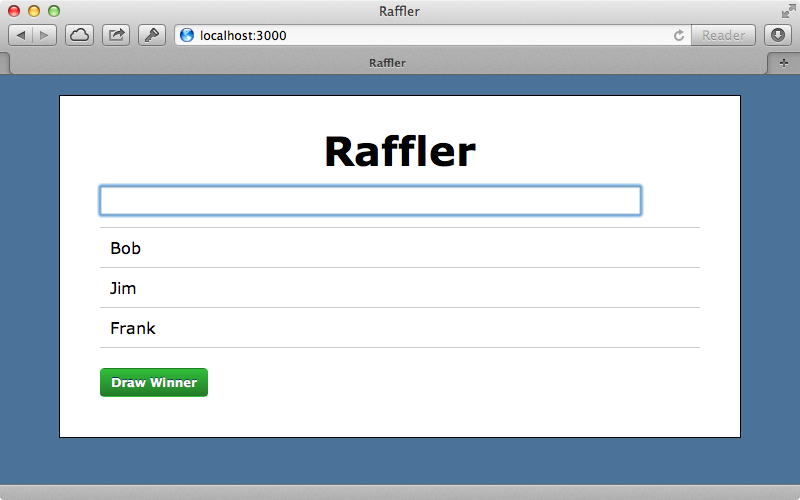
In this episode we’ll take a look at Ember.js, a JavaScript framework for building rich client-side applications that has recently hit Release Candidate 1. To demonstrate it we’ll build the same Raffler application we’ve built in the past with other frameworks so that we can compare it with Angular.js, Meteor and Backbone. In this app we can add entries to a raffle and draw random winners, the most recent of which should be displayed in red.
Getting Started With Ember
We’ll start by creating a new Rails application called raffler.
$ rails new raffler
As we’re building a single page application we can use the ApplicationController as the main page. We’ll put the template for this page in a new application directory under app/views. We’ll leave this index.html.erb template blank for now as it will be filled by Ember.js. In the routes file we’ll create a new root route to point to our action.
Raffler::Application.routes.draw do
  root to: 'application#index'
end
We don’t need to define the index action in the ApplicationController as the template will be used directly. We’ll also remove the public/index.html file now. If this was a serious production application we’d probably make a separate controller for this to avoid unwanted template inheritance but using the ApplicationController directly is a neat trick for our small example app. To complete the set up of our application we’ll add some CSS to a new layout.css.scss file. There’s too much code to show here, you can find the stylesheet on Github.
When we visit the home page of our application now we’ll see a blank page which means that we’re ready to start adding functionality through Ember. To do this we’ll use the official ember-rails gem, which integrates nicely with the asset pipeline. (Alternatively we could download the source code from the site and include it manually.) The gem is added in the usual way, by adding it the the gemfile and running bundle to install it.
gem 'ember-rails'Next we’ll need to run a generator that the gem supplies.
$ rails g ember:bootstrap
This generates a number of files and we’ll look at some of these later. It also gives us instructions to add a line of code to the configure block of our application’s environment files.
config.ember.variant = :developmentWe’ll add the same line to the test.rb file in case we add any integration-level tests later and a similar line in production.rb but with the value set to :production. The ember-rails gem is under active development so these steps may not be necessary in future versions. We now have a number of new files under app/assets/javascripts and we’ll start by looking at application.js.
//= require jquery
//= require jquery_ujs
//= require handlebars
//= require ember
//= require ember-data
//= require_self
//= require raffler
Raffler = Ember.Application.create();
The generator has added some lines to this manifest file, including ember, ember-data and handlebars which it uses for templates. There is also a line for creating a new Ember app called Raffler and this name will be used as a namespace throughout our JavaScript application. This file has a require_tree . line at the end which we can remove as all the JavaScript files for our app are included in the raffler manifest file.
All of the generated files are plain JavaScript files. There is a pull request for adding CoffeeScript support to the gem but this isn’t yet in place. For now we’ll convert the files we use to CoffeeScript as we go along. Looking at these files it seems that there’s a lot to an Ember application so we’ll take it one step at a time, starting with templates. An application.handlebar file was generated for us and will be rendered automatically by Ember and inserted into the page’s body element. We’ll remove the default content from the file and add a div with an id of container so that we can style the page. We’ll also add a heading so that we have something to look at.
<div id="container">
  <h1>Raffler</h1>
</div>
If we reload the page now the template is rendered and inserted into the page.
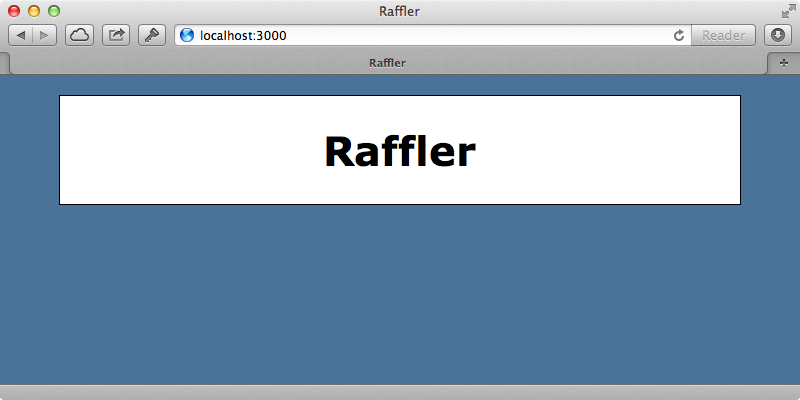
Handlebars is a template language similar to Mustache, which we covered in episode 295 and we can use it to output dynamic content using pairs of double curly brackets. Ember provides some built-in helpers that we can use in the templates and we’ll use one now to insert a text field at the top of our page. We call view to render a view object and we can use Ember.Textfield to render a text box. This takes a number of options, one useful one is called valueBinding and we can set this to a property that we want to bind the text box’s value to.
<div id="container">
  <h1>Raffler</h1>
  {{view Ember.TextField valueBinding="newEntryName"}}
  {{newEntryName}}
</div>
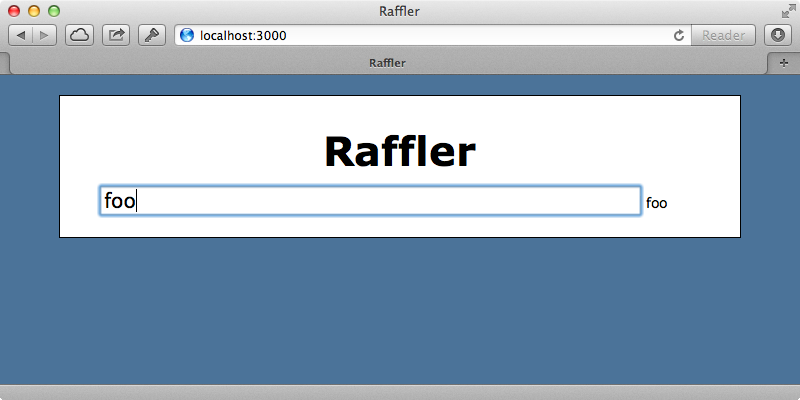
Here we’ve bound the value to a newEntryName property and we output the value of this property below the text box. If we reload the page now and start typing in the text box, whatever we type will be shown on the page.
The context of an Ember template is the controller. In this case we have our application template with its newEntryName property and this will be set on the ApplicationController which is defined in the application_controller.js.coffee file. This also applies to any actions that we trigger from the template. We’ll demonstrate this by adding an action called addEntry that will fire when we add a new entry.
<div id="container">
  <h1>Raffler</h1>
  {{view Ember.TextField valueBinding="newEntryName" action="addEntry"}}
  {{newEntryName}}
</div>
Next we need to define this function in our controller. For now we’ll just have it alert the newEntryName property and then reset it back to an empty string so that the form field is cleared.
Raffler.ApplicationController = Ember.Controller.extend
  addEntry: ->
    alert @newEntryName
    @newEntryName = ""
This won’t work as Ember bindings will not automatically detect a property that it set this way. Instead we need to use the get and set functions for each property that we want to access or update, like this:
Raffler.ApplicationController = Ember.Controller.extend
  addEntry: ->
    alert @get('newEntryName')
    @set('newEntryName', "")
If we enter a name into the text box now and hit return we’ll see the alert showing the name that we entered.
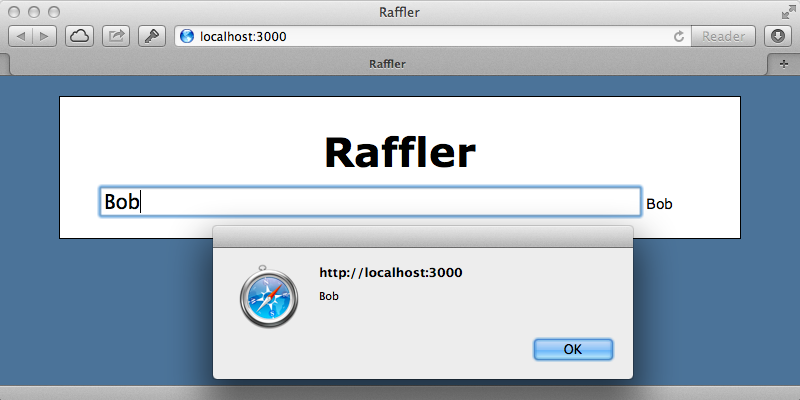
After we dismiss the alert the text field is cleared.
Next we’ll modify our application so that when we submit an entry it’s added to a list below the text field. We’ll add a new property to our controller called entries and give it a default value of an empty array. Instead of alerting an entry when it’s submitted we’ll add it to the list instead. We can’t simply push the new entry on to the list as the won’t update the binding to the view. Instead we need to use a function that Ember add to array objects called pushObject. This way Ember will detect the change and update the bindings.
Raffler.ApplicationController = Ember.Controller.extend
  entries: []

  addEntry: ->
    @entries.pushObject name: @get('newEntryName')
    @set('newEntryName', "")
Next we need to modify our template and render the list. We’ll render the items in an unordered list and we loop through each entry by calling #each and passing it the entries array. Each entry becomes the context within the block and we can just call name to render out each entry’s name.
<ul>
   {{#each entries}}
   <li>{{name}}</li>
   {{/each}}
</ul>
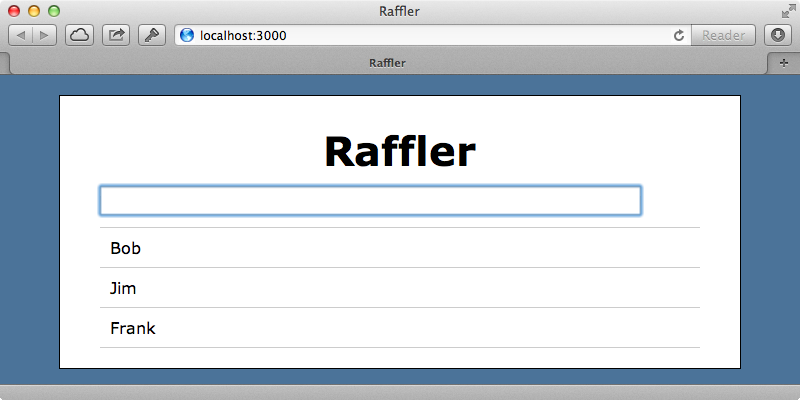
If we reload the page now then enter some names they’ll be added to the list.
Using Different Templates
So far we’ve been building everything through our application template and controller which Ember isn’t really designed to do. The template should act more like a layout template in Rails where it should contain everything that is consistent through the different states of our application. Our application is so simple that it only really has one state, but it’s still a good idea to move most of the code in the template out into a separate template and controller. To do this we’ll start by making a new template and moving the text field and list of entries into it.
{{view Ember.TextField valueBinding="newEntryName" action="addEntry"}}
<ul>
   {{#each entries}}
   <li>{{name}}</li>
   {{/each}}
</ul>
We also need to set up an entries controller to handle this behaviour. We’ll move all the logic from the ApplicationController into it.
Raffler.EntriesController = Ember.Controller.extend
  entries: []

  addEntry: ->
    @entries.pushObject name: @get('newEntryName')
    @set('newEntryName', "")
We’re not quite finished with this extraction yet as we still need to have Ember render out the entries from within the application template. We can do this by calling outlet which works in a similar way to yield in a layout template in Rails and which will render out a template and controller based on the current route.
<div id="container">
  <h1>Raffler</h1>
  {{outlet}}
</div>
This means that we’ll need to define a route, which we can do in the router file.
Raffler.Router.map ->
  @route 'entries', path: '/'
Here’s we’ve added a new route and passed it the name of the template. We can pass an optional path argument here which we’ve done to make this the root route. One benefit of making this extraction is that we can further customize our EntriesController. It’s designed to manage entries, which are an array of records, and Ember provides a custom controller for doing just this called ArrayController. We’ll modify our EntriesController controller to inherit from this instead.
Raffler.EntriesController = Ember.ArrayController.extend
  addEntry: ->
    @pushObject name: @get('newEntryName')
    @set('newEntryName', "")
This makes the controller itself behave like an array by delegating various function calls to its internal content array. We no longer need to set the entries array in the controller and we can now call pushObject directly on the controller to add it to the internal array. We do need to set the initial for this controller and this is often done in the router. We can customize what happens when we visit our entries route by defining an Raffler.EntriesRoute class and having it inherit from Ember.Route. If we define a setupController function here it will have the controller instance passed in to it which allows us to prepare it to be rendered. To set the internal array we set the content property and we’ll set this to an internal array for now.
Raffler.Router.map ->
  @route 'entries', path: '/'

Raffler.EntriesRoute = Ember.Route.extend
  setupController: (controller) -> controller.set('content', [])
One possible point of confusion here is that a route in Ember is more like a controller action in Rails in that it prepares content to be rendered. Our application does have a routes directory where this class could go but we’ll keep all the routing information in a single file until it becomes more complex and needs to be moved out into separate files. We’re not quite done here yet. We have an EntriesController with an initial array but we still need to configure our entries template. This loops through an entries array that we no longer have. Instead we can now loop through the controller directly as it behaves like an array and we can access our entries through it.
<ul>
   {{#each controller}}
   <li>{{name}}</li>
   {{/each}}
</ul>
When we try our application now it still works like it did before but the entries are being managed by the ArrayController.
Drawing Winners
Next we’ll add a “Draw Winner” button to the form so that we can select a random entrant and mark them as the winner. To click a function on the controller when the button is clicked we use an action helper and pass it the name of the function that we want to trigger.
<button {{action drawWinner}}>Draw Winner</button>We can do write this function in the controller.
drawWinner: ->
  pool = @rejectProperty('winner')
  if pool.length > 0
    entry = pool[Math.floor(Math.random()*pool.length)]
    entry.winner = true
Ember adds several enumerable functions to arrays and we use one of them here. The @rejectProperty function will loop through all the entries here and reject the ones whose winner property isn’t truthy. If we find any matching entries then we pick one at random from the pool and mark it as a winner. We need to display the winning entries on the page so we’ll modify our template to do this.
<li>
  {{name}}
  {{#if winner}}
    <span class="winner">WINNER</span>
  {{/if}}
</li>
When we try this out, however, it doesn’t work and clicking the button appears to do nothing. In these situations it’s always a good idea to check the browser’s console first for any errors. If there are none the next thing to check should be our bindings as we might have updated something in a way that the bindings can’t detect. In this case the problem is in our controller. We set the winning entry’s winner property directly here but we should use the set function instead so that the bindings are updated. That said, we can’t just call set on the entry object as this is a plain JavaScript object, not an Ember object. When we use @pushObject in the controller we’re creating a JavaScript object. We need to modify this to create an Ember object instead. We can use set on this to set properties and the bindings will keep track of it and update the view accordingly.
Raffler.EntriesController = Ember.ArrayController.extend
  addEntry: ->
    @pushObject Ember.Object.create(name: @get('newEntryName'))
    @set('newEntryName', "")

  drawWinner: ->
    pool = @rejectProperty('winner')
    if pool.length > 0
      entry = pool[Math.floor(Math.random()*pool.length)]
      entry.set('winner', true)
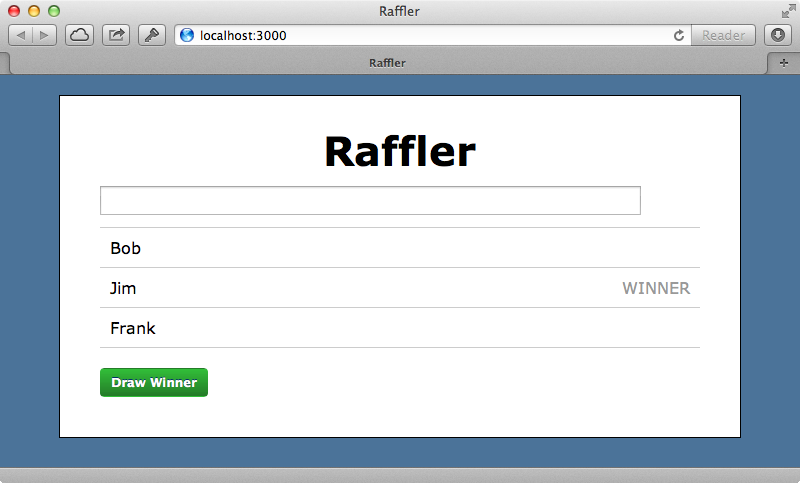
When we reload the page now and add some entrants clicking the button selects a winner, just like we want.
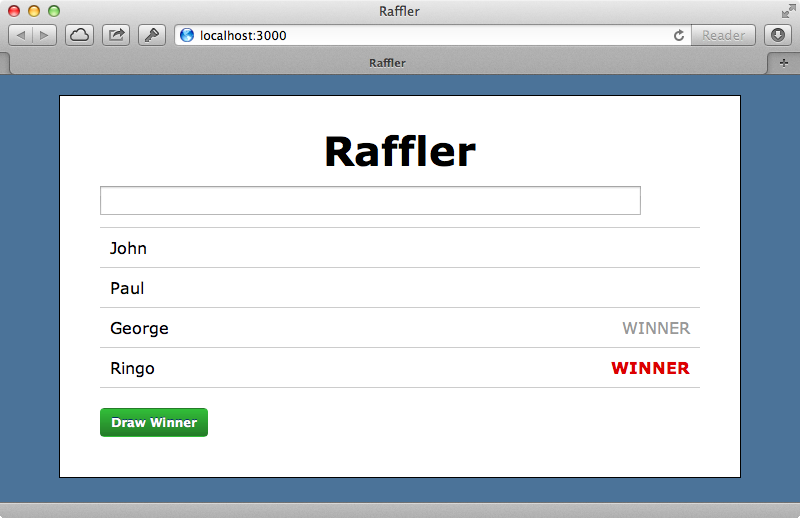
We want the most recent winner to be displayed in a different colour. To do this we can add another CSS class to the “WINNER” text for that winner. To make HTML properties dynamic we can wrap them in a call to bindAttr, like this:
<span {{bindAttr class="winner highlight"}}>WINNER</span>This will look for the winner and highlight properties on the entry object and only set these in the class if the property values are true. This means that if we add a highlight property to a winner this class will be included in the HTML. Of course we only want this to apply to the last picked winner so we’ll remove that property from all the entries before picking a new winner. We can do this by using the @setEach function that Ember provides.
drawWinner: ->
  @setEach('highlight', false)
  pool = @rejectProperty('winner')
  if pool.length > 0
    entry = pool[Math.floor(Math.random()*pool.length)]
    entry.set('winner', true)
    entry.set('highlight', true)
When we choose some winners now the most recent is highlighted.
Our application is coming along nicely and we’ve completed most of the functionality for the client-side. The data on the page isn’t persisted at all, though, and if we reload the page it disappears. In part 2 we’ll show how to persist this data to the Rails app using Ember data, along with some other things including view objects and computed properties.


