#401 ActionController::Live pro
- Download:
- source codeProject Files in Zip (73.2 KB)
- mp4Full Size H.264 Video (31.3 MB)
- m4vSmaller H.264 Video (17 MB)
- webmFull Size VP8 Video (19.3 MB)
- ogvFull Size Theora Video (41.3 MB)
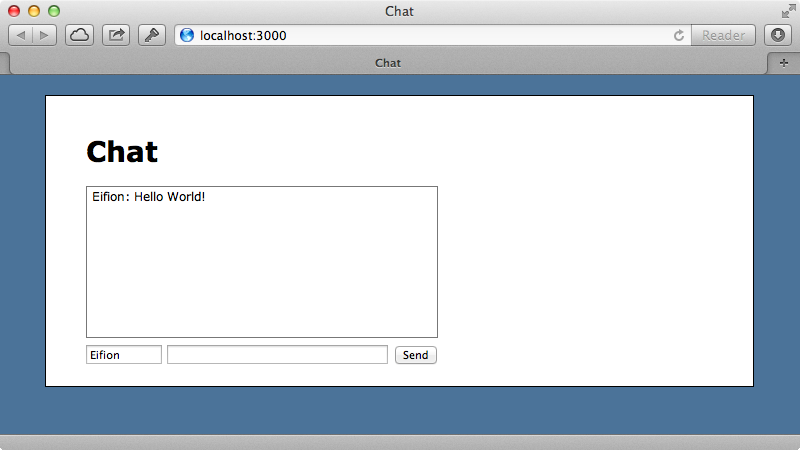
Let’s say that we’re building a chat application. Below is a screenshot showing what we’ve got so far. A user can type in a message and when they click “send” an AJAX request is submitted to save it to the database and to append it to the chat window.

If two users are chatting only the user who posts a message sees it appear in their chat window. Everyone has to reload the page to see messages from other users. There are several solutions to this problem and one option is to poll for new messages like we did in episode 229. This works but it means that there’s a delay before the other users see the message and also dramatically increases the number of requests made to our application. Alternatively we could use WebSockets and publish over this using something like Faye which we did in episode 260. In this episode we’ll use a third technique using server-sent events which allow us to publish notifications over the HTTP protocol.
With server-sent events we can create a new EventSource on the client and pass it a path or URL. This will maintain a persistent connection to the server and we can also supply a callback function that is triggered whenever an event is received from the server, which needs to send data in a specific format. Unfortunately this isn’t supported by all browsers, but recent versions of all the major browsers will work with the exception of Internet Explorer, although a third-party library is available to add IE support. As far as Rails is concerned the tricky part of this is streaming the event data from the server. In previous versions of Rails this was quite difficult but Rails 4 has a new feature has a new feature called ActionController::Live which simplifies this greatly. Aaron Patterson has written a blog post about this which shows how it can be used with server-sent events which is well worth taking the time to read.
Using ActiveController::Live in Our Application
We’ll use server-sent events to receive notifications in our chat app. To use ActiveController::Live we’ll need to use Rails 4, which is currently unreleased. We’ve already done that in our app and you can find out how by looking at episode 400. We can then include the ActionController::Live module in any of our controller and use it to steam responses. We’ll use this in our MessagesController and create an events action that will publish events to the client. We write to the stream by calling response.stream.write and for now we’ll just write three pieces of test data to the stream and pause for two seconds between each piece. After we’ve finished writing to a stream it’s important to close it so that it doesn’t stay open for ever and we do that by calling response.stream.close. It’s a good idea to use this with ensure so that it’s called even if an exception is raised.
class MessagesController < ApplicationController
  include ActionController::Live

  def index
    @messages = Message.all
  end

  def create
    @message = Message.create!(params[:message].permit(:content, :name))
  end

  def events
    3.times do |n|
      response.stream.write "#{n}...\n\n"
      sleep 2
    end
  ensure
    response.stream.close
  end
end
In order to try this out we need to add this action to our routes so we’ll do that now.
Chatter::Application.routes.draw do
  resources :messages do
    collection { get :events }
  end
  root to: 'messages#index'
end
We can now see if we’re streaming data by using curl.
$ curl localhost:3000/messages/events
0...

1...

2...
When we do this there is a long pause before the data is returned all at once. This is because we’re using WEBrick as our server and it buffers the output. We’ll have to switch servers to one that can steam responses and handle multiple connections asynchronously. We’ll use Puma, but we could use Thin or Rainbows. To install it we just need to add it to the gemfile and run bundle.
gem 'puma'We can start up this server by running rails s puma and when we run the curl command again we see the response being streamed just like we want. We can also test to see if we can handle multiple connections at once and by repeating the curl command a couple of times. (Note that repeat only works with zsh, not bash.)
% repeat 2 (curl localhost:3000/messages/events)
When we do this the responses come in one request at a time so it seems that they’re not being handle asynchronously. Threading isn’t enabled by default in development mode; to enable it we’ll have to set both cache_classes and eager_load to true.
config.cache_classes = true

config.eager_load = true
With these settings in place we’ll need to restart the server each time we make a change to our application. For more information on multi-threading in Rails applications take a look at episode 365.
Streaming Useful Data
When we restart the server then run the curl command once more the responses will come in asynchronously. With this working we’ll update the client so that it listens to new events at that path. We do so by creating a new EventSource and passing in the correct path, then adding an event listener. We need to pass this the name of the event we want to listen to and if we pass 'message' this works as a default. We can also pass a callback function which will be called whenever an event is triggered. For now we’ll just show an alert that displays the event’s data.
source = new EventSource('/messages/events')
source.addEventListener 'message', (e) ->
  alert e.data
Back in the controller we can customize the events action so that it responds in the way the browser expects.
def events
  response.headers["Content-Type"] = "text/event-stream"
  3.times do |n|
    response.stream.write "data: #{n}...\n\n"
    sleep 2
  end
rescue IOError
  logger.info "Stream closed"
ensure
  response.stream.close
end
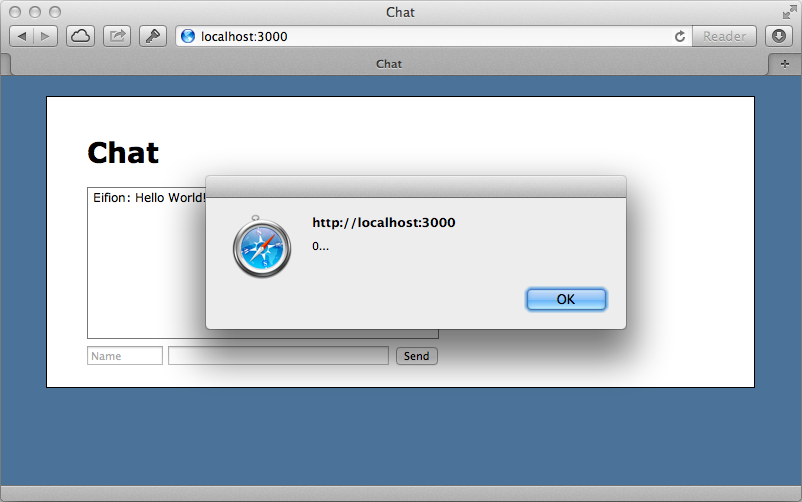
First we set the Content-Type header. Whenever we customize headers on a streaming response we need to do this before we write to or close the stream as an exception is raised if we try to do it later on. This needs to be done to all the controller’s actions, even though the other ones aren’t using streaming, as they all include the ActionController::Live behaviour. If we want to avoid this we’ll have to move our streaming actions into a separate controller. In order to trigger events in the browser we’ll need to start each line of the response stream with “data:” and end it with two newline characters. It’s also a good idea to rescue any IOError exceptions which can occur if the stream connection is closed when we try to write to it. When this happens we log this error. After we’ve restarted the server and reloaded the page, we should now see an alert for each line of data that’s streamed to the browser.

After all three events have been received the connection will be closed, but EventSource tries to keep it open so it’s reopened and the events are retriggered.
With our events system now in place we can use it to display messages as they come in. One way to do this is to poll the database for new messages and that’s what we’ll do. We’ll modify our events action to do this.
def events
  response.headers["Content-Type"] = "text/event-stream"
  start = Time.zone.now
  10.times do
    Message.uncached do
      Message.where('created_at > ?', start).each do |message|
        response.stream.write "data: #{message.to_json}\n\n"
        start = Time.zone.now
     end
   end
  sleep 2
  end
rescue IOError
  logger.info "Stream closed"
ensure
  response.stream.close
end
Here we fetch the messages that were created after the current time and return each on as JSON. Once we’ve done that we’ll reset the time so that only new messages are fetched next time. We’ll do this ten times per request for now, though it will automatically reconnect after. In production we’d do this for a longer period of time but keeping it short in development will help if the connection hangs. ActiveRecord caches the database query we make per request so new message won’t be found each time. To fix this we wrap this code in a Message.uncached block. Queries performed in the block won’t be cached so we’ll get any new messages that appear.
Now we’ll modify our CoffeeScript file so that instead of showing an alert when an event’s received we parse the JSON to get a message and append it to the list.
source = new EventSource('/messages/events')
source.addEventListener 'message', (e) ->
  message = $.parseJSON(e.data).message
  $('#chat').append($('<li>').text("#{message.name}: #{message.content}))
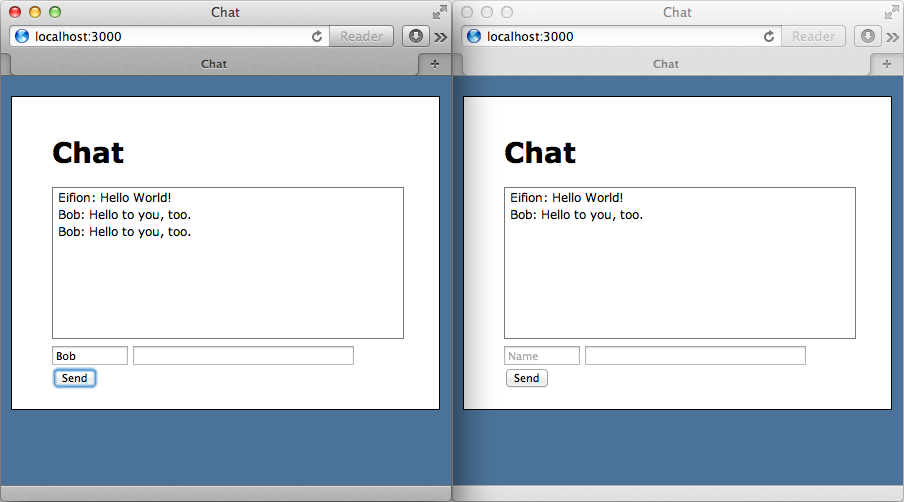
We’ll need to restart the server to try this out but once we have we can open two windows and enter a message in one of them to see if it appears in the other.

The message does appear in the other window but it’s also repeated in the one that we entered the message in. This is because we add it on response to the AJAX request but this is easy to fix. In the create action we have a JavaScript template that’s executed when a message is added and we can remove this to stop the duplicate message from appearing.
$("#message_content").val('');Removing Polling
There’s still a noticeable delay when we send the message before it shows up in the other windows and this is because we’re polling the database every two seconds. It would be much better if we were notified when a new message was created and there are a variety of ways that we can do this. If we’re using Postgres as our app’s database we could use the NOTIFY and LISTEN commands to send data across a channel to all listeners. Another option is to use Redis which has its own pub/sub features and that’s what we’ll use here. First, we’ll add its gem to the gemfile.
gem 'redis'Next we’ll create an initializer file and set up a shared Redis connection in it.
$redis = Redis.new
Whenever we create a new message now we’ll publish it over Redis.
def create
  attributes = params.require(:message).permit(:content, :name)
  @message = Message.create!(attributes)
  $redis.publish('messages.create', @message.to_json)
end
When we listen for events we no longer need to poll the database. Instead we can subscribe to the Redis database and stream any messages that arrive.
def events
  response.headers["Content-Type"] = "text/event-stream"
  start = Time.zone.now
  redis = Redis.new
  redis.subscribe('messages.create') do |on|
    on.message do |event, data|
      response.stream.write("data: #{data }\n\n")
    end
  end
rescue IOError
  logger.info "Stream closed"
ensure
  redis.quit
  response.stream.close
end
Doing this locks the connection so we need to create a new connection to the database. We can then subscribe to messages.create and when a message arrives we can stream it out. Finally we ensure that the connection is closed.
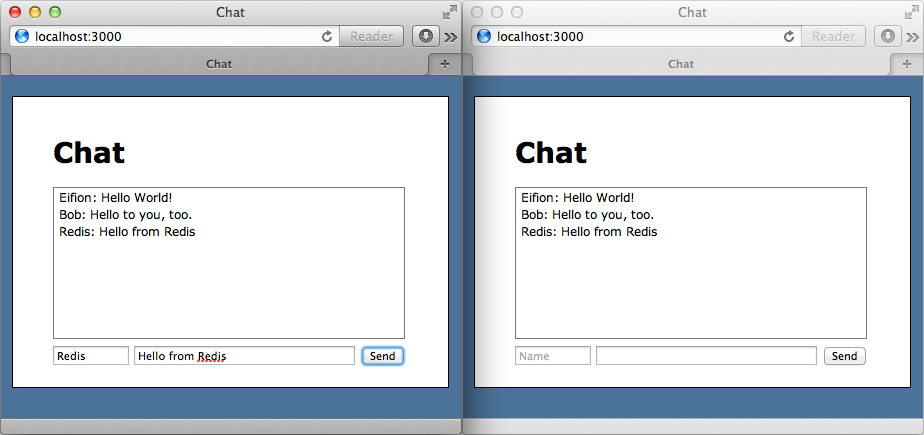
We can try this out now. We’ll start up the Redis server and restart the Puma server then open two browser windows.

When we enter a message in one window it now immediately appears in the other. There does seem to be a small issue, however, as the message we’ve entered hasn’t been cleared from the text box. This is because we’re returning the wrong MIME type from the create action but this is easy to fix.
def create
  response.headers["Content-Type"] = "text/javascript"
  attributes = params.require(:message).permit(:content, :name)
  @message = Message.create!(attributes)
  $redis.publish('messages.create', @message.to_json)
end
It seems that when we started publishing to Redis the content type changed to text/html and so we need to override it.
While we’re in the controller we’ll show you something else that we can do with our Redis setup. Instead of using subscribe we can use psubscribe, which stands for pattern subscribe, to match all the message-related events. We can then use pmessage to listen to all the events that match a pattern.
def events
  response.headers["Content-Type"] = "text/event-stream"
  start = Time.zone.now
  redis = Redis.new
  redis.psubscribe('messages.*') do |on|
    on.pmessage do |pattern, event, data|
      response.stream.write("event: #{event}\n")
      response.stream.write("data: #{data}\n\n")
    end
  end
rescue IOError
  logger.info "Stream closed"
ensure
  redis.quit
  response.stream.close
end
With this set up we can send the event name back to the client along with the data. Note that there’s only one newline character after the event, unlike after the data where we sent two. We can now modify our CoffeeScript file so that we listen for the create event.
source = new EventSource('/messages/events')
source.addEventListener 'message.create', (e) ->
  message = $.parseJSON(e.data).message
  $('#chat').append($('<li>').text("#{message.name}: #{message.content}"))
We can now easily add other events to the controller for updating or anything else we might want to do with the messages and have them reflected instantly on the client.
Scaling For Production
Our solution is pretty much complete now and adding a message instantly sends it to all the listening clients. Let’s take a quick look at how we might scale this for a production setup. If we use Puma as our web server it will default to a maximum of 16 threads. This means that we could only have 16 persistent connections open at once and these will be used up quickly if we’re using long-running connections , as we are in our app. We’ll need to either increase this number or try a different server such as Thin or Rainbows. Another setting we’ll need to change is the pool limit that’s set in the database YAML file. This has a default of 5 but we should bump it up to the number of threads that we want to accept per Rails instance. Rails reserves a database connection for every request that comes in even if that request doesn’t talk to the database.
Managing long-running requests, like our event action, is something that Rails hasn’t done much of in the past so there may be some optimizations which aren’t in place when Rails 4.0 is released. If you use this technique you should keep an eye our for memory leaks or other potential issues.
ActionController:::Live has a lot of potential but given the current state of Rails 4 it’s not easy to recommend over moving long-running requests into smaller process outside Rails, such as Faye.


