#376 JRuby Basics
- Download:
- source codeProject Files in Zip (41 KB)
- mp4Full Size H.264 Video (28.6 MB)
- m4vSmaller H.264 Video (12.8 MB)
- webmFull Size VP8 Video (14 MB)
- ogvFull Size Theora Video (23.3 MB)
JRuby is a polished and stable Ruby implementation built on top of the Java Virtual Machine. Even if you’re not a Java programmer JRuby still has a lot to offer and in this episode we’ll show you the basics of setting up JRuby and focus on some areas where it differs from Ruby MRI.
Installing JRuby
One way to install JRuby is to download it from the JRuby site but it can also be installed through a Ruby environment manager such as RVM or rbenv. We’ll use rbenv to install the latest version which at the time of writing is 1.7.0.preview2.
$ rbenv install jruby-1.7.0-preview2
Note that if you’re running OS X Mountain Lion this may prompt you to install a Java Virtual Machine. Once it has installed we can switch to it to see that it works. Note that depending on your setup you might need to prefix Ruby-related commands with a j to make sure that they use JRuby which means running jruby and jirb instead of ruby or irb.
$ rbenv shell jruby-1.7.0-preview2
$ ruby -v
jruby 1.7.0.preview2 (1.9.3p203) 2012-08-07 4a6bb0a on Java HotSpot(TM) 64-Bit Server VM 1.6.0_35-b10-428-11M3811 [darwin-x86_64]
We’ll start our look at JRuby by experimenting in the console to see what sets JRuby apart. We can run Ruby commands just as if we were running Ruby MRI 1.9.3 and for the most part we won’t notice any difference. One big change is that we now have access to the entire world of Java and its libraries. The key to unlocking this is the line require "java". This allows us to access various Java classes such as a HashMap. We’ll create a new HashMap, add a value to it then retrieve it.
>> require "java"
=> true
>> h = java.util.HashMap.new
=> {}
>> h.put(:foo, "bar")
=> nil
>> h.get(:foo)
=> "bar"
For core classes like this JRuby provides some convenience methods beyond what is provided by the Java interface. With our HashMap, for example, we can access values similar to how we’d do it in Ruby. We can even iterate over the keys with .each and much more, even though we’re working with a Java hash map.
>> h[:foo]
=> "bar"
Another more interesting use of JRuby is Swing which we can use to create a GUI.
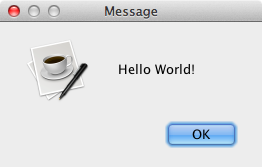
>> javax.swing.JOptionPane.showMessageDialog(nil, "Hello World!")
=> nil
 Running this shows a dialog box and we can create full-featured UIs this way. This isn’t useful for Rails applications but it’s handy for creating administrative scripts. JRuby gives us an alternative way to do this which more closely matches the Ruby style, like this:
>> Java::JavaxSwing::JOptionPane.show_message_dialog(nil, "Hello")
=> nil
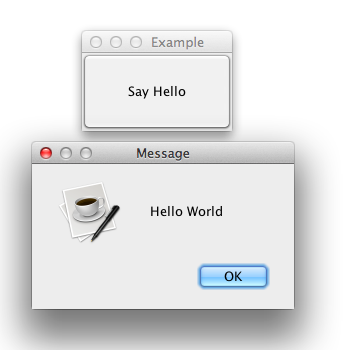
This will show a similar dialog box to the one we saw earlier. Next we’ll show you a fuller example of what’s possible with Swing.
require "java"

java_import javax.swing.JFrame
java_import javax.swing.JButton
java_import javax.swing.JOptionPane

class HelloWorld < JFrame
  def initialize
    super "Example"

    setSize(150, 100)
    setDefaultCloseOperation(JFrame::EXIT_ON_CLOSE)
    setLocationRelativeTo(nil)

    button = JButton.new("Say Hello")
    add(button)

    button.addActionListener do |e|
      JOptionPane.showMessageDialog(nil, "Hello World")
    end

    setVisible(true)
  end
end

HelloWorld.new
At the top of this file we call require "java" like we did in irb to give us access to Swing then use java_import to import some Java classes so that we don’t need to go through their package when we use them and can access the classes directly in this script. We then create a Ruby class that inherits from the Java JFrame class. This will create a window and in our class we set its size and some other properties. We then create a button, add it to the window and add an event. The code inside the event’s block is fired when the button is clicked. In Java we’d use an anonymous function to define the event’s code but here we can use a Ruby block. We then make the window visible. Finally outside the class we instantiate a new instance of our class. When we run this file through the ruby command it opens up a small window filled with the button we created. When we click it the message dialog is shown.

Improved Concurrency In JRuby
Having a bridge between Ruby and Java is useful but as a Rails developer you might not consider it to be much use. What’s more interesting about JRuby is that is has improved support for concurrency with threads. We can demonstrate this by creating a new Ruby script to calculate Fibonacci numbers.
def fib(n)
  n < 2 ? n : fib(n-1) + fib(n-2)
end

start = Time.now

1.upto(5).map do |n|
  Thread.new { puts "Thread #{n}: #{fib(32)}" }
end.each(&:join)

puts "Time: #{Time.now - start}"
Here we have a simple method for calculating Fibonacci numbers that we trigger five times, each in a separate thread and when the program has finished we print out the total time it took to run. When we run this under JRuby it takes under a second to complete, but if we switch Ruby versions and run the same program under MRI it takes over three seconds. The main reason for this slowdown is the Global Interpreter Lock. Matt Aimonetti wrote an article about this in 2011 which explains this in detail. Basically this lock prevents the Fibonacci sequence from running concurrently in separate threads and if we have a multi-core machine this time difference will be more noticeable. If we aren’t constantly processing Ruby code, but are instead waiting for a response from a database or a file system then the GIL is lifted an we can simulate this will a call to sleep in our Fibonacci code.
def fib(n)
  n < 2 ? n : fib(n-1) + fib(n-2)
end

start = Time.now

1.upto(5).map do |n|
  Thread.new { puts "Thread #{n}: #{sleep(0.5)}" }
end.each(&:join)

puts "Time: #{Time.now - start}"
If we run this code under MRI Ruby now it only takes around half a second to finish as the lock isn’t set when a thread sleeps.
If we’re building a multi-threaded Rails application and wondering how much the performance might improve under JRuby due to this concurrency difference the answer is that this depends on how much time our application spends accessing the database versus executing Ruby code and also on the number of cores that the machine has. There are, of course, many other things we should consider when comparing performance but in general if we’re setting up a multi-threaded Rails app in production under MRI we’ll probably still want to set up separate processes running the Rails app to take full advantage of concurrency. Under JRuby, however, it’s more likely that we can handle everything in a single process.
A JRuby on Rails Application
We’ll finish this episode by showing how to make a Rails application compatible with JRuby. First we’ll switch over the JRuby in the shell then install the Rails gem. Once all the gems have installed we can create a new Rails app that we’ll call blog.
$ rbenv shell jruby-1.7.0-preview2
$ gem install rails
$ rails new blog
The Rails generator is quite smart and will automatically make our new application compatible with JRuby if we make a new app while running JRuby. The key differences can be found in the gemfile and the first one is that the gem used to access SQLite is not the usual sqlite3 but something else instead.
gem 'activerecord-jdbcsqlite3-adapter'JDBC is a standard way for Java applications to communicate with a database. This gem uses this to allow ActiveRecord to talk to our application’s database. It’s important to understand that some gems are incompatible with JRuby because they rely on C extensions and the sqlite3 gem is one of them. If we try to install this gem under JRuby it will fail with an error message when trying to compile the native extensions. There are ways to get around this problem but it’s generally best to look for an alternative gem that is compatible with JRuby. The JRuby wiki has a page on C extension alternatives and this is a good place to look for an alternative to the gems your applications use that require C. Another useful resource is the JRuby-Lint gem. This provides a jrlint command that we can run in a project to see if it has any incompatibilities with JRuby. It doesn’t check everything but it does look for C extensions and a few other potential problems. Back in our app’s gemfile the next gem listed is jruby-openssl which emulates Ruby’s native OpenSSL library. The only other JRuby-specific gem listed is therubyrhino which is used to execute JavaScript. If we’re converting an existing Rails application to JRuby these are the main gems we’ll need to add to make it compatible. We should then be able to continue working on our Rails app and to demonstrate this we’ll create a scaffold for a simple Article model in our app.
$ rails g scaffold article name
$ rake db:migrate
$ rails s
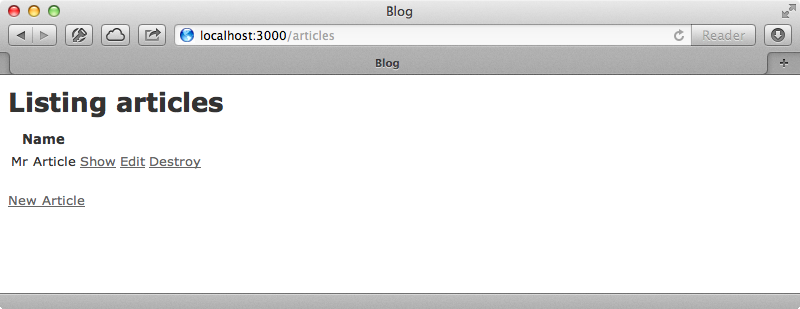
This gives us the usual scaffolding pages and we can create, modify and list articles just like we would with an application that uses MRI Ruby.

Loading in the entire Rails application under JRuby can take quite a while. In general JRuby is much slower at loading code initially but is quite fast at running it once it has loaded. If we’re struggling with this we could consider making your application compatible with both MRI and JRuby so that we can use MRI in development when we’re frequently reloading the application. We can accomplish this by using the platform command in the gemfile so that certain gems are only loaded under a specific Ruby implementation.
source 'https://rubygems.org'

gem 'rails', '3.2.8'

platform :jruby do
 gem 'activerecord-jdbcsqlite3-adapter'
 gem 'jruby-openssl'
 gem 'therubyrhino'
end

plaform :ruby do
  gem 'sqlite3'
end

# Gems used only for assets and not required
# in production environments by default.
group :assets do
  gem 'sass-rails',   '~> 3.2.3'
  gem 'coffee-rails', '~> 3.2.1'
  gem 'uglifier', '>= 1.0.3'
end

gem 'jquery-rails'
If we switch our application over to MRI Ruby 1.9.3, run bundle to install the gems, then start up the server our Rails application will run under MRI. If you’re doing this it’s a good idea to have a comprehensive test suite so that we can ensure that our app works under both JRuby and MRI.


