#366 Sidekiq
- Download:
- source codeProject Files in Zip (59.6 KB)
- mp4Full Size H.264 Video (30.6 MB)
- m4vSmaller H.264 Video (13.4 MB)
- webmFull Size VP8 Video (14.5 MB)
- ogvFull Size Theora Video (29.4 MB)
There are many solutions available in Rails for moving long-running jobs into a background process. Each of these has its own advantages and Sidekiq is no exception. Sidekiq is similar to Resque, which was covered in episode 271; its primary difference is that it handles multiple jobs concurrently using threads instead of processes and this can save on memory usage.
Our Snippets Application
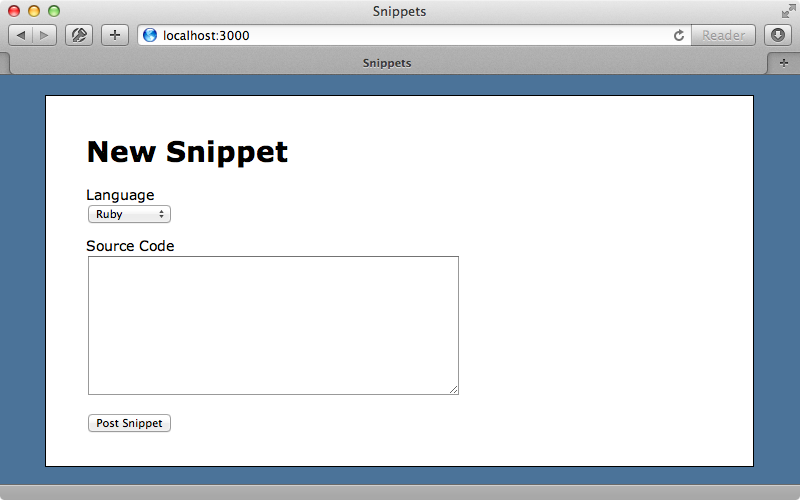
Sidekiq’s interface is similar to other solutions so we’ll cover this quickly then focus on what makes it unique. The example app we’ll be working with is shown below. It is fairly simple and has a form with a dropdown containing a list of languages and a text area where we can paste in a code snippet. When we submit this form the snippet will be displayed with syntax highlighting.

If we look at the SnippetsController’s create action we can see how the highlighting is being done.
def create
  @snippet = Snippet.new(params[:snippet])
  if @snippet.save
    uri = URI.parse("http://pygments.appspot.com/")
    request = Net::HTTP.post_form(uri, lang: @snippet.language, code: @snippet.plain_code)
    @snippet.update_attribute(:highlighted_code, request.body)
    redirect_to @snippet
  else
    render :new
  end
end
After a snippet is saved a request is made to an external web service that uses Pygments to highlight the code. If we make a POST request to this service and include the language and the plain code the response will contain the highlighted code. It’s always a good idea to move calls to external services into a background process so that if the service is down or just slow to respond the user won’t be directly affected. We’ll use Sidekiq to do this here.
Adding Sidekiq To Our Application
Like Resque, Sidekiq uses Redis to manage its job queue so we’ll need to install this first. If you’re running OS X the easiest way to do this to use Homebrew to install it by running this command:
$ brew install redis
Once it has installed we can start the Redis server up with this command:
$ redis-server /usr/local/etc/redis.conf
Next we’ll add the Sidekiq gem to the gemfile and run bundle to install it.
gem 'sidekiq'There are several interfaces that Sidekiq supports. The most common way to use it is to create a separate worker class and we’ll do this, creating a class in a new app/workers directory. Putting it here ensures that it’s auto-loaded by the application.
class PygmentsWorker
  include Sidekiq::Worker

  def perform

  end
end
This class needs to include the Sidekiq::Worker module, which we’ll discuss later, and have a perform method which contains the code that we want to run in the background. We’ll move the syntax-highlighting code from the controller into this method. To do this we call PygmentsWorker.perform_async which will add the job to Redis and then call perform asynchronously. The perform method needs to have access to the current snippet and while we could pass this directly to perform_async as an argument this isn’t the best way to do this as the object will need to be serialized to go into Redis. It’s better to serialize simpler objects like strings or integers than ActiveRecord models so we’ll pass in the snippet’s id instead and fetch the record from the database in our background process.
def create
  @snippet = Snippet.new(params[:snippet])
  if @snippet.save
    PygmentsWorker.perform_async(@snippet.id)
    redirect_to @snippet
  else
    render :new
  end
end
Now in the worker class we can paste in the code we removed from the controller and modify it so that it fetches the snippet by its id.
class PygmentsWorker
  include Sidekiq::Worker

  def perform(snippet_id)
    snippet = Snippet.find(snippet_id)
    uri = URI.parse("http://pygments.appspot.com/")
    request = Net::HTTP.post_form(uri, lang: snippet.language, code: snippet.plain_code)
    snippet.update_attribute(:highlighted_code, request.body)
  end
end
The last step is to start up the background process by running the sidekiq command from our application’s directory. Note that you might need to prefix this with bundle exec for it to work correctly.
$ bundle exec sidekiq
Now Sidekiq will be listening for new jobs and once we’ve restarted our web server so that the new worker class is picked up we can try this out.

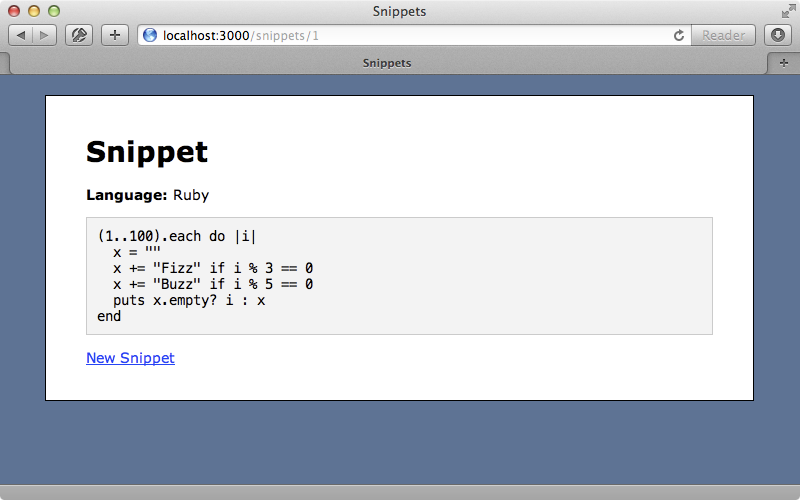
When we post a snippet now the syntax-highlighting isn’t shown as the background process is still running. If we wait a second or two and reload the page we should see the highlighting applied.
Things To Consider
There are some things that we’ll need to keep in mind when we use Sidekiq. If a job fails due to an error Sidekiq will retry that job. This means that if an exception is raised at any point in the perform method we need to be sure that there are no unwanted side-effects to the code being run again. This is especially important when working with emails as we don’t want to send a user the same email more than once. To disable this feature we can use the sidekiq_options method like this:
class PygmentsWorker
  include Sidekiq::Worker
  sidekiq_options retry: false

   # Rest of class omitted.
end
We’ll keep this feature enabled for now as there are no reasons not to retry these jobs if they fail.
Another issue to bear in mind is that all code used by a worker should be thread-safe. Thread-safety was covered in episode 365, but in general we should avoid sharing data that is mutable between instances. In Ruby this often means data at the class level and we should avoid doing this. Not only does our code need to be thread-safe but any libraries that our worker uses need to be thread-safe too.
We should also be aware of the pool size limit in the database config file. This defaults to 5 which means that only five threads can be connected to our database at once. It’s a good idea to increase this limit. By default Sidekiq will run up to 25 jobs at once so setting the pool option to the same value is a good idea, although the optimal value may change depending on your setup.
Sidekiq’s Features
Now that we know how to set up Sidekiq we’ll take a look at some of its features and many of these are documented on the Sidekiq wiki. One thing that Sidekiq makes easy is scheduling a job to run at a future time. Instead of calling perform_async on a worker we can call perform_in and provide a duration. A job will not then start to be processed until that time has elapsed.
PygmentsWorker.perform_in(1.hour, @snippet.id)
Doing this doesn’t make much sense in our application but it can be very useful for, say, clearing caches. Another nice feature is the ability to prioritize queues. Let’s say that our application has multiple workers and we want certain ones to be processed first. To do this we’ll need to assign a worker to a specific queue and we can do this by setting the queue option, like this:
class PygmentsWorker
  include Sidekiq::Worker
  sidekiq_options queue: "high"

   # Rest of class omitted.
end
If we don’t specify the name of a queue the worker will default to a queue called default. When we run the sidekiq command now we can specify the queues that we want to be processed with the -q option and give each one a relative weight.
$ bundle exec sidekiq -q high,5 default,1
Now the high queue will take priority.
When it comes to deployment Sidekiq includes a Capistrano recipe that we can use. If we have custom options that we need to pass in to the sidekiq command such as the -q option we showed above we can put these into a sidekiq.yml file in our config directory. This file could look like this:
# Sample configuration file for Sidekiq.
# Options here can still be overridden by cmd line args.
#   sidekiq -C config.yml
---
:verbose: false
:concurrency:  25
:queues:
  - [often, 7]
  - [default, 5]
  - [seldom, 3]
Monitoring Sidekiq
Next we’ll talk about monitoring the workers. Sidekiq includes a web interface, much like Resque, which is a Sinatra app that we can mount inside our Rails app in the routes file.
require 'sidekiq/web'

Example::Application.routes.draw do
  resources :snippets
  root to: "snippets#new"
  mount Sidekiq::Web, at: "/sidekiq"
end
Note that we need to require sidekiq/web as it isn’t included by default. If we’re going to use the web interface there are a couple of gems that we need to add to the gemfile too. We’ll need to run bundle again and restart our server for these changes to be picked up.
gem 'sinatra', require: false
gem 'slim'
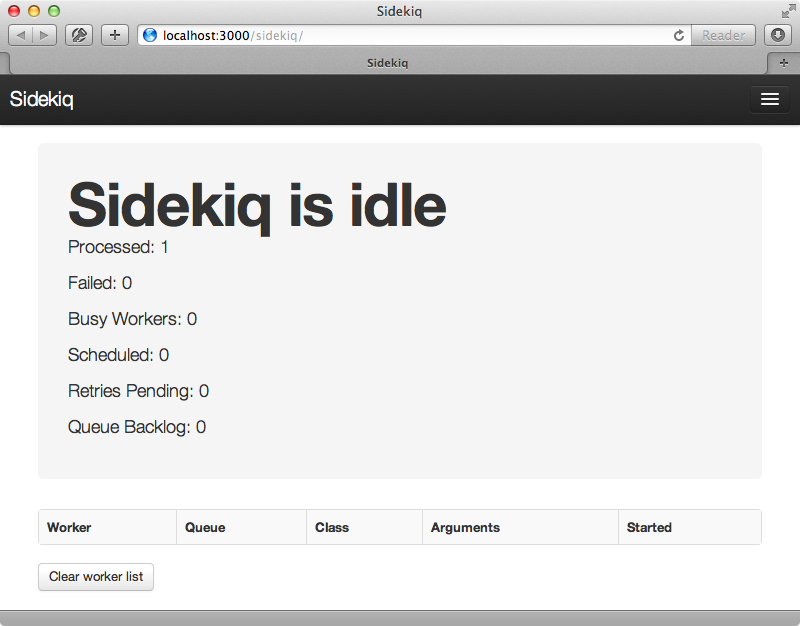
If we visit the /sidekiq path now we’ll see the web interface which tells us how many jobs have been processed, the number of failures, the currently-active workers and what queues we have.

When our app is in production we should password-protect this and the Sidekiq wiki has information on how to do this.
Looking At Sidekiq’s Source
We’ll finish off this episode with a look at some of Sidekiq’s source code as there’s always a lot to be learned from doing this. We’ll start by looking at the Sidekiq::Worker module that we included in our PygmentsWorker class. This module is quite simple and has several class methods including the perform_async and perform_in methods that we’ve already used. These methods add a hash of details to Redis.
def perform_async(*args)
  client_push('class' => self, 'args' => args)
 end

def perform_in(interval, *args)
  int = interval.to_f
  ts = (int < 1_000_000_000 ? Time.now.to_f + int : int)
  client_push('class' => self, 'args' => args, 'at' => ts)
end
alias_method :perform_at, :perform_in

def get_sidekiq_options # :nodoc:
  self.sidekiq_options_hash ||= DEFAULT_OPTIONS
end
This module also includes the sidekiq_options method that we used earlier in our worker and there is documentation for the options that we can pass in.
##
# Allows customization for this type of Worker.
# Legal options:
#
#   :queue - use a named queue for this Worker, default 'default'
#   :retry - enable the RetryJobs middleware for this Worker, default *true*
#   :timeout - timeout the perform method after N seconds, default *nil*
#   :backtrace - whether to save any error backtrace in the retry payload to display in web UI,
#      can be true, false or an integer number of lines to save, default *false*

def sidekiq_options(opts={})
  self.sidekiq_options_hash = get_sidekiq_options.merge(stringify_keys(opts || {}))
end

DEFAULT_OPTIONS = { 'retry' => true, 'queue' => 'default' }

def get_sidekiq_options # :nodoc:
  self.sidekiq_options_hash ||= DEFAULT_OPTIONS
end
Another part of Sidekiq that’s worth looking at is middleware. This shouldn’t be confused with Rack middleware; this is behaviour that happens around the processing of a job. Sidekiq has client-side middleware which runs before a job is inserted into Redis and server-side which runs before the job is processed. This middleware retrying jobs, logging them and handling exceptions. The last of these taps into a variety of exception handlers such as Airbrake, Exceptional or ExceptionNotifier. We can configure these and there’s information about how to set these up in the wiki. This is a nice example of how simple Sidekiq middleware can be and we can write our own if we want to extend Sidekiq’s behaviour.
One more thing worth looking at is Sidekiq’s processor class. This handles the processing of the jobs after they’re pulled from Redis. This class lists the middleware that’s added by default. When a job is processed each piece of middleware is invoked and perform is called on the worker. This class also includes Celluloid and this is the key to Sidekiq’s multi-threaded behaviour. Celluloid is a great project that can really help to deal with concurrency in Ruby. We won’t be covering it in detail here but it’s certainly worth looking into.


