#359 Twitter Integration pro
- Download:
- source codeProject Files in Zip (119 KB)
- mp4Full Size H.264 Video (32.4 MB)
- m4vSmaller H.264 Video (18.2 MB)
- webmFull Size VP8 Video (13.3 MB)
- ogvFull Size Theora Video (44.4 MB)
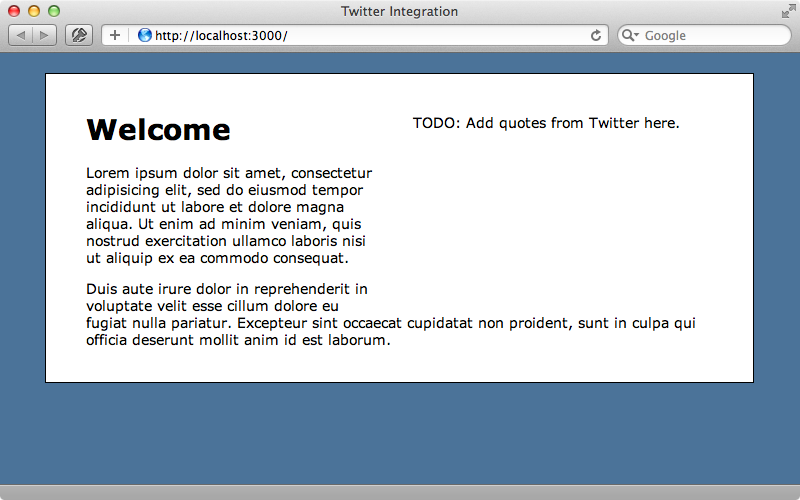
In this week’s episode we’ll show you a few different ways to integrate Twitter into a Rails app. We’ll start with something simple by adding some quotes from Twitter users who are saying good things about our application to the page below.

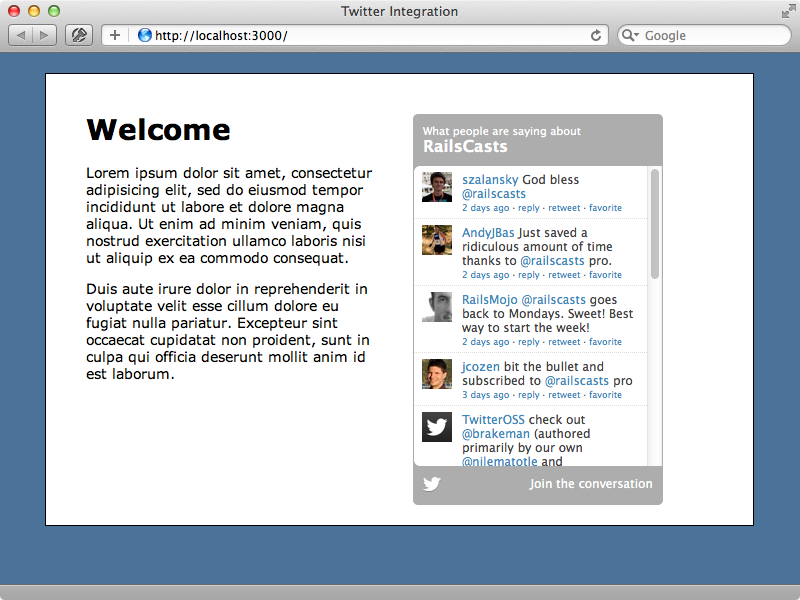
We want an easy way to do this and one way is to use favourites. We can set up a Twitter account for our app and mark those tweets that we want to appear in our app as favourites. Once we’ve done that we need a way to fetch and display these tweets on the page. Twitter provides some widgets that make it easy to do this including a Faves Widget which will display favourites from a given account. We can configure this widget’s appearance and settings then, when we’re happy with them, click the “Finish & Grab Code” button to get an HTML snippet that we can paste into our application. We want to add the widget to the index page so we’ll paste the code from Twitter in here.
<div id="testimonies">
<script charset="utf-8" src="http://widgets.twimg.com/j/2/widget.js"></script>
<script>
new TWTR.Widget({
  version: 2,
  type: 'faves',
  rpp: 10,
  interval: 30000,
  title: 'What people are saying about',
  subject: 'RailsCasts',
  width: 250,
  height: 300,
  theme: {
    shell: {
      background: '#adadad',
      color: '#ffffff'
    },
    tweets: {
      background: '#ffffff',
      color: '#444444',
      links: '#3f89ba'
    }
  },
  features: {
    scrollbar: true,
    loop: false,
    live: true,
    behavior: 'all'
  }
}).render().setUser('railscasts').start();
</script>
</div>
When we reload the page now we’ll see our widget on the page.

Interacting Directly With Twitter
The widget is easy to add but it isn’t that flexible. If we want to have more control over the look of our list of tweets and we don’t want the user to make a separate request to Twitter to fetch the quotes we’ll need to interact with Twitter directly from our Rails application. We’ll focus on how this is done for the rest of this episode.
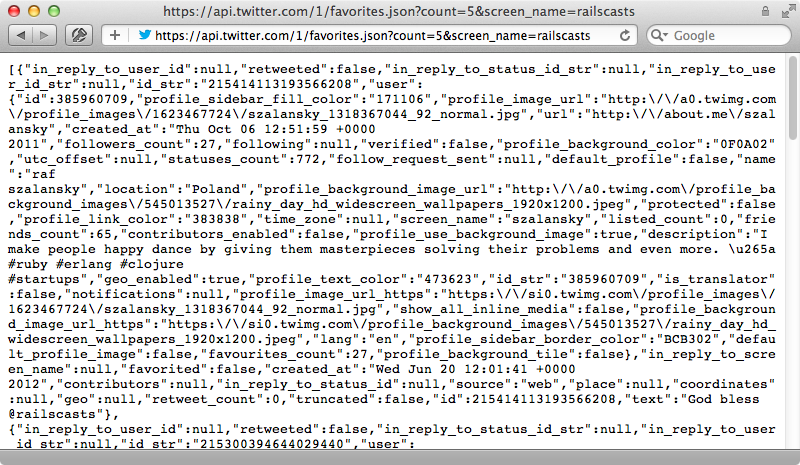
We’ll be communicating with Twitter through its APIs so it helps to have the documentation to hand and to familiarize ourselves with what it can do. There’s a section on favourites we can use to fetch favourites for a given user which lists the options we can pass in along with an example that we can try. This returns a JSON response giving us details about the selected tweets which that user has made favourites.

We could make this request and parse the response on our own but why bother doing all that work when we can use the Twitter gem? This gem makes it easy to communicate with Twitter’s REST API directly from Ruby; to use it we just need to add it to the gemfile and run bundle. To keep this episode up to date we’ll use version 3 of this gem, which is currently at Release Candidate 1, but most of what we do here will work perfectly well in version 2.
gem 'twitter', '3.0.0.rc.1'
A good place to look for documentation about this gem is the RDocs for the Twitter::Client class. This class has a whole list of methods which line up nicely with the APIs. For example there’s a favourites method which we can use to fetch favourites for a given user and that’s what we’re interested in here. As we’ve installed the gem we can try it out in the Rails console. If we just want a certain number of tweets returned we can use the count option. We’ll get the first one and assign it to a variable so that we can look at what it contains.
>> Twitter.favorites("railscasts", count: 1)
# Response omitted.
>> t = _.first
There are methods we can call on this tweet to get its various properties.
>> t.text
=> "God bless @railscasts"
>> t.id
=> 215414113193566208
>> t.created_at
=> 2012-06-20 13:01:41 +0100
We can also get information about the tweet’s user.
>> t.user.name
=> "raf szalansky"
>> t.user.screen_name
=> "szalansky"
>> t.user.profile_image_url
=> "http://a0.twimg.com/profile_images/1623467724/szalansky_1318367044_92_normal.jpg"
We’ll apply this now to our application, replacing the code that displays the widget with some that displays information about the 3 most-recent favourite tweets.
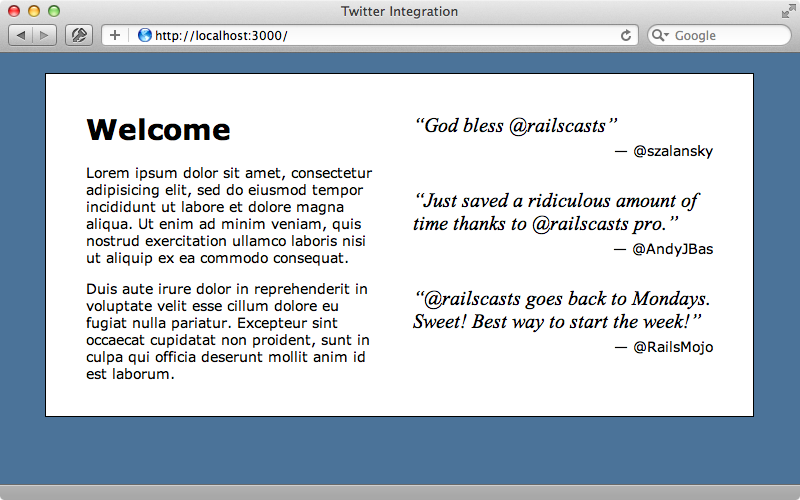
<div id="testimonies"> <% Twitter.favorites("railscasts", count: 3).each do |tweet| %> <blockquote><%= tweet.text %></blockquote> <div class="from">— @<%= tweet.user.screen_name %></div> <% end %> </div>
When we reload our home page now we’ll see the quotes fetched from the API. We’ve already added some styling to this page to make the quotes look prettier.

The problem with this approach is that when we call Twitter.favorites a synchronous request is made to the API. This can slow down the response or even cause the server to not respond at all. We also need to be aware of Twitter’s rate limiting. Twitter has some strict limits on how often we can call their API. For unauthenticated requests such as we’ve been making here we can only make 150 requests an hour. If we authenticate (and we’ll discuss this later) we can make 350 requests an hour. If we want to see how many requests we have left to make we can call Twitter.rate_limit_status to get more information about the limits.
>> Twitter.rate_limit_status
=> #<Twitter::RateLimitStatus:0x007f8b225f6f18 @attrs={"reset_time_in_seconds"=>1340400098, "reset_time"=>"Fri Jun 22 21:21:38 +0000 2012", "remaining_hits"=>130, "hourly_limit"=>150}>
To get around this limit we can add caching so that the API request doesn’t need to happen every time the page is loaded. The easiest way to do this would be to use fragment caching. We’ll pass the current date into the cache’s name so that it automatically expires each day.
<div id="testimonies"> <% cache "testimonies#{Date.today}" do %> <% Twitter.favorites("railscasts", count: 3).each do |tweet| %> <blockquote><%= tweet.text %></blockquote> <div class="from">— @<%= tweet.user.screen_name %></div> <% end %> <% end %> </div>
With this code in place the only time the Twitter API is triggered is when the first request is made each day. This solves a lot of problems but it’s not the perfect solution. If Twitter is down when the first request of the day is made the cache will never be generated and the page will be broken for everyone. Falling back to an older version of the cache can be tricky so instead we’ll cache the data in the database. We’ll generate a new model called Testimony that will store the information we want to display about each tweet.
$ rails g model testimony tweet_id screen_name content:text
$ rake db:migrate
We now need a way to create a new record for each favourited tweet and so this in the Testimony model.
class Testimony < ActiveRecord::Base
  attr_accessible :content, :screen_name, :tweet_id

  def self.pull_tweets
    Twitter.favorites("railscasts").each do |tweet|
      unless exists?(tweet_id: tweet.id)
        create!(
          tweet_id: tweet.id,
          content: tweet.text,
          screen_name: tweet.user.screen_name,
        )
      end
    end
  end
end
In our new pull_tweets method we call Twitter.favorites and loop through each tweet, creating a new record unless one already exists for that given tweet_id. To populate this table we’ll run this method from the terminal but we can do this from wherever we want. We could add it to a Rake task and call it through cron or use the Resque scheduler gem and set it up in a background process.
>> Testimony.pull_tweetsThis creates a new Testimony record for each favourited tweet. If we call the same method again it won’t generate any more records as they already exist, unless some new items have been favourited. The Twitter API call we’re making is still returning Tweets that we’ve already added to the database. To reduce the amount of content returned we can use the since_id option and set it to the latest tweet’s id in the database.
def self.pull_tweets
  Twitter.favorites("railscasts", since_id: maximum(:tweet_id)).each do |tweet|
    unless exists?(tweet_id: tweet.id)
      create!(
        tweet_id: tweet.id,
        content: tweet.text,
        screen_name: tweet.user.screen_name,
      )
    end
  end
end
This will reduce the amount of traffic that’s returned quite substantially. All that’s left to do now is to display these testimonies in the view.
<div id="testimonies"> <% cache "testimonies#{Date.today}" do %> <% Testimony.order("tweet_id desc").limit(3).each do |testimony| %> <blockquote><%= testimony.content %></blockquote> <div class="from">— @<%= testimony.screen_name %></div> <% end %> <% end %> </div>
When we reload the page now it looks just the same. Nothing has changed from the user’s perspective but now that the tweets are served from the database we’re no longer as dependent on Twitter being up. This is also a more flexible approach: we could now add testimonies from other sources or edit a testimony to include just a snippet or anything else we want.
Authenticated Requests
All the requests we’ve made to the Twitter API so far have been unauthenticated. If we want to have access to private content or maybe post tweets we’ll need to let Twitter know about our application first by creating an app at the Twitter developer site. Once we’ve done this we’ll be given a consumer key and a consumer secret for our application and we’ll need these to make authenticated requests to the API. In order to act as the owner of the Twitter account we’ll also need to supply the access token and access token secret. If we want to allow our app to post Tweets as the account owner we’ll need to give the access token read and write permissions and this can be configured on the settings tab for the application.
The Usage Examples section of the Twitter gem’s README shows how to use these authentication tokens can be passed in through a configure block which we can do inside an initializer. We’ll create a new initializer file in our app to do this.
Twitter.configure do |config|
  config.consumer_key = ENV["TWITTER_CONSUMER_KEY"]
  config.consumer_secret = ENV["TWITTER_CONSUMER_SECRET"]
  config.oauth_token = ENV["TWITTER_OAUTH_TOKEN"]
  config.oauth_token_secret = ENV["TWITTER_OAUTH_TOKEN_SECRET"]
end
Here we set the keys based on environment variables that are set elsewhere. This initializer file will become unnecessary in future versions of the Twitter gem as it will automatically look in these environment variables for the authentication.
With this in place all API requests will now be authenticated. This means that we can call methods like favorites without a username and they’ll default to the authenticated user.
>> Twitter.favorites(count: 1)
# Response omitted.
As we have read/write permissions we can even now post Tweets from our app.
>> Twitter.update("This is a Tweet from the Twitter gem.")
# Response omitted.
We now know how to authenticate as the application’s owner but how do we access the API as a user whose signed in to our app through Twitter? We’ve added the ability for other users to sign in to our application with OmniAuth, like we showed in episode 241 and there’s now a “Sign in” link on the home page that when clicked will take the user to the Twitter website so that they can authorize our application. When they do so they’ll be giving our application permission to post tweets.
How does our application access the Twitter API through the user who’s signed in? When we use OmniAuth in a Rails app it provides a hash of details about each user who signs in. We pass this hash to the User model in a from_omniauth class method.
def self.from_omniauth(auth)
  where(auth.slice("provider", "uid")).first || create_from_omniauth(auth)
end
To see what’s in this hash we’ll raise an exception in this model that displays it in YAML format.
def self.from_omniauth(auth)
  raise auth.to_yaml
  where(auth.slice("provider", "uid")).first || create_from_omniauth(auth)
end
Now when we sign in through Twitter we’ll be immediately signed in and we’ll see some interesting information about the user who has signed in, specifically a credentials hash which contains the OAuth token and secret. We can use these to authenticate as this user through the twitter API. We’ll need to store these values in the User model so that we can access them later so we’ll generate a migration to add some new fields to that model.
$ rails g migration add_oauth_to_user oauth_token oauth_secret
$ rake db:migrate
In the User model we now need to set these columns when the user signs in. We could do this when we create the user record but we’ll do it every time they sign in so that if the token is reset we’ll always have the current version. When a user signs in our from_omniauth method returns a User record that we can now set the oauth_token and oauth_secret for. We’ll then save the record and return it.
def self.from_omniauth(auth)
  user = where(auth.slice("provider", "uid")).first || create_from_omniauth(auth)
  user.oauth_token = auth["credentials"]["token"]
  user.oauth_secret = auth["credentials"]["secret"]
  user.save!
  user
end
This method is beginning to get a little long and complex so we could refactor part of it out but we’ll leave it as it is here. With this code in place we can access the Twitter API through this user’s credentials. To do that we’ll create a new twitter method.
def twitter
  if provider == "twitter"
    @twitter ||= Twitter::Client.new(oauth_token: oauth_token, oauth_token_secret: oauth_secret)
  end
end
Here we create a new Twitter::Client instance, passing in the user’s token and secret and cache the result in and instance variable, but only if the current provider is Twitter. If we sign in through Twitter now the token and secret will be stored in the User record. We can now use the Twitter API with this user and we’ll demonstrate this in the console.
>> u = User.first
  User Load (0.2ms)  SELECT "users".* FROM "users" LIMIT 1
>> u.twitter
=> #<Twitter::Client:0x007fd945995ba8 @adapter=:net_http, @connection_options={}, @consumer_key=nil, @consumer_secret=nil, @endpoint="https://api.twitter.com", @gateway=nil, @oauth_token="14246143-h0CTvnpNUYXjEmnf1YcmMHGk7ftx4EW60hYJQZF10", @oauth_token_secret="IXbVzWIk1RdmKUW77zpVAf9fXOiQCktg7XHuU7EP1c", @proxy=nil, @search_endpoint="https://search.twitter.com", @user_agent="Twitter Ruby Gem 3.0.0.rc.1", @media_endpoint="https://upload.twitter.com">
When we fetch a user now we have a twitter method that we can call on them that will return a Twitter::Client object. We can call methods on this object just like we’ve done with the Twitter gem so far. For example we can call favorites to get the user’s favourites or update to post a tweet as that user.
A quick word now about requiring read/write access when users sign in to our app through Twitter. We should be careful not to abuse this. If we are posting tweets under someone’s account we should be sure that they know about this and that they can see any messages before authorizing them as an app can get a bad name if it posts to its users’ accounts without their explicit permission. If an app can work with only read-only permission then it’s best to stick to this as a lot of users will be reluctant to authorize a third party app to write to their account.
Twitter allows us to change our app’s permissions dynamically when a user signs in and we can do this with OnmiAuth. The “Sign in” link points to the /auth/twitter path and we can pass in an x_auth_access_type parameter to this and give it a value of read, write or whatever we want to set the permissions to. This will take us to Twitter where a user can sign in with just read permissions and so our app will only be able to access the user’s account with read permissions. This is handy if we want to have different Twitter permissions for different types of user.


