#357 Adding SSL pro
- Download:
- source codeProject Files in Zip (99.9 KB)
- mp4Full Size H.264 Video (38.9 MB)
- m4vSmaller H.264 Video (17.7 MB)
- webmFull Size VP8 Video (19.4 MB)
- ogvFull Size Theora Video (38.8 MB)
When working with a user’s private information in a web application it’s important that this data is sent over a secure connection. Take for example a login form that has a username and password. The data from this form is sent in plain text unless we use the HTTPS protocol which encrypts the information before it’s sent to the server. This applies to anything that we want kept private, from a user’s credit card number to a session token stored in a cookie. None of this is public information and so it should be sent over a secure connection. In this episode we’ll show you how to set up SSL and HTTPS in a Rails application.
Using HTTPS Connections on Our Local Machine
Before we start configuring a Rails application to require HTTPS we set up our development machine so that we can try it out locally. The default Rails server won’t serve HTTPS requests so we need to run our Rails application on top of something that does and we’ll use a combination of Pow and Nginx. Pow is a great server for running Rails applications in development and what’s useful here is that it gives each app a consistent domain name on our local machine. Best of all it’s easy to install and set up. To install it we just need to run this command:
$ curl get.pow.cx | sh
Pow requires Mac OS X but if you’re running on another platform you can edit your HOSTS file to point a local domain name to your application. Our app is in a todo directory under our home directory so to use it with Pow we just need to move into Pow’s directory and symlink our app’s directory here.
$ cd ~/.pow
$ ln -s ~/todo
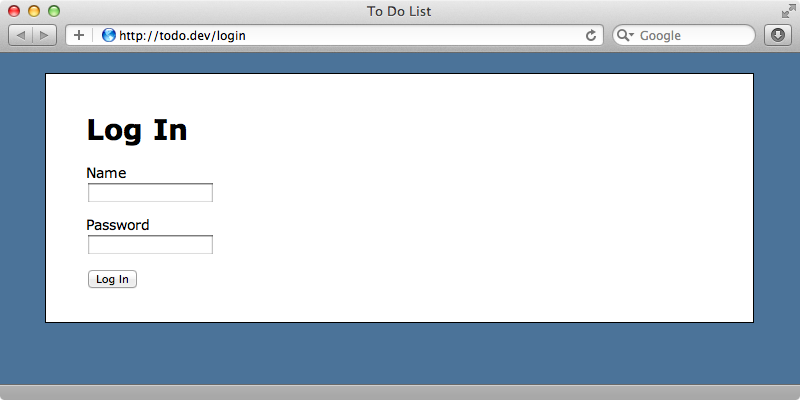
Now, instead of accessing our app at http://localhost:3000/ we can use the app’s name followed by .dev, in this case http://todo.dev/.

HTTPS won’t work yet, however. To get it working we’ll use Nginx. This is a lightweight web server and we’ll use it here to handle the SSL communication. There are a variety of ways to download and install Nginx and you should use the one appropriate to your operating system. If you’re running OS X the best way to install it is through Homebrew which is done by running this command.
$ brew install nginx
When we have Nginx installed we need to configure it to handle SSL. Its configuration directory is on our system at /usr/local/etc/nginx, but this may vary depending on your platform and how you installed Nginx. In it we’ll generate the self-signed certificate needed for SSL. We’ll discuss certificates in more detail later but for now we’ll just run the commands to create a certificate. The first command generates two files: a private key and a certificate signing request. When we run it it will ask several questions about the certificate but we can leave these at their default as their values aren’t important given that we’re just using it on our local machine.
$ openssl req -new -nodes -keyout server.key -out server.csr
This next command generates a certificate file using the two files we created with the command above.
$ openssl x509 -req -days 365 -in server.csr -signkey server.key -out server.crt
We’ll configure Nginx to use this certificate. This installation is configured to run on port 8080 for HTTP but we don’t need this so we can comment out this server section. We do want this to be an HTTPS server, though, so we’ll uncomment that section further down and modify it for our setup.
# HTTPS server

server {
  listen       443;
  server_name  *.dev;

  ssl                  on;
  ssl_certificate      server.crt;
  ssl_certificate_key  server.key;

  ssl_session_timeout  5m;

  ssl_protocols  SSLv2 SSLv3 TLSv1;
  ssl_ciphers  HIGH:!aNULL:!MD5;
  ssl_prefer_server_ciphers   on;

  location / {
      proxy_set_header Host $host;
      proxy_set_header X-Forwarded-For $proxy_add_x_forwarded_for;
      proxy_set_header X-Forwarded-Proto https;
      proxy_redirect off;
      proxy_pass http://127.0.0.1;
  }
}
This section has a server listening on port 443, which is correct for HTTPS connections. The server_name is set to localhost by default but we’ve changed it to match anything running on a local Pow server. We’ve also changed the ssl_certificate and ssl_certificate_key settings to match the certificate files we’ve generated. The only other part of the file that we need to change is the location section. We want to use Nginx as a reverse proxy and we need to set this up here. This is similar to the configuration we used in episode 293 and you’ll find more information on how to set up Nginx as a reverse proxy there. Now that we’ve configured Nginx we can try it out. First we’ll run nginx with the -t option to test the configuration file.
$ sudo nginx -t
nginx: the configuration file /usr/local/etc/nginx/nginx.conf syntax is ok
nginx: configuration file /usr/local/etc/nginx/nginx.conf test is successful
This is successful so we can start Nginx up.
$ sudo nginx
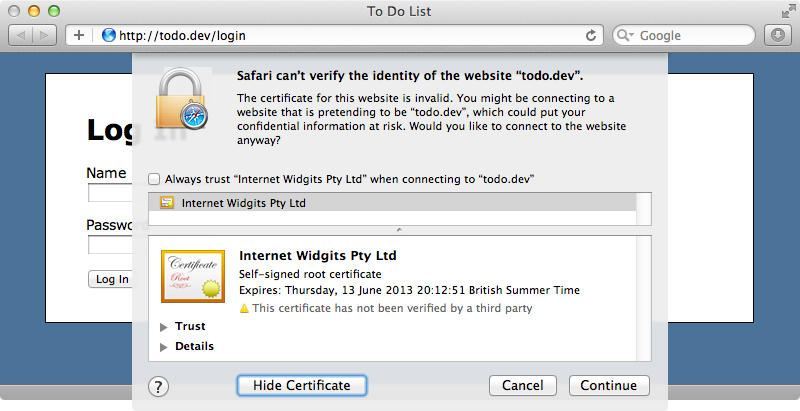
If we try to visit the HTTPS version of our site now our browser will show us a warning telling us that it can’t verify the certificate but this is to be expected as it’s a self-signed site.

When we accept the certificate our site works and we can view our site over HTTPS locally. Whether you follow these steps on your local machine or on some kind of staging server it’s nice to be able to experiment with how the application behaves while running under HTTPS before it goes into production.
Restricting Access To Pages
Our application still works under HTTP but we want to restrict some of its pages, such as the login page, so that they’re only available through HTTPS. We could consider making every page in our application secure. This is done in the production config file and there’s a commented-out option in this file that we can enable to do this.
# Force all access to the app over SSL, use Strict-Transport-Security, and use secure cookies.
config.force_ssl = true
This will make every HTTP request redirect to a secure connection but only in the production environment. We’ll move this into the application config file so that it applies to all the environments that we want to test the SSL connection on. To make this more flexible we’ll move the value of this setting out into an environment variable that we’ll call ENABLE_HTTPS. We can’t really represent boolean values in environment variables so we’ll compare it with the string “yes” to determine whether HTTPS is enabled or not.
module Todo
  class Application < Rails::Application
    config.force_ssl = (ENV["ENABLE_HTTPS"] == "yes")

    # Rest of config omitted
  end
end
The nice thing about this approach is that we can add this variable to Pow’s configuration file. While we doing that we can add some other configuration options, too. We’ll change the POW_TIMEOUT setting as by default it will quit an application after fifteen minutes of inactivity. We’ll increase this to an hour.
export ENABLE_HTTPS="yes"
export POW_TIMEOUT=3600
For these settings to take effect we’ll need to restart the Pow server. The easiest way to do this is to run the following command.
$ launchctl stop cx.pow.powd
This will stop the Pow process but it will start up again immediately. With these changes in effect whenever we make a request to a page in our application through HTTP we should be automatically redirected to the secure version. To get this working in production we just need to set the ENABLE_HTTPS environment variable to “yes”.
The force_ssl option works by adding SSL through Rack middleware. If we enable it and run rake middleware we’ll see Rack::SSL at the top of the middleware stack.
$ ENABLE_HTTPS=yes rake middleware
use Rack::SSL
# Rest of stack omitted.
The source code for Rack::SSL is worth reading through. It’s less than 100 lines of code and is quite interesting. For example one of its options, called default_hsts_options which is enabled by default instructs the client that any requests made to this domain should always use HTTPS. This is set for a given amount of time, by default a year. If we don’t want to lock ourselves in to SSL or make our use of it more dynamic we can configure this option. There’s also an exclude option that we can use to customize when HTTPS is required for a request.
Near the bottom of the Rack::SSL source there’s an interesting method called flag_cookies_as_secure that will mark every cookie set in our application as secure. This means that the client will only send cookies back to the server over a secure connection. This is a great way to prevent session hijacking like we covered in the previous episode. If we want to configure Rack::SSL in our Rails application we can use the config.ssl_options option in the config file. For example if we want to change the hsts expiry value we can do so like this:
module Todo
  class Application < Rails::Application
    config.force_ssl = (ENV["ENABLE_HTTPS"] == "yes")
    config.ssl_options = {hsts: {expires: 3600}}
    # Other config options omitted
  end
end
Making Assets Secure
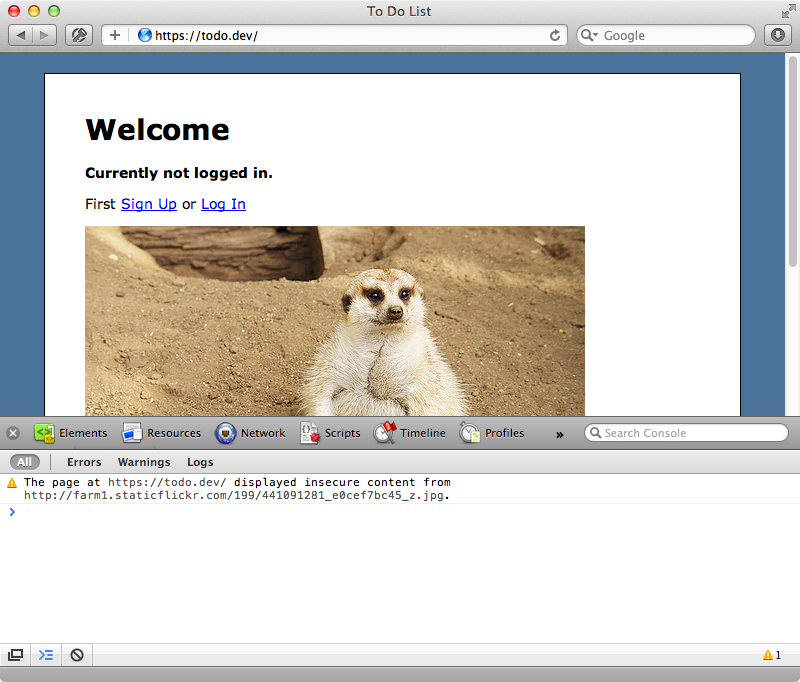
When we’re working with HTTPS it’s important that all the files that a page includes are fetched over a secure connection. This includes style sheets, JavaScript files, images and video. For example on our home page we have an image of an overweight meerkat. This image is fetched over an insecure connection and if we look in the browser’s console we’ll see a warning about this. Most browsers will display a warning when a secure page has insecure content.

To fix this we need to make sure that any requests our application makes happen over HTTPS. This is easy to fix for our image.
<p>
  <%= image_tag "https://farm1.staticflickr.com/199/441091281_e0cef7bc45_z.jpg" %>
  <i>Photo by Damien du Toit</i>
</p>
When we reload the page now we no longer see a warning. It’s usually best to host all the assets on the same server as the app to avoid these problems but with videos or embedded user content this isn’t always possible so we may want to make certain sections of our site work without SSL.
If we want to stick with Rack::SSL we can add an exclude option to config.ssl_options and pass in a proc but this can get messy unless we’re doing something simple like excluding a subdomain from SSL. Instead it’s better to not use Rack::SSL and so we’ll comment these lines out in the configuration file.
module Todo
  class Application < Rails::Application
    # config.force_ssl = (ENV["ENABLE_HTTPS"] == "yes")
    # config.ssl_options = {hsts: {expires: 3600}}
    # Other config options omitted
  end
end
Rails provides a force_ssl method that we can call in our controllers for these occasions. This doesn’t do quite what we want, however. For example it doesn’t persist flash messages on a redirect. This has been improved in the current master branch of Rails, which will become Rails 4. Until then we’ll have to implement this ourselves and we’ll do so in a before_filter in the ApplicationController.
class ApplicationController < ActionController::Base
  protect_from_forgery
  before_filter :https_redirect

private
  def current_user
    @current_user ||= User.find(session[:user_id]) if session[:user_id]
  end
  helper_method :current_user

  def https_redirect
    if ENV["ENABLE_HTTPS"] == "yes"
      if request.ssl? && !use_https? || !request.ssl? && use_https?
        protocol = request.ssl? ? "http" : "https"
        flash.keep
        redirect_to protocol: "#{protocol}://", status: :moved_permanently
      end
    end
  end

  def use_https?
    true # Override in other controllers
  end
end
We define two methods here. One is use_https? which should return true or false and which we can override in other controllers to define whether HTTPS should be used in their actions. We also have the https_redirect method which is called by the before filter. This checks to see if the ENABLE_HTTPS environment variable is set to “yes”. If it is we check to see if the request is secure but shouldn’t be and vice versa. In these cases it will redirect to the correct protocol, keeping the flash message.
Now in another controller, such as our HomeController, we can override use_https? so that its actions don’t use HTTPS.
class HomeController < ApplicationController
  def index
  end

  private
  def use_https?
    false
  end
end
We’ll need to restart our app server for these changes to be picked up and we can do so by touching a restart file.
$ touch tmp/restart.txt
If we visit our homepage under HTTPS now we’ll be redirected to the HTTP version but if we visit one of another controller’s actions, such as the login page which is under then SessionsController, we’ll be redirected back to the HTTPS version.
If we’re going to use this approach we need to be aware of session hijacking attacks as we covered in episode 356 and use secure cookies for private data. One thing that bothers some with this approach is that some links on the site will lead to a redirect. For example on the home page the link to log goes from an insecure page to a secure page. To avoid this we can explicitly define links like this to use to correct protocol for the page being liked to, like this:
<%= link_to "Log In", login_url(protocol: "https") %>We can apply this to every link that goes across the security border. There are solutions that automate this but it can be easier to do this manually. If we miss a link it’s not a big problem as there’s no security risk, just an added redirect. We do need to watch out for forms that submit across the border. A redirect won’t work here so we need to explicitly specify the protocol.
Certificates in Production
Once we have our Rails application working the way we want and we’re ready to deploy it it’s time to buy an SSL certificate signed by an authorized provider. Some providers can be rather expensive and this might scare you off but certificates can be found cheaply. A good place to look is your domain name provider as they often have partnership deals that let us buy certificates for good prices. For example DNSimple for as little as $20 a year. If this is still too much there are some free options available such as one at StartSSL. If you’re looking for something that’s a step above a self-signed certificate that won’t cause a warning in a browser this is worth taking a look at.
Once we sign up for a certificate we’ll be provided with a number of files. Among these is a private key, a certificate and possibly an intermediate certificate, too. Once we have these files we can configure our server to use them. If we’re using Apache our configuration would look something like this:
# Enable mod_ssl: sudo a2enmod ssl
<VirtualHost *:443>
  ServerName example.com
  DocumentRoot /path/to/current/public
  SSLEngine on
  SSLCertificateFile /path/to/example.com.crt
  SSLCertificateKeyFile /path/to/example.com-private.key
  SSLCertificateChainFile /path/to/example.com-intermediate.crt
</VirtualHost>
Note that we need to enable mod_ssl which we can do by running this command:
$ sudo a2enmod ssl
For Nginx the configuration is similar to what we showed earlier in this episode. We create a server that listens on port 443 on our site’s domain then pass in the certificate and key files.
server {
  listen       443
  server_name  example.com;

  ssl                  on;
  ssl_certificate      /path/to/example.com.crt;
  ssl_certificate_key  /path/to/example.com-private.key;

  ssl_session_timeout  5m;

  ssl_protocols  SSLv2 SSLv3 TLSv1;
  ssl_ciphers HIGH:!aNULL:!MD5;
  ssl_prefer_server_ciphers  on;

  location / {
    # ...
  }
}
Note that there’s no option for an intermediate certificate here though if have one. In this case we need to make a certificate chain file which we can do by concatenating the files together.
$ cat example.com.crt example.com-intermediate.crt > example.com-chain.crt
We can now use this chain file as the ssl_certificate in the config file.
ssl_certificate /path/to/example.com-chain.crt;
Finally we should lock these files down so that they’re only readable by the root user.
$ chmod 400 *.key *.crt
$ sudo chown root *.key *.crt


