#353 OAuth with Doorkeeper pro
- Download:
- source codeProject Files in Zip (153 KB)
- mp4Full Size H.264 Video (45 MB)
- m4vSmaller H.264 Video (22 MB)
- webmFull Size VP8 Video (26.9 MB)
- ogvFull Size Theora Video (46.9 MB)
Below is a screenshot from a Todo List application with some authentication. A user can sign up or log in and when they do they can view their list and add items to it.
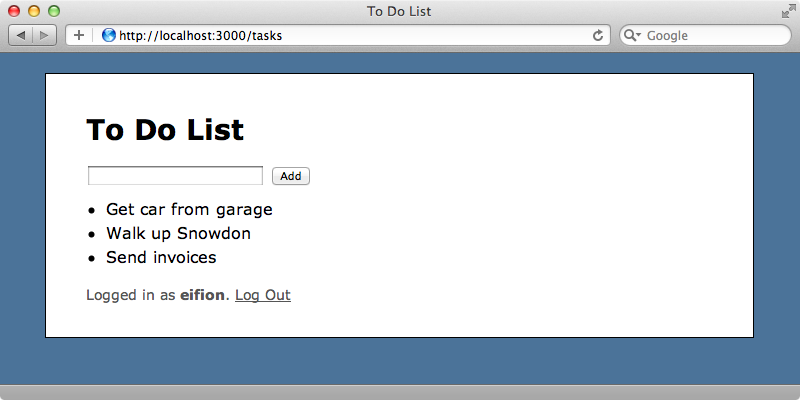
Each list is unique to the user that owns it so if we log in as another user we’ll see a different list of items. We’d like to provide an API for this application and we already have one set up as we showed in episode 350 at the path /api/tasks. Visiting this path returns some JSON that contains all the tasks in the database but this isn’t what we want as the lists are meant to be private. What we need to do is add a layer of authentication to our API so that it can only manage tasks for the user who has granted permission to it.
There are many ways that we can lock down an API and we showed some of these in episode 352. The solution that will work best with this application is OAuth, specifically OAuth 2. Even though OAuth 2 is still in draft form it’s used by many large applications such as Facebook and Github. To integrate it into our application we’ll use a gem called Doorkeeper. This is a Rails engine which makes it easy to turn our app into an OAuth 2 provider. It currently relies on ActiveRecord so you’ll need to be aware of that if you’re planning to use it.
The contributors to Doorkeeper have done an excellent job in providing several example applications and it’s worth spending some time trying these to experiment with how it works.
Adding Doorkeeper To Our Application
We’ll use Doorkeeper now to turn our application into an OAuth 2 provider. First we’ll make a quick configuration change as there can be some conflicts between Doorkeeper and the active_record.whitelist_attributes option. We’ll set this to false here; presumably these problems will be resolved in a future version.
config.active_record.whitelist_attributes = falseWith that change in place we can add the Doorkeeper gem to our gemfile. As ever we’ll need to run bundle afterwards to install it.
gem 'doorkeeper'Next we’ll need to run the Doorkeeper generator.
$ rails g doorkeeper:install
This creates several files, which we’ll look at shortly, and adds a line to our routes file to mount the engine. It also provides some instructions for adjusting the configuration and tells us to migrate the database. We’ll do this first.
$ rake db:migrate
==  CreateDoorkeeperTables: migrating =========================================
-- create_table(:oauth_applications)
   -> 0.0115s
-- add_index(:oauth_applications, :uid, {:unique=>true})
   -> 0.0009s
-- create_table(:oauth_access_grants)
   -> 0.0013s
-- add_index(:oauth_access_grants, :token, {:unique=>true})
   -> 0.0005s
-- create_table(:oauth_access_tokens)
   -> 0.0011s
-- add_index(:oauth_access_tokens, :token, {:unique=>true})
   -> 0.0004s
-- add_index(:oauth_access_tokens, :resource_owner_id)
   -> 0.0006s
-- add_index(:oauth_access_tokens, :refresh_token, {:unique=>true})
   -> 0.0007s
Running this migration has created a number of tables for managing the apps that can connect to our API and for defining how they can access it. Next we’ll take a look at the generated main configuration file that. This file is well commented and it’s worth reading through these comments to see the available configuration options. The only part we’re interested in now is the block that the resource_owner_authenticator method takes. By default this will raise a exception but it needs to return either the current user or redirect to a login page. There’s a commented-out line in this block that we can modify to suit our needs.
Doorkeeper.configure do
  # This block will be called to check whether the
  # resource owner is authenticated or not
  resource_owner_authenticator do |routes|
    #raise "Please configure doorkeeper resource_owner_authenticator block located in #{__FILE__}"
    # Put your resource owner authentication logic here.
    # If you want to use named routes from your app you need
    # to call them on routes object eg.
    # routes.new_user_session_path
    User.find_by_id(session[:user_id]) || redirect_to(routes.login_url)
  end
  # Rest of comments omitted
end
For our application we look for a user by their id which is stored in a session variable and if we don’t find one we’ll redirect to the login_url. Obviously you can alter both of these to suit your own application. After restarting our application we can test some of the functionality that Doorkeeper provides. If we make sure we’re logged out then visit the /oauth/authorize path provided by Doorkeeper we’ll be redirected to our login page. This is because visiting that path triggers the resource_owner_authenticator block and as there’s no current user it will trigger the redirect instead.
If we login and visit that URL again this time we’ll see an error message.
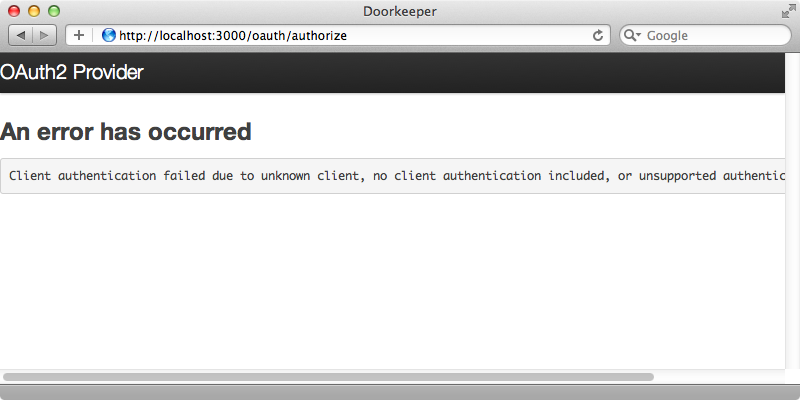
This happens because Doorkeeper doesn’t know what application the user is trying to authorize. We need to set up an application and we do that by visiting /oauth/applications/. Doorkeeper provides a scaffold-type interface here for creating an application and we’ll create one so that we can try things out. We need to give it a name and a URL that the user will be redirected to after authorizing. We don’t have an application set up yet but when we do it’ll be at http://localhost:3001 and the path we want to be redirected to is /auth/todo/callback.

When we create our application we’ll be shown two long hexadecimal strings, an application id and a secret. We can use these to test OAuth but it helps to have an OAuth client to interact with our provider. The OAuth2 gem can help us here as it allows us to interact with the OAuth2 protocol using Ruby. It’s README has some nice instructions for acting as an OAuth 2 client and this will work well for testing Doorkeeper so we’ll add it to our application in the usual way by adding it to the gemfile and running bundle.
gem 'oauth2'We can now open irb and use this gem there.
$ irb -r oauth2
The client will need to know the callback URL, the application id and the secret that were generated earlier so we’ll create variables to hold these.
1.9.3p125 :001 > callback = "http://localhost:3001/auth/todo/callback"
1.9.3p125 :002 > app_id = "2a514a754809f926b2c0fe4bb2f5f29adfa2684331b433f468f8fa4b8dbb20d5"
1.9.3p125 :003 > secret = "ac516ef825cfc0f57f0b679dc8c2a0cf6eb79163d9b74708a205a4504b4b2a48"
We can use the gem now to set up the client, passing in our app id and secret and the URL of the site we’re trying to connect to.
1.9.3p125 :004 > client = OAuth2::Client.new(app_id, secret, site: "http://localhost:3000/")
We can determine the URL to redirect the user to like this:
1.9.3p125 :005 > client.auth_code.authorize_url(redirect_uri: callback)
 => "http://localhost:3000/oauth/authorize?response_type=code&client_id=2a514a754809f926b2c0fe4bb2f5f29adfa2684331b433f468f8fa4b8dbb20d5&redirect_uri=http%3A%2F%2Flocalhost%3A3001%2Fauth%2Ftodo%2Fcallback"
Now we have a URL for authorizing this client which is at the same path we visited earlier. This time, though, we have a client_id parameter and a URL to redirect back to. This is the URL we’d send the user to to authorize the client and if we visit in in a browser we’ll see this:
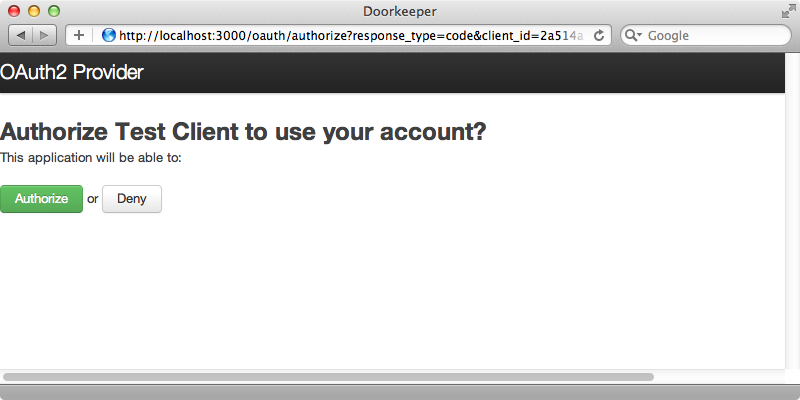
When we click “Authorize” we’ll see an error message as Safari can’t connect to the callback URL. This is to be expected as we don’t yet have our client app running on port 3001. The callback URL includes a code parameter and our application should take this and generate an OAuth access token from it. We can generate this token from that code back in the console by calling get_token and passing it in along with the callback URL.
1.9.3p125 :006 > access = client.auth_code.get_token('4125be61e6780812595dc275a8bf365aa5738fcf0e6d4429019ad1f68ee37363', redirect_uri: callback)
This will return an AccessToken object and we can call token on this to see our access token.
1.9.3p125 :007 > access.token
=> "1cb2d5226e3ffba32372ff7923504e9c6e9192be48fb6252fc44519d0f7e78a8"
By default this token will be valid for two hours before it expires.
Restricting What’s Returned by The API
With all this in place our client is now able to interact with our application’s API on the user’s behalf. Now that we’ve authorized our application we can visit http://localhost:3000/api/tasks and see the JSON representation ocode the tasks. This page is still public, however, and still shows all tasks for all users so we need to restrict access to this page to those users who have signed in through OAuth. We can do this by calling doorkeeper_for in the controller and we’ll pass it :all to restrict all the actions.
module Api
  module V1
    class TasksController < ApplicationController
      doorkeeper_for :all
      respond_to :json

      def index
        respond_with Task.all
      end

      def create
        respond_with Task.create(params[:task])
      end
    end
  end
end
If we try reloading the page in the browser now we’ll get an empty response. If we look at the response headers we’ll see that we’re getting a 401 Unauthorized response which is what we expect as we haven’t gone through OAuth in the browser. To get this to work we can append an access_token parameter to the URL and pass in the access token that we generated in the console. When we do we’ll have access to our API again.
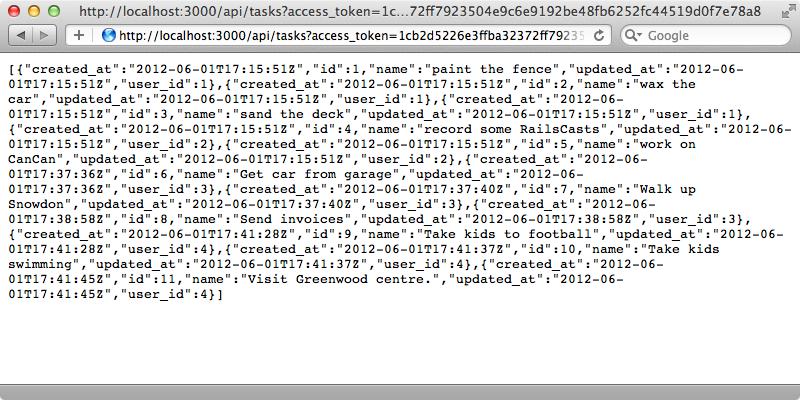
We’re still seeing all the tasks, however, and we only want to show those for the user who has authorized the access so the index action in our API’s TasksController needs to return only their tasks. Doorkeeper provides a doorkeeper_token method which is an ActiveRecord model instance and which has some information about the token that the user is accessing the page through. This has a resource_owner_id method which returns the id of the object that’s returned by resource_owner_authenticator in the configuration file. This is the user’s id and so we can use it to fetch the current user and return only their tasks.
module Api
  module V1
    class TasksController < ApplicationController
      doorkeeper_for :all
      respond_to :json

      def index
        user = User.find(doorkeeper_token.resource_owner_id)
        respond_with user.tasks
      end

      def create
        respond_with Task.create(params[:task])
      end
    end
  end
end
Reloading the page now will show only the current user’s tasks.
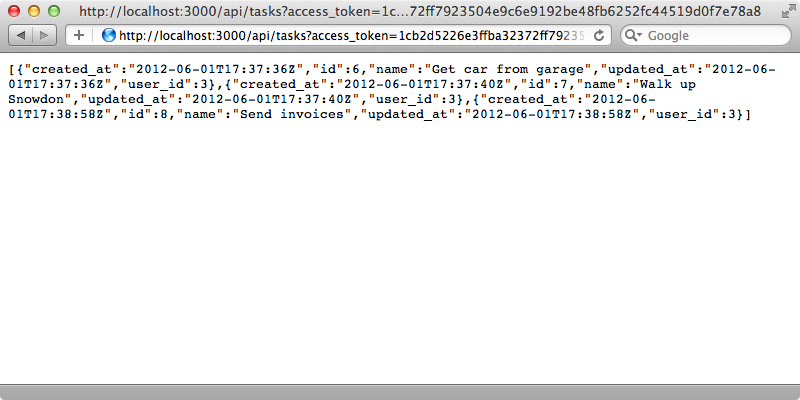
We’ll be making similar changes throughout various API controller actions so we want to be able to share this behaviour. One way to do this is to override the current_user method at the api controller level so that it fetches the current user from Doorkeeper. We can then use this overridden method in the index and create actions.
def index
  respond_with current_user.tasks
end

def create
  respond_with current_user.tasks.create(params[:task])
end

private
def current_user
  @current_user ||= User.find(doorkeeper_token.resource_owner_id)
end
All the other controllers will still fetch the current user from a cookie or session variable or whatever other method our application uses to do this.
Accessing The API Through Ruby Code
When we reload the page now it still works but in general we won’t be interacting with the API through a browser but through Ruby code instead. The OAuth2 gem can help us here too. We can call get, post, put and delete methods on the access object and fetch tasks this way. Calling get and passing a path will return a response object; calling parsed on this will parse the JSON and return an array.
1.9.3p125 :008 > access.get('/api/tasks').parsed
 => [{"created_at"=>"2012-06-01T17:37:36Z", "id"=>6, "name"=>"Get car from garage", "updated_at"=>"2012-06-01T17:37:36Z", "user_id"=>3}, {"created_at"=>"2012-06-01T17:37:40Z", "id"=>7, "name"=>"Walk up Snowdon", "updated_at"=>"2012-06-01T17:37:40Z", "user_id"=>3}, {"created_at"=>"2012-06-01T17:38:58Z", "id"=>8, "name"=>"Send invoices", "updated_at"=>"2012-06-01T17:38:58Z", "user_id"=>3}]
We can create a task by calling the post method like this:
1.9.3p125 :009 > access.post("/api/tasks", params:{task: {name: "test oauth"}})
This gem is great and might be all we need to create a client for authenticating over OAuth and communicating with our API. If we’re setting up a Rails application as an OAuth 2 client we should consider using OmniAuth which was covered in episode 241. If we look at the Doorkeeper wiki we’ll find documentation on creating an OmniAuth Strategy. We can copy the sample class from the wiki page and fill in the values relevant to our provider, changing the name, the URL and so on.
module OmniAuth
  module Strategies
    class Doorkeeper < OmniAuth::Strategies::OAuth2
      # change the class name and the :name option to match your application name
      option :name, :doorkeeper

      option :client_options, {
        :site => "http://my_awesome_application.com",
        :authorize_path => "/oauth/authorize"
      }

      uid { raw_info["id"] }

      info do
        {
          :email => raw_info["email"]
          # and anything else you want to return to your API consumers
        }
      end

      def raw_info
        @raw_info ||= access_token.get('/api/v1/me.json').parsed
      end
    end
  end
end
OmniAuth expects there to be some way to fetch additional information about the user through the API through its raw_info method. By default it calls access_token.get to do this which means that it uses the OAuth2 gem in the same way that we used it in the terminal. Our application doesn’t currently provide any user information through the API so we’ll need to add this before we can set up OmniAuth as a client. This is quite easy to do so we’ll run through it quickly. First we’ll add a new route that points to the UsersController’s show action.
namespace :api, defaults: {format: 'json'} do
  scope module: :v1 do
    resources :tasks
    match 'user', to: 'users#show'
  end
end
We’ll need to create the UsersController next. This will use Doorkeeper and have a show action that returns the current user’s information with the exception of their password digest. We need to use the current_user method here but this is defined in the TasksController. We’ll create a new BaseController class and move this method here. We can then have our other two API controllers inherit from this class.
module Api
  module V1
    class BaseController < ApplicationController
    private
      def current_user
        if doorkeeper_token
          @current_user ||= User.find(doorkeeper_token.resource_owner_id)
        end
      end
    end
  end
end
Now we can write our UsersController and have inherit from this class.
module Api
  module V1
    class UsersController < BaseController
      doorkeeper_for :all
      respond_to :json

      def show
        respond_with current_user.as_json(except: :password_digest)
      end
    end
  end
end
We can modify our TasksController now to inherit from BaseController and remove its own current_user method.
module Api
  module V1
    class TasksController < BaseController
      doorkeeper_for :all
      respond_to :json

      def index
        respond_with current_user.tasks
      end

      def create
        respond_with current_user.tasks.create(params[:task])
      end
    end
  end
end
We now have a UsersController that will return information about the current user and we can try it out through the OAuth2 gem in the console.
1.9.3-p125 :010 > access.get("/api/user").parsed
 => {"created_at"=>"2012-06-01T17:37:28Z", "id"=>3, "name"=>"eifion", "updated_at"=>"2012-06-01T17:37:28Z"}
This is exactly what we need to do in our OmniAuth strategy.
We’ve already created a client-side app that uses OmniAuth similar to the one we created in episode 241.
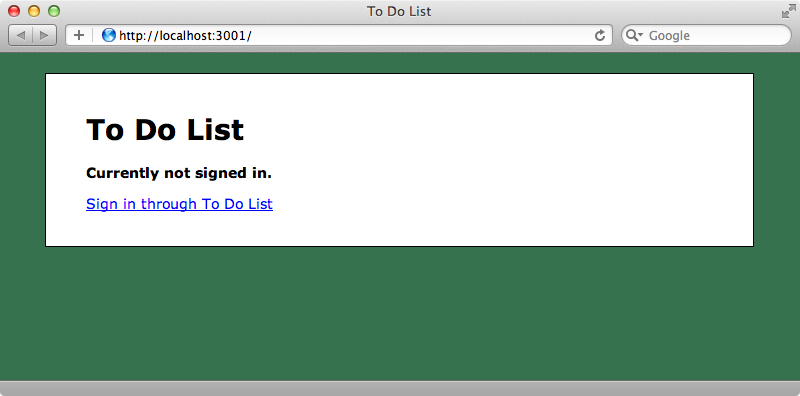
This runs on port 3001, but we could set it up with Pow to make it easier to have multiple Rails applications interacting on our local machine. This application has a link for signing in through our Todo list provider app. When we click it we’ll be signed in instantly as we’ve already authorized this application when we signed in through the command line. This client application has the same functionality as the provider app but uses the API to list and update tasks. We’ll take a look through this app’s source code to understand how it works.
The app’s gemfile includes the omniauth-oauth2 gem which it uses for defining the strategy. The strategy itself is defined in a todo.rb file.
module OmniAuth
  module Strategies
    class Todo < OmniAuth::Strategies::OAuth2
      option :name, :todo

      option :client_options, {
        site: "http://localhost:3000",
        authorize_path: "/oauth/authorize"
      }

      uid do
        raw_info["id"]
      end

      info do
        {name: raw_info["name"]}
      end

      def raw_info
        @raw_info ||= access_token.get('/api/user').parsed
      end
    end
  end
end
Here we specify the provider’s URL and the user’s name and information which we get from the API path that we set up earlier. The provider is set up under the /config/initializers directory.
require File.expand_path('lib/omniauth/strategies/todo', Rails.root)

Rails.application.config.middleware.use OmniAuth::Builder do
  provider :todo, ENV["OAUTH_ID"], ENV["OAUTH_SECRET"]
end
Here we load in the strategy file and specify it as a provider and we pass in the application’s id and secret from environment variables. When the user signs in the SessionsController’s create action is triggered.
def create
  auth = request.env["omniauth.auth"]
  user = User.find_by_provider_and_uid(auth["provider"], auth["uid"]) || User.create_with_omniauth(auth)
  session[:user_id] = user.id
  session[:access_token] = auth["credentials"]["token"]
  redirect_to root_url
end
Here we create a user or find an existing one that matches the OmniAuth id and store the user id and access token in the session so that we can access the API. We could store this access token somewhere else, such as in the users table in the database, but for this application storing it in the session will work perfectly.
We call the API in the TasksController. In the index action we fetch the tasks through the access token that the OAuth2 gem provides (we’ll show you how we get the token shortly). The create action does something similar but uses post to create a new task.
class TasksController < ApplicationController
  def index
    @tasks = access_token.get("/api/tasks").parsed if access_token
  end

  def create
    access_token.post("/api/tasks", params: {task: {name: params[:name]}})
    redirect_to root_url
  end
end
The ApplicationController is where most of the work is done.
class ApplicationController < ActionController::Base
  protect_from_forgery

  rescue_from OAuth2::Error do |exception|
    if exception.response.status == 401
      session[:user_id] = nil
      session[:access_token] = nil
      redirect_to root_url, alert: "Access token expired, try signing in again."
    end
  end

private

  def oauth_client
    @oauth_client ||= OAuth2::Client.new(ENV["OAUTH_ID"], ENV["OAUTH_SECRET"], site: "http://localhost:3000")
  end

  def access_token
    if session[:access_token]
      @access_token ||= OAuth2::AccessToken.new(oauth_client, session[:access_token])
    end
  end

  def current_user
    @current_user ||= User.find(session[:user_id]) if session[:user_id]
  end
  helper_method :current_user
end
This is where the access_token method that we use in the TasksController is defined. It creates a new OAuth2::AccessToken object based on the OAuth client. The client is created here in an oauth_client method in a way similar to what we did in the irb console earlier. At the top of this file we have a rescue_from to rescue from any OAuth2::Error in case we get an Unauthorized response which will happen if the token has expired. When this happens we’ll clear the user’s session and redirect them so that they can sign in again.
There are probably some gems that would help to improve this client app but here we’re focussing more on the provider and the OAuth interaction.
There are a few more things left to do on the provider app to improve the experience. For example if we sign out of both of the applications then try signing in again we’ll see the login screen from the provider app which is what we expect. When we sign in, however, we’re redirected to our todo list on the provider app rather than on the client app. Fixing this is pretty easy, thankfully. We just need to modify our Doorkeeper configuration file in the provider app and modify the line that redirects the user to the login URL if they aren’t signed in. We can pass in additional options here and we’ll use return_to to make sure that the user is redirected correctly when they sign in.
Doorkeeper.configure do
  # This block will be called to check whether the
  # resource owner is authenticated or not
  resource_owner_authenticator do |routes|
    #raise "Please configure doorkeeper resource_owner_authenticator block located in #{__FILE__}"
    # Put your resource owner authentication logic here.
    # If you want to use named routes from your app you need
    # to call them on routes object eg.
    # routes.new_user_session_path
    User.find_by_id(session[:user_id]) || redirect_to(routes.login_url(return_to: request.fullpath))
  end
  # Rest of comments omitted
end
We also need to modify the SessionsController to handle this.
class SessionsController < ApplicationController
  def new
    session[:return_to] = params[:return_to] if params[:return_to]
  end

  def create
    user = User.find_by_name(params[:name])
    if user && user.authenticate(params[:password])
      session[:user_id] = user.id
      if session[:return_to]
        redirect_to session[:return_to]
        session[:return_to] = nil
      else
        redirect_to root_url
      end
    else
      flash.now.alert = "Email or password is invalid"
      render "new"
    end
  end

  def destroy
    session[:user_id] = nil
    redirect_to login_url
  end
end
This now stores the return_to URL in a session variable in the new action while in create it checks that session variable and if it redirects to that URL when the user logs in, after deleting the session variable. Now when we try signing in through the client app the URL to return to is included in the URL parameters and we’ll be redirected correctly when we sign in.
Another thing we should do in the client app is restrict access to the /oauth/applications path. We don’t want this publicly available as then anyone will be able to add an application. There’s an admin_authenticator block in the configuration file for doing this. We can use this to define the users who can access this page. To keep it simple we’ll let only the user with an id of 1 have access.
# If you want to restrict the access to the web interface for
# adding oauth authorized applications you need to declare the
# block below
admin_authenticator do |routes|
  # Put your admin authentication logic here.
  # If you want to use named routes from your app you need
  # to call them on routes object eg.
  # routes.new_admin_session_path
  session[:user_id] == 1 || redirect_to(routes.login_url(return_to: request.fullpath))
end
Now if we’re not logged in as the first user and we visit /oauth/applications we’ll be redirected back to the login page.
There’s much more that Doorkeeper provides that we haven’t covered in this episode such as authorization scopes. These provide a way to restrict what an OAuth client is able to do. The wiki has more information on how to use these.
We’ll finish with a quick note about security. We’ve been using plain HTTP here but it’s important to use a secure HTTPS connection when working with OAuth and when communicating with our API.


