#351 A Look at Meteor pro
- Download:
- source codeProject Files in Zip (3.36 KB)
- mp4Full Size H.264 Video (41.5 MB)
- m4vSmaller H.264 Video (18.4 MB)
- webmFull Size VP8 Video (20.5 MB)
- ogvFull Size Theora Video (43 MB)
This week’s episode we’ll be a little unusual as the topic doesn’t relate directly to Rails. We’ll be taking a look at Meteor, a JavaScript framework for building rich client-side applications. Why are we covering this? Well, as Rails developers it’s important that we stay up to date with innovative new technologies and there’s a lot that Rails can learn from Meteor.
Getting Started
To demonstrate Meteor we’ll build a Raffling application. This lets us add entrants and draw random winners. It’s the same application we built in previous episodes with Backbone.js and Rails and will serve as a nice comparison with that.
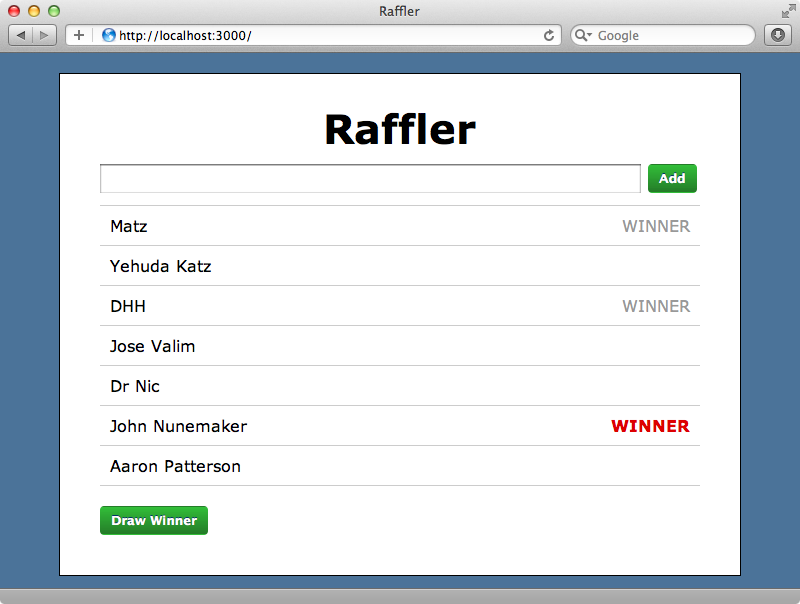
First we’ll need to install Meteor, which we do by running this curl command.
$ curl install.meteor.com | sh
Once this has downloaded and installed we’ll have a meteor command which we can use to create a new application.
$ meteor create raffler
We can view this application by moving into its directory and running meteor without any arguments.
$ cd raffler
$ meteor
We can browse the generated application at http://localhost:3000/ where we’ll see a simple “Hello World” application with a button. When we click the button a message is logged in the console.
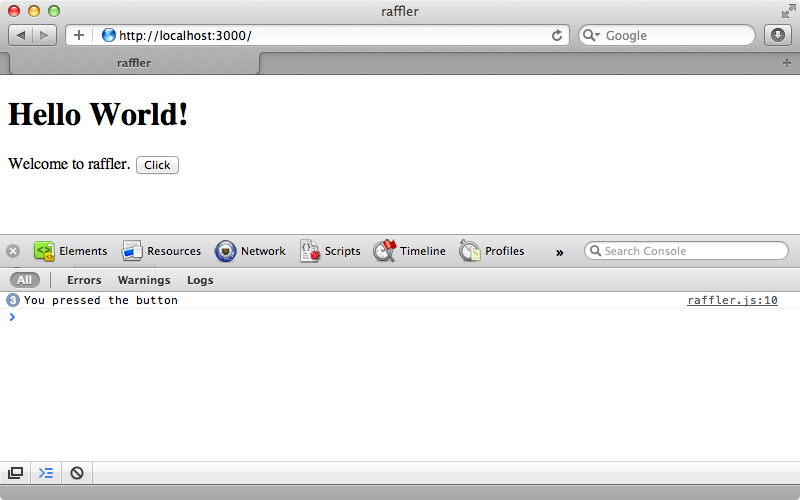
Let’s take a look at the source code that was generated for this app. A Meteor application can be made up of just three files: an HTML file, a JavaScript file and a CSS file. By default the CSS file is empty; the HTML file is more interesting.
<head>
  <title>raffler</title>
</head>

<body>
  {{> hello}}
</body>

<template name="hello">
  <h1>Hello World!</h1>
  {{greeting}}
  <input type="button" value="Click" />
</template>
This is made up of three sections. There’s a head section, a body section and there can be any number of template sections. Note that this isn’t a complete HTML document: there’s no surrounding HTML tag and there are no tags that include the JavaScript and CSS files as Meteor will add these automatically for us. Note also that this file uses the Handlebars template language to dynamically insert content. For example the code in the body section includes a template called hello. The call to {{greeting}} will search for a greeting attribute defined in the JavaScript file and include it in the output.
Let’s look at the JavaScript file next. What’s interesting here is that this same JavaScript file will be executed on both the server and the client, though if we want code to execute on only one or the other we can use Meteor.is_client or Meteor.is_server and this can be seen used in the generated code.
if (Meteor.is_client) {
  Template.hello.greeting = function () {
    return "Welcome to raffler.";
  };

  Template.hello.events = {
    'click input' : function () {
      // template data, if any, is available in 'this'
      if (typeof console !== 'undefined')
        console.log("You pressed the button");
    }
  };
}

if (Meteor.is_server) {
  Meteor.startup(function () {
    // code to run on server at startup
  });
}
The code that only runs on the client here defines the greeting attribute that is rendered in the template. Below that we define an event that fires when any input element is clicked (we can use any CSS selector after the space here). When any matching element is clicked the function will be clicked and this will display the console message.
Creating Our Raffler Application
We’ll replace the generated code now with that for our Raffler application. If we prefer CoffeeScript over JavaScript we can use it. Running meteor list in the terminal will show us the packages that Meteors provides and these include a coffeescript one. We can add it by running this command.
$ meteor add coffeescript
We’ll need to rename our raffer.js file to raffler.coffee to use it with CoffeeScript. Before we write any code, though, we’ll add some CSS to raffler.css. There’s too much code to list here, but you can find the stylesheet on Github. Next we’ll make some changes to the HTML file.
<head>
  <title>Raffler</title>
</head>

<body>
  <div id="container">{{> raffle}}</div>
</body>

<template name="raffle">
  <h1>Raffler</h1>

  <ul id="entries">
    {{#each entries}}
    <li>{{name}}</li>
    {{/each}}
  </ul>
</template>
We’ve changed the page’s title along with the name of the template and the headline. Below the headline we want a list of the current entries so we’ve added an unordered list with an id of entries. Inside this list we loop through each entry and display its name. We’ve also wrapper the template in a div with an id of container so the correct styles are applied.
Our template is done for now. Next we need to define the entries attribute in the CoffeeScript. We only want to define this on the client side so we’ll use is_client before defining entries. For now we’ll just set it to a hard-coded value.
if Meteor.is_client
  Template.raffle.entries = [{name: "Hello World"}]
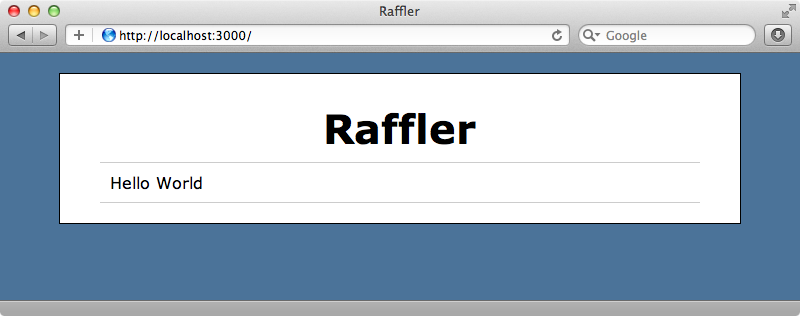
When we browse to our application now we’ll see the page including the one entry.
Persisting Data
We want our entries to be persistent and backed by a database so that we can change them dynamically. We make a persistent collection in Meteor by creating a new Meteor.Collection and giving it a name which we can use in our app.
Entries = new Meteor.Collection("entries")

if Meteor.is_client
  Template.raffle.entries = -> Entries.find()
To get the list we call find() on the collection. Note that we’ve placed the call inside a function so that it’s only triggered when we call entries in the template. A Meteor collection is backed by MongoDB on the server but we can interact with it directly on the client as well. Note that we define Entries outside the call to is_client so that its usable on both the client and the server.
Now’s a good time to take a look at Meteor’s documentation which covers the various parts of Meteor. The section on collections explains how they work and what the functions we can call on a collection are.
The list of entries is currently empty as there are no entries in the database. We can add some from the client-side by running JavaScript code in the browser’s console. To add an entry we cal Entries.insert.
> Entries.insert({name: 'Bob'})
When we do the list is updated immediately.
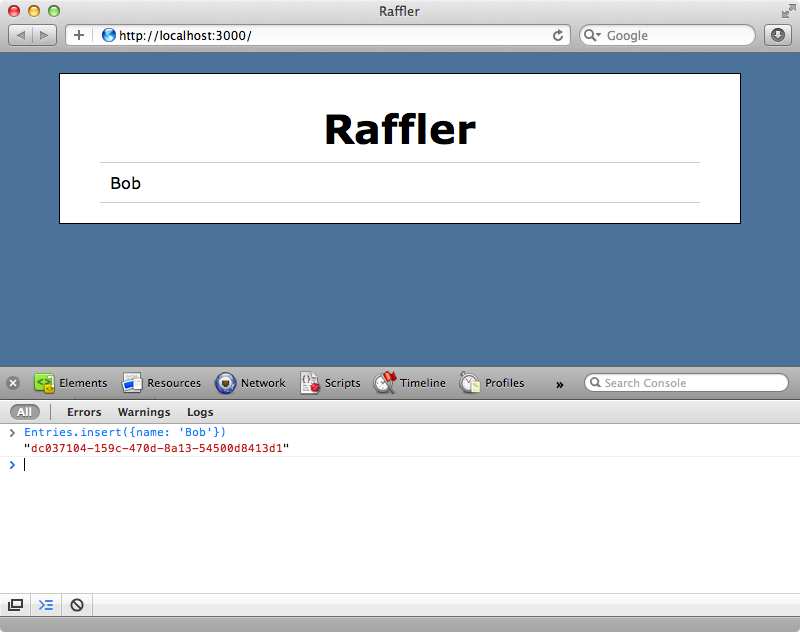
Note that the view automatically updates when the data changes. We don’t have to add callback hooks or re-render the view ourselves. Next we’ll add a field at the top of the list so that entries can be added through the interface.
<form id="new_entry">
  <input type="text" name="name" id="new_entry_name">
  <input type="submit" value="Add">
</form>
In our CoffeeScript we now need to add an event handler for the template. We do this by setting Template.raffle.events. We set this to listen to the form’s submit event. When the form is submitted we first call preventDefault to stop the form from actually being submitted then create a new entry with a name taken from the value of the text field. Finally we clear the text field ready for the next entrant.
Entries = new Meteor.Collection("entries")

if Meteor.is_client
  Template.raffle.entries = -> Entries.find()

  Template.raffle.events =
          'submit #new_entry': (event) ->
                  event.preventDefault()
                  Entries.insert(name: $('#new_entry_name').val())
                  $('#new_entry_name').val('')
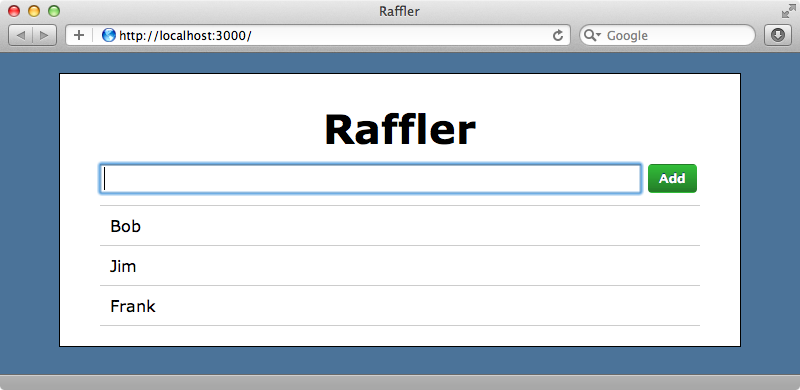
The Meteor server will automatically detect changes to file and update the browser accordingly so there’s no need to reload the page to see the updated page. When we add names in the textfield now the list and the database are updated automatically.
Drawing Winners
Now that we can add entries we need to add a “Draw Winner” button which will, when clicked, mark a random entry as the winner. First we’ll add the button at the bottom of the raffle template.
<button id="draw">Draw Winner</button>
In the CoffeeScript file we’ll listen for the button’s click event and select a random winner when it fires.
  Template.raffle.events =
    'submit #new_entry': (event) ->
      event.preventDefault()
      Entries.insert(name: $('#new_entry_name').val())
      $('#new_entry_name').val('')

    'click #draw': ->
      winner = _.shuffle(Entries.find().fetch())[0]
      if winner
        Entries.update(winner._id, $set: {winner: true})
To do this we get all the entries with Entry.find(), like we did before. This returns a cursor object that we can call fetch() on to turn it into an array. To get a random entry we use Underscore.js’s shuffle function to shuffle the array the return the first entry from that array.
If a record is found we update their entry in the database to mark them as a winner. To do this we call the $set option. This is passed in directly to MongoDB and if we look at the relevant page of the documentation we’ll see that this sets the value of the field that’s passed in. We can also use MongoDB operators when querying records through Meteor. For example if we wanted to find all the records that aren’t winners we could use $ne. We’ll use this in our code so that we don’t we don’t select someone who’s already been marked as a winner.
  Template.raffle.events =
    'submit #new_entry': (event) ->
      event.preventDefault()
      Entries.insert(name: $('#new_entry_name').val())
      $('#new_entry_name').val('')

    'click #draw': ->
      winner = _.shuffle(Entries.find(winner: {$ne: true}).fetch())[0]
      if winner
        Entries.update(winner._id, $set: {winner: true})
We still need to update the HTML to show that a given entry is a winner. All we need to do is make a small change to our template.
<ul id="entries">
  {{#each entries}}
  <li>
    {{name}}
    {{#if winner}}
      <span class="winner">WINNER</span>
    {{/if}}
  </li>
  {{/each}}
</ul>
Now when we click “Draw Winner” a random entrant will be marked as a winner.
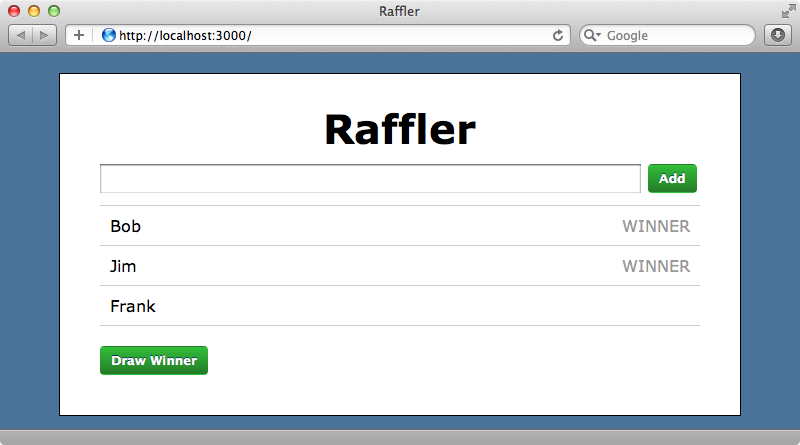
It can be easy to lose track of which winner is the most recent so we’ll highlight this one. We could do this through some jQuery code but we want this to be persistent so we’ll store this information in the database. To do this we’ll set a recent attribute on the most recent winner after first removing this attribute from any other recent winners.
Entries = new Meteor.Collection("entries")

if Meteor.is_client
  Template.raffle.entries = -> Entries.find()

  Template.raffle.events =
    'submit #new_entry': (event) ->
      event.preventDefault()
      Entries.insert(name: $('#new_entry_name').val())
      $('#new_entry_name').val('')

    'click #draw': ->
      winner = _.shuffle(Entries.find(winner: {$ne: true}).fetch())[0]
      if winner
        Entries.update({recent: true}, {$set: {recent:false}}, {multi: true})
        Entries.update(winner._id, $set: {winner: true, recent: true})
We’ll need to modify our template now to show the most recent winner differently from the other winners. As this logic is now beginning to get a little complex we’ll move it off into a new template.
<ul id="entries">
  {{#each entries}}
    {{> entry}}
  {{/each}}
</ul>
We’ll create the new template at the bottom of the same file. In it we’ll use a custom attribute called winner_class that will have a different value depending on whether the current entrant is a recent winner or not.
<template name="entry">
  <li>
    {{name}}
    {{#if winner}}
      <span class="winner {{winner_class}}">WINNER</span>
    {{/if}}
  </li>
</template>
We can set the value of this attribute in our CoffeeScript. We’ll add the attribute to them template and set it to a function call which checks this.recent and sets winner_class depending on its value. In the function this is the current scope of the template so has access to all the template’s attributes.
  Template.entry.winner_class = ->
    if this.recent then 'highlight' else ''
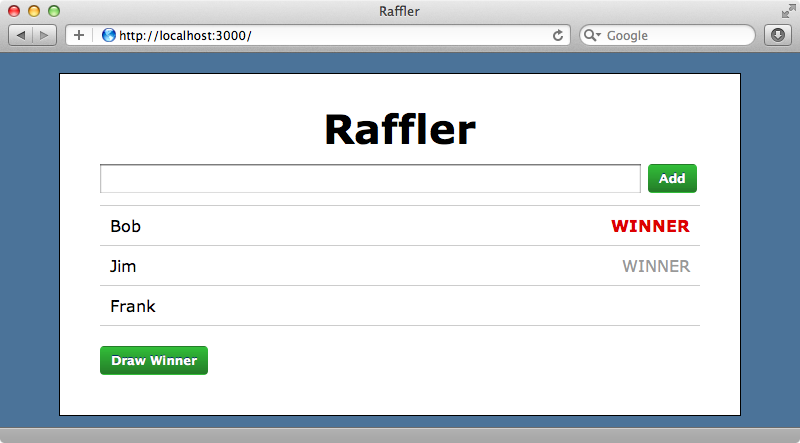
Now when we click “Draw Winner” the most recent winner is highlighted in red.
Automatic Updates
We haven’t yet shown you one of the coolest features of Meteor. This is that all changes are automatically pushed to all clients. If we have multiple browser windows open and click “Draw Winner” in one of them the new winner is immediately shown in the other window too. Similarly adding a new entrant in one window will immediately add it to all lists. Meteor does this all automatically for us.
Another great feature is ease of deployment. Meteor has some servers set up which we’re free to deploy our application to. All we need to do is run meteor deploy and pass in a domain name.
$ meteor deploy asciicast-raffler.meteor.com
When we visit that address now we’ll see our Meteor application and it will work just like it does on our local machine.
One concern about Meteor is its security. Anyone can visit our application, open up their browser’s console and remove all the entrants by running Entries.remove({}). Meteor will handle security better in future releases, in the meantime it’s worth reading this blog entry which shows several work-arounds for various security issues including handling cases when we don’t want the client to perform database actions directly.


