#342 Migrating to PostgreSQL
- Download:
- source codeProject Files in Zip (139 KB)
- mp4Full Size H.264 Video (26.7 MB)
- m4vSmaller H.264 Video (11.9 MB)
- webmFull Size VP8 Video (10.4 MB)
- ogvFull Size Theora Video (28.2 MB)
PostgreSQL is an increasingly popular database choice for Rails developers and with good reason. The many features it provides mean that a lot of developers who previously used MySQL have now moved over to Postgres. We’ll mention some of these at the end of this episode but first we’ll show you how to set up Postgres in a Rails application. First we’ll need to install Postgres. The downloads page on the PostgreSQL site has packages for a variety of operating systems. Mac OS X Lion comes with Postgres and we can check the version by running the psql command.
$ psql --version
psql (PostgreSQL) 9.0.5
Even though there’s a version provided it’s better to install Postgres through Homebrew to get the latest version and the development files. This command will download and compile Postgres for us.
$ brew install postgresql
This may take a while to run and after it finishes we’ll be given some instructions on how to set it up. We’ll need to run this command to finish creating the database.
$ initdb /usr/local/var/postgres
Next we’ll need to start up the server. One way to do this by setting up an agent.
$ mkdir -p ~/Library/LaunchAgents
$ cp /usr/local/Cellar/postgresql/9.1.3/homebrew.mxcl.postgresql.plist ~/Library/LaunchAgents
$ launchctl load -w ~/Library/LaunchAgents/homebrew.mxcl.postgresql.plist
Alternatively we can start up the server manually with this command.
$ pg_ctl -D /usr/local/var/postgres -l /usr/local/var/postgres/server.log start
We should now be running the latest version of Postgres and by running which psql we can see that we’re using the version under the /usr/local/bin directory and not the version that came with the system.
$ psql --version
psql (PostgreSQL) 9.1.3
$ which psql
/usr/local/bin/psql
Creating a Rails Application With Postgres
With Postgres installed we can now create a Rails application that uses it. We can use the -d option to specify the database that’s used.
$ rails new blog -d postgresql
When the application is created Bundler will install the pg gem. If we see an error message while this is compiling it might mean that Postgres isn’t set up correctly. If the gem is already installed we might need to uninstall then reinstall it so that when it’s reinstalled the correct version of Postgres is used.
If we look at the database.yml file in our application we’ll see that it’s already configured to use Postgres.
development:
  adapter: postgresql
  encoding: unicode
  database: blog_development
  pool: 5
  username: blog
  password:
The username in this file defaults to the name of the application. This is a good idea in production so that every application has a different user but in development it’s more convenient to keep everything under the same user which is the user on our system. This user is automatically created by the Homebrew installation but you might need to create it for other installations. We’ll use it for the development and test databases and remove the production configuration as this application won’t be going into production.
development:
  adapter: postgresql
  encoding: unicode
  database: blog_development
  pool: 5
  username: eifion
  password:

test:
  adapter: postgresql
  encoding: unicode
  database: blog_test
  pool: 5
  username: eifion
  password:
With the database.yml file configured correctly we can now create the application’s databases. There’s a Rake command that will do this for us.
$ rake db:create:all
Next we’ll generate an article scaffold so that we can try out application out and migrate the database.
$ rails g scaffold article name content:text
$ rake db:migrate
==  CreateArticles: migrating =================================================
-- create_table(:articles)
NOTICE:  CREATE TABLE will create implicit sequence "articles_id_seq" for serial column "articles.id"
NOTICE:  CREATE TABLE / PRIMARY KEY will create implicit index "articles_pkey" for table "articles"
   -> 0.0114s
==  CreateArticles: migrated (0.0116s) ========================================
One difference when using Postgres is that we get a couple of notices telling us that it has created a sequence and an index. When we start up the server now we can browse our application and create, edit and delete articles just as we would with an application running with a SQLite database.
Working Directly With The Database
If we want to interact directly with the database we can do so by running the psql command followed by the name of the database. Alternatively we can run rails db, which will do the same thing.
$ rails db
psql (9.1.3)
Type "help" for help.

blog_development=#
Here we can type SQL queries against our database or use Postgres-specific commands, such as \d which gets a list of the tables in the current database.
blog_development=# \d
               List of relations
 Schema |       Name        |   Type   | Owner
--------+-------------------+----------+--------
 public | articles          | table    | eifion
 public | articles_id_seq   | sequence | eifion
 public | schema_migrations | table    | eifion
Running the same command and passing in the name of a table will give us information about that table.
blog_development=# \d articles
                                     Table "public.articles"
   Column   |            Type             |                       Modifiers
------------+-----------------------------+-------------------------------------------------------
 id         | integer                     | not null default nextval('articles_id_seq'::regclass)
 name       | character varying(255)      |
 content    | text                        |
 created_at | timestamp without time zone | not null
 updated_at | timestamp without time zone | not null
Indexes:
    "articles_pkey" PRIMARY KEY, btree (id)
We can get a full list of Postgres commands by typing \?. The \h command will give us a list of SQL commands and we can pass it the name of a command to it to get documentation about that command. When we’re ready to exit the Postgres console we can do so by running \q. If you’re unfamiliar with databases and SQL now is a great time to start learning. The Postgres site has a tutorial and the Postgres console lets you experiment with running SQL commands to see what they do.
Migrating an Existing Application
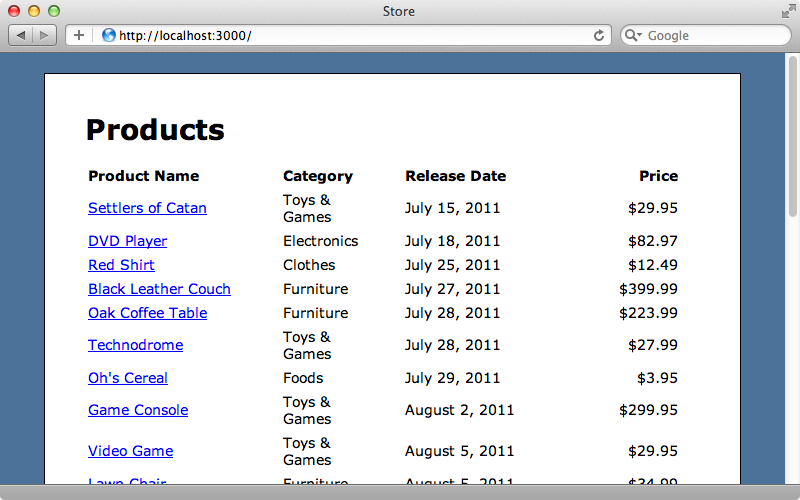
Now we know how to set up a new Rails application to run under Postgres but what do we do if we have an existing database that runs under a different database, such as SQLite or MySQL? Below is a page from an application that displays a list of products. This application’s data is currently stored in a SQLite database but we’d like to move it over to Postgres and migrate the data over, too.

The application’s database.yml file looks like this.
# SQLite version 3.x
#   gem install sqlite3
#
#   Ensure the SQLite 3 gem is defined in your Gemfile
#   gem 'sqlite3'
development:
  adapter: sqlite3
  database: db/development.sqlite3
  pool: 5
  timeout: 5000

# Warning: The database defined as "test" will be erased and
# re-generated from your development database when you run "rake".
# Do not set this db to the same as development or production.
test:
  adapter: sqlite3
  database: db/test.sqlite3
  pool: 5
  timeout: 5000

production:
  adapter: sqlite3
  database: db/production.sqlite3
  pool: 5
  timeout: 5000
We’ll replace these with settings for Postgres.
development:
  adapter: postgresql
  encoding: unicode
  database: store_development
  pool: 5
  username: eifion
  password:

test:
  adapter: postgresql
  encoding: unicode
  database: store_test
  pool: 5
  username: eifion
  password:
Next we’ll modify the gemfile and replace the sqlite3 gem with pg and run bundle to install it.
gem 'pg'We’ll need to create the two new databases and we can do this by running the Rake command we ran earlier.
$ rake db:create:all
At this point we could run the migrations but we want to migrate the contents of the tables as well as the structure so we’ll need to try something different. Fortunately there’s a Ruby gem that can help with this called Taps. This allows us to export data from one database and import it into another by using a Sinatra server. To use it we’ll first need to install the taps gem and its dependencies.
$ gem install taps
This gem provides a taps command that we can use to serve a database and also to pull data from that database into another. We’ll use it now to host our SQLite database. We need to pass it a path to the database and also set a username and password to protect the database.
$ taps server sqlite://db/development.sqlite3 eifion secret
This will host the database on a Sinatra server on port 5000. In another terminal window we can now pull the data from this database into our Postgres database. We need to specify the username and name of the Postgres database we want to import the data into and also the URL to the Sinatra server including the username and password we defined when we started the server.
$ taps pull postgres://eifion@localhost/store_development http://eifion:secret@localhost:5000
Receiving schema
Schema:          0% |                                          | ETA:  --:--:--
Schema:         50% |=====================                     | ETA:  00:00:00
Schema:        100% |==========================================| Time: 00:00:01
Receiving data
2 tables, 400 records
products:      100% |==========================================| Time: 00:00:00
schema_migrat: 100% |==========================================| Time: 00:00:00
Receiving indexes
schema_migrat:   0% |                                          | ETA:  --:--:--
schema_migrat: 100% |==========================================| Time: 00:00:00
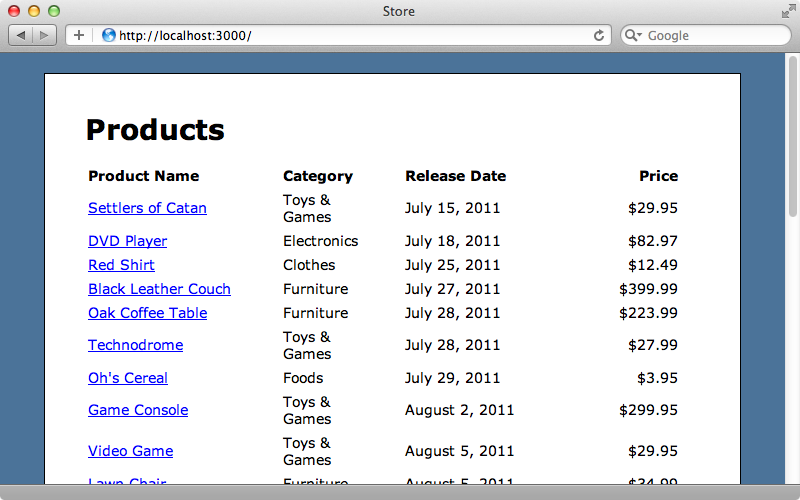
This will pull all the data from our SQLite database into our new Postgres one. We can now try running our Rails application with our new database.
It works, the page looks the same, but the data is now coming from our Postgres database.

Now that we’ve switched over to Postgres we can take advantage of its many features, including full-text searching. Take a look at the Texticle or PGSearch gems to help out with this. We can even use Postgres as a worker queue and the queue_classic gem can be used if we want to do this. If you want to use a NoSQL database Postgres can do this too, using HStore and there’s a blog post that explains how to do this.


