#341 Asset Pipeline in Production pro
- Download:
- source codeProject Files in Zip (107 KB)
- mp4Full Size H.264 Video (39.6 MB)
- m4vSmaller H.264 Video (18.2 MB)
- webmFull Size VP8 Video (17.5 MB)
- ogvFull Size Theora Video (46.3 MB)
Below is a screenshot from a simplified version of the Raliscasts site. The design is made up from several images and CSS files and these files are managed using the asset pipeline. This makes it convenient to work with SASS and CoffeeScript but it can be a pain point, especially in production and that’s what we’ll focus on in this episode. If you’re new to the asset pipeline first watch episode 279 which covers the basics.
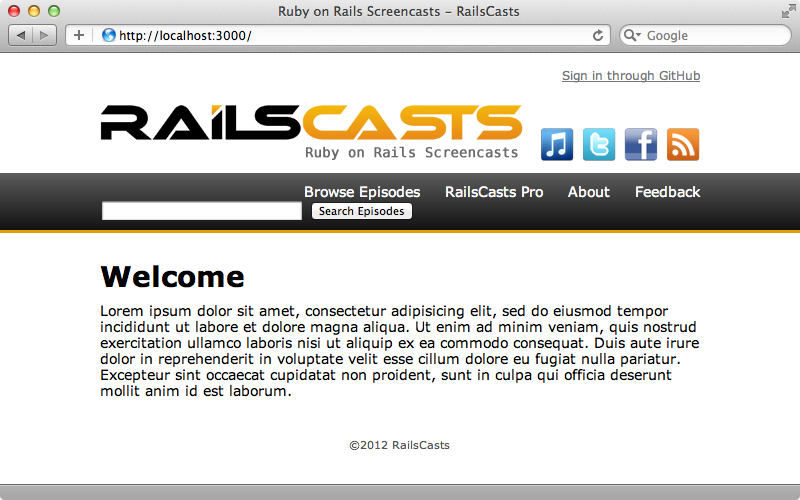
The first thing we want to do is try to run the application in the production environment on our local machine. This will give us a better understanding of how the asset pipeline works in a production application.
$ rails s -e production
When we try reloading the page now we get an error message. If we look at the production log we’ll see what the error was.
Started GET "/" for 127.0.0.1 at 2012-04-22 20:31:59 +0100
Processing by HomeController#index as HTML
  Rendered home/index.html.erb within layouts/application (2.0ms)
Completed 500 Internal Server Error in 40ms

ActionView::Template::Error (application.css isn't precompiled):
    2: <html>
    3:   <head>
    4:     <title>Ruby on Rails Screencasts - RailsCasts</title>
    5:     <%= stylesheet_link_tag    "application", media: "all" %>
    6:     <%= javascript_include_tag "application" %>
    7:     <%= csrf_meta_tags %>
    8:   </head>
  app/views/layouts/application.html.erb:5:in `_app_views_layouts_application_html_erb__4503618850121487729_70317726904360'
The error message tells us that application.css isn't precompiled. Production mode works differently from development and doesn’t generate assets dynamically, instead expecting them to be precompiled. There’s a Rake task which does this and we need to run it before running the application in production mode.
$ rake assets:precompile
This command compiles the assets into the public/assets directory and we can see them all if we list this directory’s contents.
$ ls public/assets
application-30939899585cf2854059a1905b2feb91.js
application-30939899585cf2854059a1905b2feb91.js.gz
application-f8fc873a94b16acbbf6f7ae162bb5593.css
application-f8fc873a94b16acbbf6f7ae162bb5593.css.gz
application.css
application.css.gz
application.js
application.js.gz
icons
manifest.yml
railscasts_logo-46d331662a9cfa9012688c4d587d5a52.png
railscasts_logo.png
Each asset has a couple of variations, one with an MD5 digest in its name and a gzip version. We’ll explain these and how they work later on in this episode. Now that we’ve precompiled the assets we’ll try starting up the server in production mode again. When we do and reload the page we don’t get a 500 error but it looks as if the assets aren’t loading correctly.
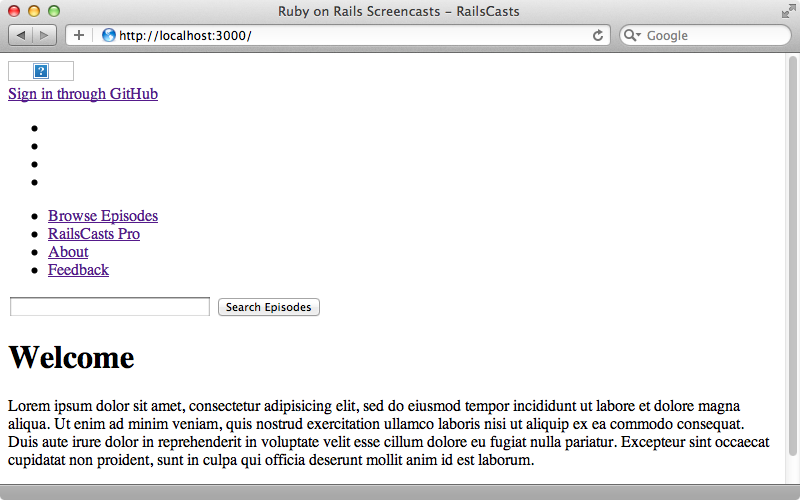
If we look at the log files again we’ll see routing errors. It looks like our application is trying to process each asset path instead of serving up the precompiled static file. This is another important distinction between development and production. If we look at the middleware for the development environment we’ll see at the top of the list a piece of middleware called ActionDispatch::Static which serves up static files from the public directory. If we look at the middleware for the production environment, however, we won’t find it listed. For performance reasons Rails doesn’t handle serving static files in production but expects these to be handled by a web server, usually Apache or Nginx. For more information on Rack Middleware take a look at episode 319. As we’re just trying out the production environment on our local machine we can change a setting in our production config file called serve_static_assets to true.
# Disable Rails's static asset server (Apache or nginx will already do this)
  config.serve_static_assets = true
We can either do this temporarily or set up a new environment as was covered back in episode 72. Now we can start up our application in production mode one more time and this time when we reload the page the assets all load properly as our Rails app now serves static files.
The Asset Pipeline and Capistrano
Now that we know how to get production mode working on our local system let’s see what part the asset pipeline plays in deployment with Capistrano. We’ll first need to uncomment the Capistrano gem in the gemfile then run bundle to install it.
# Deploy with Capistrano
gem 'capistrano'
When Bundler finishes we’ll run capify to generate the Capistrano-related files.
$ capify .
[add] writing './Capfile'
[add] writing './config/deploy.rb'
[done] capified!
We now have a capfile at the root of our project and there is a comment in there telling us to uncomment the line below it if we’re using the asset pipeline. We are so we’ll do this.
load 'deploy'
# Uncomment if you are using Rails' asset pipeline
load 'deploy/assets'
Dir['vendor/gems/*/recipes/*.rb','vendor/plugins/*/recipes/*.rb'].each { |plugin| load(plugin) }
load 'config/deploy' # remove this line to skip loading any of the default tasks
We mentioned this in episode 335 but we’ll go into more detail here and show exactly what the deploy/assets file does. We can find this file in the Capistrano source code on Github. Nothing magical happens inside this file: it defines a few Capistrano variables and tasks to add the asset pipeline behaviour to Capistrano deployment. The variables are defined at the top of the file and they include a RAILS_GROUPS=assets setting which specifies the gem group to use when compiling the assets.
load 'deploy' unless defined?(_cset)

_cset :asset_env, "RAILS_GROUPS=assets"
_cset :assets_prefix, "assets"
_cset :assets_role, [:web]

_cset :normalize_asset_timestamps, false

before 'deploy:finalize_update', 'deploy:assets:symlink'
after 'deploy:update_code', 'deploy:assets:precompile'
# Rest of file omitted.
If we look at our application’s gemfile we’ll see the assets group. The gems in this group are only loaded when the assets are precompiled as normally these gems are not loaded in in the production environment.
# Gems used only for assets and not required
# in production environments by default.
group :assets do
  gem 'sass-rails',   '~> 3.2.3'
  gem 'coffee-rails', '~> 3.2.1'

  # See https://github.com/sstephenson/execjs#readme for more supported runtimes
  # gem 'therubyracer', :platform => :ruby

  gem 'uglifier', '>= 1.0.3'
end
Let’s take a look at some of the tasks that are defined in the assets Capistrano recipe. The first is a deploy:assets:symlink task. This is used internally and is run automatically before the deploy:finalize_update task.
before 'deploy:finalize_update', 'deploy:assets:symlink'
after 'deploy:update_code', 'deploy:assets:precompile'

namespace :deploy do
  namespace :assets do
    desc <<-DESC
      [internal] This task will set up a symlink to the shared directory \
      for the assets directory. Assets are shared across deploys to avoid \
      mid-deploy mismatches between old application html asking for assets \
      and getting a 404 file not found error. The assets cache is shared \
      for efficiency. If you cutomize the assets path prefix, override the \
      :assets_prefix variable to match.
    DESC
    task :symlink, :roles => assets_role, :except => { :no_release => true } do
      run <<-CMD
        rm -rf #{latest_release}/public/#{assets_prefix} &&
        mkdir -p #{latest_release}/public &&
        mkdir -p #{shared_path}/assets &&
        ln -s #{shared_path}/assets #{latest_release}/public/#{assets_prefix}
      CMD
    end
    # Other tasks omitted.
  end
end
This task symlinks the shared assets path to the public assets path on each release so all the assets are actually stored under the shared directory on the server. The next task is called precompile and this triggers the assets:precompile Rake task that we ran earlier to prepare the assets for production.
desc <<-DESC
  Run the asset precompilation rake task. You can specify the full path \
  to the rake executable by setting the rake variable. You can also \
  specify additional environment variables to pass to rake via the \
  asset_env variable. The defaults are:

    set :rake,      "rake"
    set :rails_env, "production"
    set :asset_env, "RAILS_GROUPS=assets"
DESC
task :precompile, :roles => assets_role, :except => { :no_release => true } do
  run "cd #{latest_release} && #{rake} RAILS_ENV=#{rails_env} #{asset_env} assets:precompile"
end
This task is also run automatically during the deployment process so we don’t have to think about preparing the server for the asset pipeline; it will happen automatically when we deploy. There’s one more task defined in this file called clean.
desc <<-DESC
  Run the asset clean rake task. Use with caution, this will delete \
  all of your compiled assets. You can specify the full path \
  to the rake executable by setting the rake variable. You can also \
  specify additional environment variables to pass to rake via the \
  asset_env variable. The defaults are:

    set :rake,      "rake"
    set :rails_env, "production"
    set :asset_env, "RAILS_GROUPS=assets"
DESC
task :clean, :roles => assets_role, :except => { :no_release => true } do
  run "cd #{latest_release} && #{rake} RAILS_ENV=#{rails_env} #{asset_env} assets:clean"
end
This removes the assets and isn’t run automatically so we’ll need to trigger it manually if we want it to run.
Deploying Our Application
Now that we know what’s going on behind the scenes let’s try deploying this application. We’ve already set up a server and prepared this application and you can watch episodes 335 and 337 for more information on how to do this. We’ve done everything up to the point of running cap deploy:cold so let’s run this to deploy our application. This command will check out our application from a Git repository, run bundle install to install any gems, run the migrations then run rake assets:precompile to compile any assets. When we run this command we’ll see a lot of output but at the end we’ll get an error. The assets:precompile task fails to run and if we look further up the file we’ll see the error Could not find a JavaScript runtime. Some of the assets, including CoffeeScript require JavaScript to compile but a bare Ubuntu setup such as we have doesn’t include a JavaScript runtime by default so we’ll have to install one. Normally when setting up a server we install node.js but we’ve purposely left that step out here so that you can see what the error message looks like. If installing node.js on the server isn’t an option another way to solve this problem is to use a gem called therubyracer. This is shown commented out in the gemfile so we just need to uncomment it and run bundle again.
# Gems used only for assets and not required
# in production environments by default.
group :assets do
  gem 'sass-rails',   '~> 3.2.3'
  gem 'coffee-rails', '~> 3.2.1'

  # See https://github.com/sstephenson/execjs#readme for more supported runtimes
  gem 'therubyracer', :platform => :ruby

  gem 'uglifier', '>= 1.0.3'
end
We’ll need to commit this change to our Git repository before we can try deploying our application again and push the change up to Github.
$ git commit -am "adding therubyracer."
$ git push origin master
This time when we run cap deploy:cold we don’t see any errors so let’s try looking at our application in a browser. Now it works and all our application’s assets are loaded properly.
Caching
If we look at the network activity for the request we’ll see all the requests for assets that were made. Note that each of them has the MD5 digest at the end of the filename. This is a unique fingerprint based on the contents of the file and this means that if the file itself changes the name will change as well. This means that we can cache this file, knowing that if it changes, its name will change too.
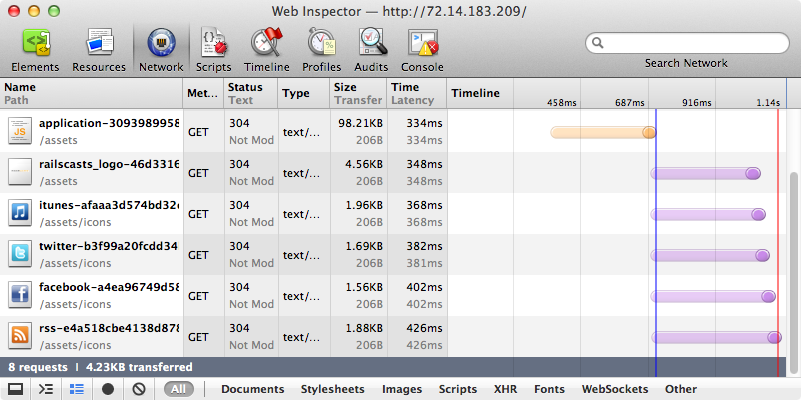
Our Nginx server configuration file looks is shown below. Take a look at the location section which focuses on everything under the /assets directory.
upstream unicorn {
  server unix:/tmp/unicorn.<%= application %>.sock fail_timeout=0;
}

server {
  listen 80 default deferred;
  # server_name example.com;
  root <%= current_path %>/public;

  location ^~ /assets/ {
    gzip_static on;
    expires max;
    add_header Cache-Control public;
  }

  try_files $uri/index.html $uri @unicorn;
  location @unicorn {
    proxy_set_header X-Forwarded-For $proxy_add_x_forwarded_for;
    proxy_set_header Host $http_host;
    proxy_redirect off;
    proxy_pass http://unicorn;
  }

  error_page 500 502 503 504 /500.html;
  client_max_body_size 4G;
  keepalive_timeout 10;
}
One of the options here is expires and this is set to max which means that the browser should cache the files that come from this directory for as long as possible. If we look at the response headers for one of these files we’ll see that the Cache-Control header has the max-age set to a very high number which means that the file will be cached in the browser for a long time.
Date: Mon, 23 Apr 2012 16:09:30 GMT
Connection: close
Last-Modified: Tue, 10 Apr 2012 07:15:23 GMT
Server: nginx/1.0.14
Cache-Control: max-age=315360000, public
Expires: Thu, 31 Dec 2037 23:55:55 GMT
The site feels much faster when assets are served through the cache but this wouldn’t be possible without the digest in the name as otherwise the browser wouldn’t know when the browser had changed and so wouldn’t know that it had to update the cache. As the file’s name changes every time its contents change the new version is always requested from the server. For more information on HTTP caching see episode 321. One side effect of this behaviour is that we always need to use helper methods when referencing an asset. For example we have to use image_tag to add an image instead of using a static path. In SASS files we can use the image-url function to reference an image and this will add the correct digest.
Not only does the asset pipeline help with caching it also tries to make the content of each asset as small as possible. JavaScript files, for example, are minimized to reduce the file size. In addition to this a gzipped version of each JavaScript and CSS file is generated and we take advantage of this in our Nginx configuration file by setting gzip_static to on. This means that Nginx will look for a gzipped version and send that to the user when it can. If we’re ever unsure if gzip is working we can use this HTTP compression test. All we need to do is pass the URL to an asset and it will tell us if it’s served with gzip compression or not.
Hopefully this has given you an understanding of why the asset pipeline works in the way it does. It might seem that it jumps through a lot of hoops but if it gives a better and faster experience to the user then it’s worth it.
The default asset pipeline behaviour is good and it’s recommended that you stick with it if you can. This behaviour doesn’t fit everyone’s needs, however, and it’s customizable as we can see in the production configuration file. For example we can choose to turn off JavaScript and CSS compression by setting config.assets.compress to false.
# Compress JavaScripts and CSS
config.assets.compress = false
This can be useful for debugging purposes, for example in a staging environment. We can also enable asset compiling by setting the config.assets.compile option. We can do this if we don’t want to precompile assets but instead compile them on the fly as requests are made to them.
# Don't fallback to assets pipeline if a precompiled asset is missed
config.assets.compile = true
If we make this change we’ll also need change the application.rb file as by default the gems in the assets group won’t be loaded in production. We’ll need to comment out the line that tells Bundler only to require the asset group gems in development and test and uncomment the one that requires them for the current environment.
if defined?(Bundler)
  # If you precompile assets before deploying to production, use this line
  # Bundler.require(*Rails.groups(:assets => %w(development test)))
  # If you want your assets lazily compiled in production, use this line
  Bundler.require(:default, :assets, Rails.env)
end
If we make this change we’ll also want comment out the load 'deploy/assets' line in the capfile so that the assets aren’t precompiled when we deploy.
This compile option is useful if we don’t want to precompile the assets, but it’s not really recommended as it means that our application is going to load all the asset-related gems in every Rails instance and compile them there. This will use more memory which can be avoided by precompiling the assets. If our issue with precompiling is that it takes a long time to do we can add another configuration option to production.rb.
config.assets.initialize_on_precompile = falseThis means that the entire Rails application won’t be loaded when the assets are precompiled. Some deployment solutions expect you to set this option such as Heroku. Finally there’s an option to turn the digest feature off if we don’t want this added to the end of each file name.
# Generate digests for assets URLs
config.assets.digest = false
If we do remove the digest we should also remove the expires max; line from the nginx_unicorn.rb file so that the asset files aren’t cached. This means that if we remove the digest we lose the advantages of caching.
While we’re in the production.rb configuration file we should also uncomment the x_sendfile_header option for the web server that we’re using, in our case Nginx.
# Specifies the header that your server uses for sending files
# config.action_dispatch.x_sendfile_header = "X-Sendfile" # for apache
config.action_dispatch.x_sendfile_header = 'X-Accel-Redirect' # for nginx
This way if the Rails app sends a file back the web server will be used.
Precompiling Assets Locally
There’s one more asset pipeline variation that we’ll talk about and this has to do with the Capistrano precompile task that we showed earlier. If we have trouble compiling assets on the server then we can’t run the assets:precompile Rake task there. Instead we can run it on our local machine and upload the compiled assets to the server.
There are a number of steps we need to take to do this. First we need to add the /public/assets directory to the application’s .gitignore file so that the compiled assets aren’t added to the Git repository.
# See http://help.github.com/ignore-files/ for more about ignoring files.
#
# If you find yourself ignoring temporary files generated by your text editor
# or operating system, you probably want to add a global ignore instead:
#   git config --global core.excludesfile ~/.gitignore_global

# Ignore bundler config
/.bundle

# Ignore the default SQLite database.
/db/*.sqlite3

# Ignore all logfiles and tempfiles.
/log/*.log
/tmp

/config/database.yml

/public/assets
While we could use Git to sync these assets we’ll use rsync as otherwise our repository can get fairly messy. Next we’ll need to check that the load 'deploy/assets' line is uncommented in the capfile as we still want to use the other tasks that this provides. Finally at the bottom of deploy.rb we’ll need to add this task.
namespace :deploy do
  namespace :assets do
    desc "Precompile assets on local machine and upload them to the server."
    task :precompile, roles: :web, except: {no_release: true} do
      run_locally "bundle exec rake assets:precompile"
      find_servers_for_task(current_task).each do |server|
        run_locally "rsync -vr --exclude='.DS_Store' public/assets #{user}@#{server.host}:#{shared_path}/"
      end
    end
  end
end
This overrides the deploy:assets:precompile task so that it runs rake assets:precompile locally then runs rsync to sync the public/assets directory to each server in the web role. With these settings in place when we run cap deploy now the assets will be compiled locally and then synced to the server. With this set up the asset pipeline still works and our server doesn’t have to precompile the assets.


