#303 Publishing a Gem pro
- Download:
- source codeProject Files in Zip (8.6 KB)
- mp4Full Size H.264 Video (35.7 MB)
- m4vSmaller H.264 Video (15.6 MB)
- webmFull Size VP8 Video (16.1 MB)
- ogvFull Size Theora Video (38.9 MB)
In episode 301 we extracted a Ruby gem from an existing Rails application. This gem, called url_formatter, hasn’t been published yet so it’s only available on our development machine. This means that if we want to use the gem in an application we have to specify the path option in the gemfile.
gem 'url_formatter', path: '~/code/url_formatter'
In this episode we’ll publish the gem so that we can share it with the world and let anyone use it in their Rails applications.
Publishing The Source on Github
We’ll host the gem’s source code on Github. When we used Bundler to create the gem’s initial files it created a git repository for us in this directory but we haven’t committed any files to it yet so our first step is to do that. We’ll add all the files and then make the initial commit.
$ git add .
$ git commit -m "Initial commit."
Next we’ll need to go to Github and create a repository. (If you don’t have a Github account you’ll need to sign up first.) Once we’ve done so we’ll be taken to a page that shows the next steps we’ll need to take. As we’re adding an existing repository we just need to add the new remote and push the files up.
$ git remote add origin git@github.com:eifion/url_formatter.git
$ git push -u origin master
Our project is now up on Github and anyone can use our url_formatter gem by copying its git URL, git@github.com:eifion/url_formatter.git, and using it in the Gemfile for a Rails application like this.
gem 'url_formatter', git: 'git@github.com:eifion/url_formatter.git'
When we run bundle for this application now it will pull this gem from Github instead of using the local version.
Publishing Our Gem
Our gem is now publicly available but hasn’t been officially released. To this we need to publish our gem to RubyGems. This is easy to do, we just have to run a couple of gem commands, but we need to do a couple of other things first.
We have a version file in our gem’s source code that contains the current version of the gem. In the last episode we set this to 0.0.1.alpha as the first version of the gem was still in development. Now that we’re ready to release the first version of our gem we can remove the ‘alpha’.
module UrlFormatter
  VERSION = "0.0.1"
end
As we’re making the first official release of our gem it’s a good idea to make a change log file where we can log the changes between each version. This is our first version so we’ll simply note that this is the initial release.
## v0.0.1

* Initial release
It’s important that we commit any outstanding changes before we build our gem so we’ll commit the changed version file and the change log now.
$ git add .
$ git commit -m "Releasing v0.0.1"
We’re ready to build our gem now. We could use gem build and gem push here but Bundler provides a Rake task that will do all of this for us.
$ rake release
This command will also tag our release and push it to Github and RubyGems. You might be asked for your RubyGems login details when you do this, so if you haven’t created a RubyGems account you’ll need to do so. If we visit our Github repository now we’ll see that that commit has been pushed and that we have a v0.0.1 tag listed, too.
Now when someone wants to use our gem it’s no longer necessary to use the git option as the gem has been officially published. To include the gem in a Rails app we only need to specify its name.
gem 'url_formatter'Now that the gem has been officially released we’ll bump up the version number to the next release version. This is sign that we’re developing the next version on the current codebase.
module UrlFormatter
  VERSION = "0.0.2.alpha"
end
Continuous Integration
Next we’ll show some tools and services that we can use to improve our gem now that it’s been released. The first of these is Travis CI. This is a Continuous Integration server that will automatically run your tests in the background when you push changes up to Github. To get started with this we just need to visit the site and sign in through Github. Once we’ve signed up we can go to our profile page where we’ll see a list of our Github repositories and can choose the ones to enable for Travis CI. If we need to customize this functionality we can do so on the repository’s Github site. In the Service Hooks section we can select the Travis Hook and configure the options there. Normally, though this shouldn’t be necessary.
When Travis CI tries to run our gem’s tests it fails. We can find out why by clicking on the build number where we’ll see the output that we’d get from the console as it ran its commands. The error message we see says “rake is not part of the bundle” so we’ll need to add this to our gem’s dependencies.
# specify any dependencies here; for example:
s.add_development_dependency "rake"
s.add_development_dependency "rspec"
s.add_runtime_dependency "supermodel"
Next we’ll commit the changes and push them to Github.
$ git commit -a -m "Adding rake dependency."
$ git push origin master
Travis will automatically pick up the commit to Github and will run the tests again. They fail again, though this isn’t surprising as Travis CI is using Ruby 1.8.7 while our gem is written in Ruby 1.9 and uses some of the new 1.9 syntax. We need to tell Travis to use 1.9 for testing and we do so by creating a new file in our gem’s root directory and specifying the version of Ruby to use there.
rvm:
  - 1.9.2
If we want to support multiple Ruby versions we can do so here, but for this gem we only need to support 1.9.2. We’ll need to add, commit and push this file for Travis to pick it up.
$ git add .
$ git commit -m "Added travis.yml file."
$ git push origin master
Travis will pick up this change and now all of the tests pass.
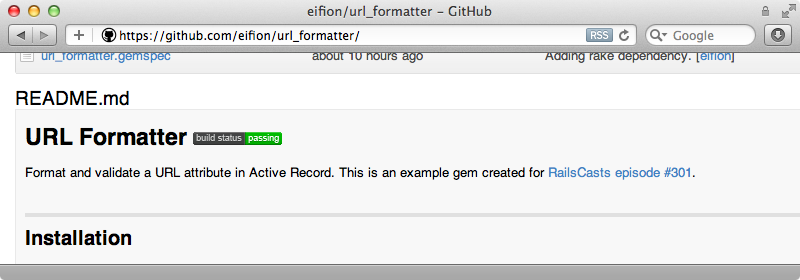
Travis CI provides a build status image. We’ll link to this in our project’s README so that people browsing the project on Github can see its current status.
# URL Formatter [](https://secure.travis-ci.org/eifion/url_formatter.png)
The project’s build status will now show on Github next to the README’s title.

Documentation
Next we’ll focus on the gem’s documentation. A README file often isn’t enough so we’ll share the RDocs on RubyDoc.info. Our gem doesn’t have any inbuilt documentation yet but by adding comments to the source code we can add some. We should add documentation for every public method that’s considered part of the API. Our gem only has one public method, format_url in the ModelAdditions module so we’ll add some comments to it that describe how it works.
module UrlFormatter
  module ModelAdditions
    # To format and validate a URL attribute, call <tt>format_url</tt>
    # in any Active Record model class and pass it the name of an attribute.
    #
    #   class User < ActiveRecord::Base
    #     format_url :website
    #   end
    #
    # This will add a <tt>before_validation</tt> callback to add "http://" to
    # the attribute if a protocol doesn't exist already. It then validates the
    # format of the URL.
    def format_url(attribute)
      before_validation do
        send("#{attribute}=", UrlFormatter.format_url(send(attribute)))
      end
      validates_format_of attribute, with: UrlFormatter.url_regexp, message: "is not a valid URL"
    end
  end
end
If any of your gem’s public methods take arguments or a hash of options it’s a good idea to describe those in detail here. Note that we’re using some custom RDoc formatting in the comments; wrapping text in tt tags will turn that text into a code snippet. There’s more information on the markup syntax on the RDoc Readme page. If we use YARD, which is supported by RubyDoc.info, there are some additional options that we can pass inside the documentation and the Getting Started guide has more information on that.
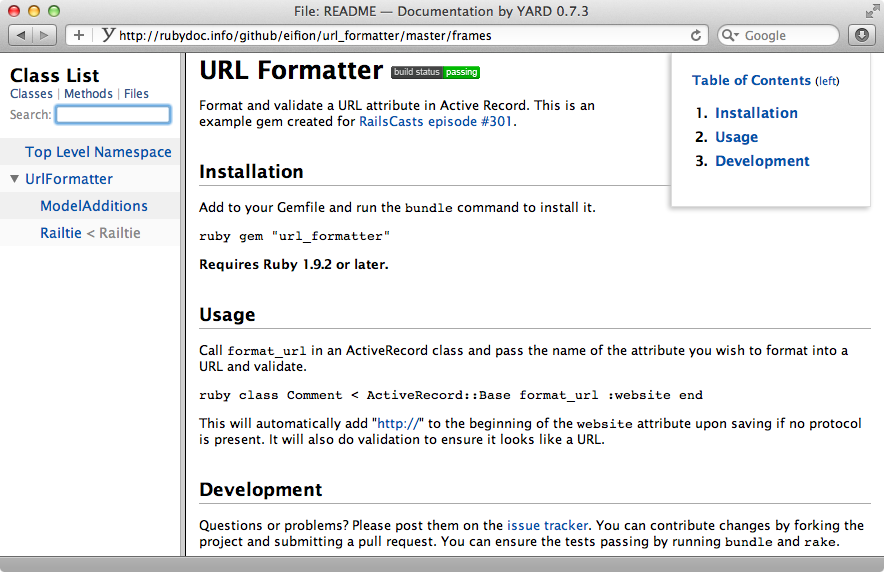
Once we’ve committed and pushed the model_additions file we can add our project to RubyDoc.info. All we need to do is click the “Add Project” button on the home page, enter our repository’s public git URL, in this case git://github.com/eifion/url_formatter.git and click “Go”. After we do that we’ll be taken to our project’s new documentation page.

The generated documentation includes the gem’s README and if we click on the “ModelAdditions” link in the left frame we’ll see the documentation that we wrote for the format_url method.
It’s a good idea to link to this documentation from the README file so that anyone browsing the project on Github will see it. Each method listed has a permalink so that we can link to it if we need to. We should also add some documentation on our project’s Github wiki.
Relish is another service that can help with documentation. It ties in nicely with Cucumber features so if your project uses Cucumber you should consider using it.
Advertising Our New Gem
Now that our gem is well documented and tested its time to advertise it so that other Ruby developers know about it. One good place to do this is The Ruby Toolbox which is an excellent resource for finding gems that solve a specific problem. We’ll need to sign in to this site through Github to use it and once we have we can suggest that they add our project on this page.
We can also advertise our gem on RubyFlow. We can write a blog post here that shows what our gem does and how to use it. Once we feel that our gem is production ready and rock-solid we can share it with some podcasts such as The Ruby Show and Ruby 5.


