#293 Nginx & Unicorn pro
- Download:
- source codeProject Files in Zip (47.9 KB)
- mp4Full Size H.264 Video (57.9 MB)
- m4vSmaller H.264 Video (25.5 MB)
- webmFull Size VP8 Video (25.4 MB)
- ogvFull Size Theora Video (61.4 MB)
In this episode we’ll show you how to serve a Rails application using nginx and Unicorn. This hosting solution is used by many large companies such as Github and 37 Signals to host their Rails applications and here we’ll go through the steps necessary to get it set up on a Linux server.
Normally of course we’d do this on a production server, but if it’s the first time you’ve done this it’s a good idea to use a virtual machine so that you have a safe environment in which to test things. We’ll be using Vagrant and the virtual machine we created in the last episode. This VM machine already has Ruby 1.9.2 installed via rbenv and has a shared directory at /vagrant that contains a very basic Rails application. We won’t be focussing on Capistrano or deployment as our application is already on the server.
We can already start up our Rails application on the VM. First we need to do is SSH into the VM from the application’s directory with
$ vagrant ssh
Then on the VM we move to /vagrant and run the default Rails server.
vagrant@lucid32:~$ cd /vagrant
vagrant@lucid32:/vagrant$ bundle exec rails s
This will boot our application up on port 3000 under WEBrick and as this port is shared with our host machine we can view the app in a browser. This is fine for development but it isn’t how we want to run it in production so let’s get it running under nginx and Unicorn.
Installing Nginx
We’ll start by installing nginx. If we want to install the latest version it’s best to install it from source but we’ll install it using apt-get.
vagrant@lucid32:/vagrant$ sudo apt-get install nginx
nginx command but the installer also installs an init.d file that we can use to manage our nginx server as well.
vagrant@lucid32:/vagrant$ /etc/init.d/nginx -h
Usage: nginx {start|stop|restart|reload|force-reload|status|configtest}
We can run this init.d command directly or we can interact with it through the service command and we’ll use this to start it up.
vagrant@lucid32:/vagrant$ sudo service nginx start
Starting nginx: the configuration file /etc/nginx/nginx.conf syntax is ok
configuration file /etc/nginx/nginx.conf test is successful
nginx.
From the output we can see that nginx has booted up successfully and that the configuration file at /etc/nginx/nginx.conf has been successfully parsed.
While nginx has booted up on port 80 on our VM, we can’t browse our website on our host machine as Vagrant isn’t currently forwarding traffic on port 80. We’ll modify the Vagrantfile so that this traffic is forwarded to port 8080 on the host.
# Forward a port from the guest to the host, which allows for outside
# computers to access the VM, whereas host only networking does not.
config.vm.forward_port "http", 80, 8080
config.vm.forward_port "rails", 3000, 3000
Having made this change we need to reload Vagrant so we’ll exit from our SSH session and reload the virtual machine so that it picks up the new config.
vagrant@lucid32:/vagrant$ exit
logout
Connection to 127.0.0.1 closed.
$ vagrant reload
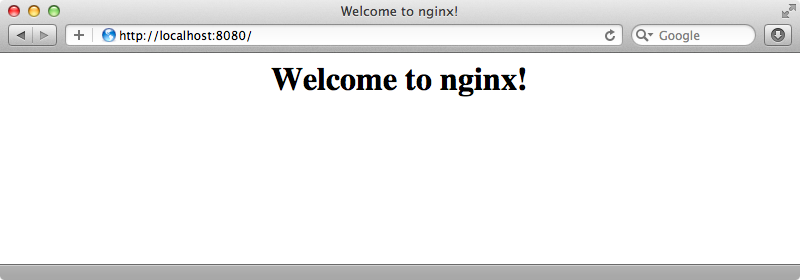
Traffic on port 80 is will now be forwarded to port 8080 on our host machine. The init.d file means that nginx will will have been automatically restarted too. If we visit http://localhost:8080 now we’ll see nginx’s default page.
Configuring nginx
Now that we know that nginx is working let’s take a look at how to configure it. Its main configuration file is at /etc/nginx/nginx.conf and by default it looks like this:
user www-data;
worker_processes  1;

error_log  /var/log/nginx/error.log;
pid        /var/run/nginx.pid;

events {
    worker_connections  1024;
    # multi_accept on;
}

http {
    include       /etc/nginx/mime.types;

    access_log        /var/log/nginx/access.log;

    sendfile        on;
    #tcp_nopush     on;

    #keepalive_timeout  0;
    keepalive_timeout  65;
    tcp_nodelay        on;

    gzip  on;
    gzip_disable "MSIE [1-6]\.(?!.*SV1)";

    include /etc/nginx/conf.d/*.conf;
    include /etc/nginx/sites-enabled/*;
}
We can pretty much leave these settings at their defaults but it’s a good idea to have at least a passing familiarity with them. We can see from the config that we’re running nginx as a user called www-data and that we have one worker process set up that can accept up to 1024 connections. The nginx wiki is a good resource for understanding these settings and the Core Module page has documentation on the main configuration settings.
The main configuration file contains includes for a number of other configuration files such as mime.types for configuring MIME types. At the bottom of the file are two lines that include any .conf files under the /etc/nginx/conf.d/ directory and also any files under the sites-enabled directory. It’s under the sites-enabled directory that we need to put any site-specific configuration.
If we look in sites-enabled we’ll find a single file called default which is a symbolic link to a default file in the sites-available directory. This file contains the configuration information for the site that contains the “Welcome to nginx!” page we saw earlier. We could use this file as a template for our application’s configuration but instead we’ll create it from scratch.
It’s a good idea to keep all of the configuration information inside the Rails app itself and then symlink the file to the correct location on the server. Of course you may need to structure this differently depending on how your server is set up. We’ll create a new file called nginx.conf in our application’s config directory and put just enough configuration information in there to get us started.
server {
 listen 80 default;
 # server_name example.com;
 root /vagrant/public;
}
All we’ve added to the config file is a server block which is similar to a VirtualHost in Apache. We tell the server to listen on port 80 and pass in default to tell nginx to use this server by default if it can’t find a matching server name. If our application had a domain name we could use the server_name option and pass it in but as we’re only viewing our site on localhost we won’t use this. Finally we need to use the root option to tell nginx where the application’s static files are.
Before we try to view our site in a browser we’ll need to remove the default server from the sites-enabled directory and symlink up our configuration file. We’ll symlink it as todo.
vagrant@lucid32:/etc/nginx/sites-enabled$ sudo rm default
vagrant@lucid32:/etc/nginx/sites-enabled$ sudo ln -s /vagrant/config/nginx.conf todo
We’ll need to restart nginx for these changes to be picked up.
vagrant@lucid32:/etc/nginx/sites-enabled$ sudo service nginx restart
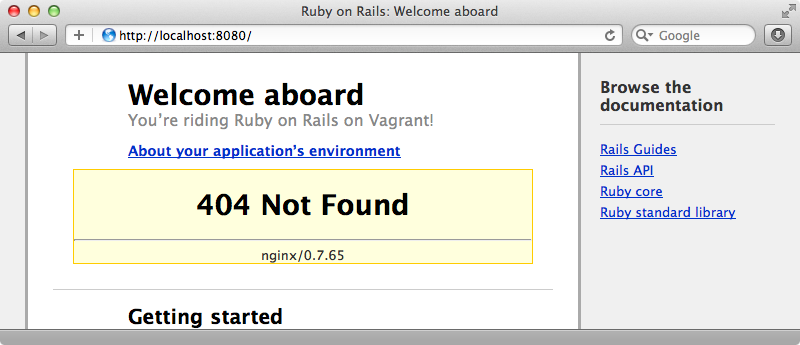
If we visit localhost:8080 on our host machine now we’ll see the “Welcome aboard” page so it looks like our application’s index.html page is being served correctly. Anything dynamically generated by Rails won’t work, however, as the Rails server is currently offline. Note that the image is missing as the asset pipeline isn’t working and that we get a 404 error when we view the environment as this is what nginx returns when we try to view something that isn’t a static file.
Sending Requests To The Rails Application
We need to adjust our configuration file so that it sends requests to our Rails application. We don’t want it to send every request, just the ones where a static file doesn’t exist. We can use try_files to do this.
server {
 listen 80 default;
 # server_name example.com;
 root /vagrant/public;
 try_files $uri/index.html $uri @unicorn;
 location @unicorn {
   proxy_pass http://localhost:3000;
 }
}
We pass try_files a list of locations to try, using the $uri variable which contains the path that the user has passed in in the URL. We check first to see if an index.html file exists at that location and, if not, we then try the location itself. If neither of these exist we fall back to our Rails application. We handle this through what’s known as a named location and we’ve called ours @unicorn. We use the location command to create that named location and inside this command we tell nginx to pass the request off to the Unicorn server by calling proxy_pass. As we don’t have Unicorn set up yet we’ll pass the request off to WEBrick for now.
We’ll need to restart nginx again and then move back to our /vagrant directory and start WEBrick.
vagrant@lucid32:/etc/nginx/sites-enabled$ sudo service nginx restart
vagrant@lucid32:/etc/nginx/sites-enabled$ cd /vagrant
vagrant@lucid32:/vagrant$ bundle exec rails s
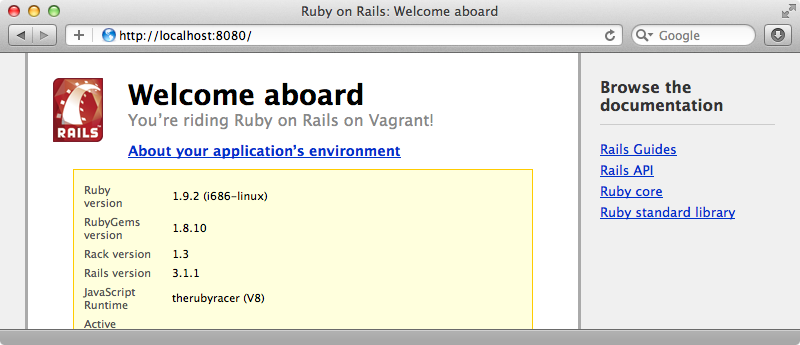
When we try reloading the page now the dynamic content is served by WEBrick.
If we kill the WEBrick server and reload the page again we’ll see 502 errors for the dynamic content as nginx can no longer access our Rails application.
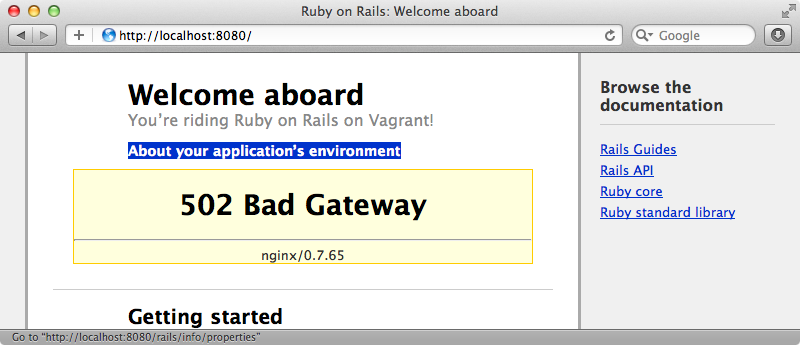
When an error like this happens we should show Rails’ 500 error page rather than the nginx error. To do that we just add the following line to our nginx config file inside the server section. This tells nginx to show our Rails app’s 500.html page when any of the various 500-related errors happen.
error_page 500 502 503 504 /500.html;
There are number of other settings we can change in the nginx config file but we’ll leave it as it is for now and concentrate instead on getting Unicorn up and running.
Installing Unicorn
If you’re unfamiliar with Unicorn then Github’s blog post about it is well worth reading. It contains a lot of useful information on the advantages it provides and also some details on how go get it set up.
To install it we just need to add theunicorn gem to our application’s Gemfile.
gem 'unicorn'We’ll need to run bundle on our virtual machine to finish the installation. Once Unicorn has installed we’ll need to add a configuration file to tell it how to run our application. Unicorn configuration files are written in Ruby so we’ll create a new file at /config/unicorn.rb and add the following code to it.
working_directory "/vagrant"
pid "/vagrant/tmp/pids/unicorn.pid"
stderr_path "/vagrant/unicorn/unicorn.log"
stdout_path "/vagrant/unicorn/unicorn.log"

listen "/tmp/unicorn.todo.sock"
worker_processes 2
timeout 30
In this configuration file we first tell Unicorn in which directory our Rails application lives and specify the path the the pid file and the log files. We then call listen and pass it the path to a socket. (We can alternatively pass in a port number instead.) Finally we call worker_processes to specify the number of Rails instances Unicorn will boot up and specify a timeout, which we’ll set to 30 seconds. If the Rails application doesn’t respond in this time Unicorn will quit it and boot it up again. There’s more information on Unicorn’s configuration options on the Configurator page on the Unicorn website.
We given Unicorn enough configuration information now to try starting it up and we do this by running the unicorn command through bundle, passing it the path to our configuration file via a -c option and also -D to make it a daemonized process. (There’s also a unicorn_rails command available but we don’t need to use it as Rails 3 is fully Rack-compatible.)
vagrant@lucid32:/vagrant$ bundle exec unicorn -c config/unicorn.rb -D
If we don’t see any errors then Unicorn should have booted up correctly. Before we can view the page in a browser though we’ll need to modify the nginx configuration file to pass dynamic pages to Unicorn rather than to WEBrick. We do this through an upstream block that we give a name. In this block we use server and point it to a Unix socket, which is the one we used in the Unicorn configuration file. We also set the fail_timeout to 0 here so that if our Rails application fails to respond and Unicorn times out this is handled correctly. Lower down in the file we now set proxy_pass to http://unicorn so that it points to the upstream block above.
upstream unicorn {
  server unix:/tmp/unicorn.todo.sock fail_timeout=0;
}

server {
 listen 80 default;
 # server_name example.com;
 root /vagrant/public;
 try_files $uri/index.html $uri @unicorn;
 location @unicorn {
   proxy_pass http://unicorn;
 }
 error_page 500 502 503 504 /500.html;
}
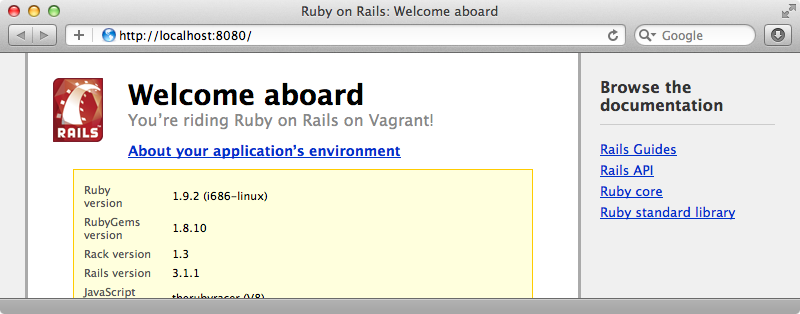
After we’ve restarted nginx again we can view the page through Unicorn on port 8080.
More nginx Configuration
The configuration options we’ve passed to nginx are the bare minimum needed to get everything up and running but there will likely be other options that you’ll want to use. The Unicorn project’s Github pages have a number of different example configurations including one for nginx. This example configuration is very well documented and it’s well worth taking a look through it and picking out the sections you’ll need for your own application’s config files. For example there are several proxy options that we should pass in to the location block for setting various headers and turning off the redirect handling. Also we should set client_max_body_size so that users can upload large files and keepalive_timeout.
location @unicorn {
  proxy_set_header X-Forwarded-For $proxy_add_x_forwarded_for;
  proxy_set_header Host $http_host;
  proxy_redirect off;
  proxy_pass http://unicorn;
}

client_max_body_size 4G;
keepalive_timeout 5;
error_page 500 502 503 504 /500.html;
Finally, if we’re on a Linux system we should add the deferred option to the listen command so that it uses the TCP Defer Accept option.
server {
 listen 80 default;
 # Rest of block omitted.
}
All of these options are well documented in the nginx wiki so if you need any more information on there then check there.
Using an init.d script to start Unicorn Automatically
While we’re looking through the Unicorn examples we’ll take a look at the init shell script, an example init.d shell script that we can use to start up and manage the Unicorn process. We’ll add this script to our server as unicorn_init.sh in the /config directory. Before we can use it there are some variables at the top of the file that we’ll need to set and one of these is the path to the unicorn executable but as we installed Unicorn through Bundler how do we set this?
Bundler has a solution for this. If we run bundle install --binstubs. This will generate a /bin directory in our application that will contain executables for all of the gems that Bundler manages.
vagrant@lucid32:/vagrant$ ls bin
erubis              rake          ri                        scss         tilt  unicorn       rackup        rake2thor  sass
therubyracer  tt      unicorn_rails rails         rdoc         sass-convert  thor          turn
We can now specify this unicorn executable in CMD. We’ll also need to change the APP_ROOT variable so that it points at our Rails application.
#!/bin/sh
set -e
# Example init script, this can be used with nginx, too,
# since nginx and unicorn accept the same signals

# Feel free to change any of the following variables for your app:
TIMEOUT=${TIMEOUT-60}
APP_ROOT=/vagrant
PID=$APP_ROOT/tmp/pids/unicorn.pid
CMD="$APP_ROOT/bin/unicorn -D -c $APP_ROOT/config/unicorn.rb"
#INIT_CONF=$APP_ROOT/config/init.conf
action="$1"
set -u

#test -f "$INIT_CONF" && . $INIT_CONF
There’s also an INIT_CONF option in the example file that points to an application-specific config file. We don’t need that here as this file will be our application config file so we can remove this and also the test command that calls this variable.
This script runs as the root user and therefore Unicorn and our Rails application will also run as root. We want to run them as the vagrant user so we’ll replace each call to $CMD in the file with this:
su -c "$CMD" - vagrant
We’ll need to make this file executable, which we can do by running
vagrant@lucid32:/vagrant$ chmod +x config/unicorn_init.sh
Finally we’ll need to create a link to this file in the init.d directory. We’ll just call it unicorn but if you’re running multiple applications you’ll want to make this name more specific.
vagrant@lucid32:/vagrant$ sudo ln -s /vagrant/config/unicorn_init.sh /etc/init.d/unicorn
We can now run the file with
vagrant@lucid32:/vagrant$ sudo service unicorn restart
reloaded OK
With all of this set up we should be able to restart the server and have nginx and Unicorn boot up automatically for us. However, as we’re running under Vagrant there’s a catch and this won’t work. Vagrant mounts the /vagrant shared folder that contains our Rails application after the virtual machine boots up and therefore after the init.d scripts are run. This means that when the init scripts run the init.sh file in our app’s config directory won’t be available and so we have to start up the services manually.
vagrant@lucid32:/vagrant$ sudo service nginx restart
Restarting nginx: the configuration file /etc/nginx/nginx.conf syntax is ok
configuration file /etc/nginx/nginx.conf test is successful
nginx.
vagrant@lucid32:/vagrant$ sudo service unicorn restart
reloaded OK
If we were setting up a physical server this way we wouldn’t have to worry about this as the config scripts will be available as the machine boots up.
If we visit our application at localhost:8080 again it still works. We’re still running it in development mode, however. To run it in production mode we pass the -E option to Unicorn and specify the environment.
CMD="$APP_ROOT/bin/unicorn -D -c $APP_ROOT/config/unicorn.rb -E production"
Handling Local Versions of Ruby
There’s one more thing to note about the binstubs we set up earlier. If we take a look at one of them we can see that it’s a script that runs under /usr/bin/env/ruby.
#!/usr/bin/env ruby
#
# This file was generated by Bundler.
#
# The application 'unicorn' is installed as part of a gem, and
# this file is here to facilitate running it.
#

require 'pathname'
ENV['BUNDLE_GEMFILE'] ||= File.expand_path("../../Gemfile",
  Pathname.new(__FILE__).realpath)

require 'rubygems'
require 'bundler/setup'

load Gem.bin_path('unicorn', 'unicorn')
This is fine for us as we set up a global version of Ruby 1.9.2 when we setup rbenv. If we specify a local version of Ruby to use for this project like this (this is, of course, the same version we’re using globally) this will add a .rbenv-version file to our project specifying the Ruby version we want to run the application under.
vagrant@lucid32:/vagrant$ rbenv local 1.9.2-p290
If the local version is different from the global version then we’ll run into issues when we run the commands in the bin directory. To fix this we can do a find and replace across the bin files and replace any call to ruby with ruby-global-exec. This will ensure that the local version of Ruby is always run.
vagrant@lucid32:/vagrant$ sed -i 's/env ruby/env ruby-local-exec/' bin/*
That’s it for this episode on nginx and Unicorn. We haven’t been able to cover everything here. One thing we haven’t mentioned that’s worth taking a look at is Unicorn’s preload_app option. This loads a Rails app before its forked off to separate processes. This approach will load up large applications much more quickly.
There are a couple of other blog posts that are worth reading, too. One, by Tyler Bird, is called “Everything You Need to Know About Unicorn” and contains a lot of interesting information to help you understand Unicorn. The other is by Ryan Tomayko and is called “I Like Unicorn because it’s Unix”. This post does a great job in explaining how Unicorn works underneath.


