#279 Understanding the Asset Pipeline
- Download:
- source codeProject Files in Zip (438 KB)
- mp4Full Size H.264 Video (24.8 MB)
- m4vSmaller H.264 Video (13.5 MB)
- webmFull Size VP8 Video (17.5 MB)
- ogvFull Size Theora Video (28.5 MB)
The asset pipeline is one of the biggest new features in Rails 3.1 but it can also be the most confusing. In this episode we’ll attempt to demystify it a little by showing how it manages your Rails applications’ assets. If you’re completely unfamiliar with it a good place to start is the a Rails Guide on the asset pipeline as this covers a lot of its features.
If you’ve written any Rails 3.1 applications you’ll probably know that if you visit http://localhost:3000/assets/application.js you’ll get a file containing all of your application’s JavaScript. But how does this work?
There’s nothing special about the application.js file; any file that is put under the /app/assets/javascripts directory is just as accessible. If, for example, we create a file in that directory called greeting.txt we can view it in a browser in a similar way at http://localhost:3000/assets/greeting.txt. Even though the file is under /app/assets/javascripts the URL we access it from is /assets/greeting.txt. This applies no matter what subdirectory under /app/assets we put the file in. We can even create a new directory and put the file in there and it’ll still be available at the same URL. If we do create a new directory however, we’ll need to restart the server before any files we put in there are accessible.
The /app/assets directory isn’t the only place that we can add assets. If we create an assets directory under /lib any files we add there will be accessible from there as if they were in the main /app/assets directory. This also applies to any files under a /vendor/assets directory.
If you have assets that are not really specific to the current application then assets directories under either /lib or /vendor are ideal places for them. If our app uses a jQuery plugin then the /vendor/assets directory is a good place for its JavaScript files as these are something that’s maintained by someone else. For assets that we do maintain but which aren’t specific to our application the /lib directory is a good place.
At its most basic the asset pipeline is a list of loadpaths. We can see this list by running the console and viewing Rails.application.config.assets.paths. We’ll view the output as YAML to make it easier to read.
> y Rails.application.config.assets.paths
---
- /Users/eifion/store/app/assets/images
- /Users/eifion/store/app/assets/javascripts
- /Users/eifion/store/app/assets/stylesheets
- /Users/eifion/store/lib/assets/greeting.txt
- /Users/eifion/store/vendor/assets/stylesheets
- /Users/eifion/.rvm/gems/ruby-1.9.2-p180@railspre/gems/jquery-rails-1.0.13/vendor/assets/javascripts
The output shows every directory under the /app/assets directory and also those under /lib/assets and /vendor/assets. There’s an interesting directory at the end of the list which comes from the jquery-rails gem that we’ve included in our application. We can look at its contents with the bundle open command.
$ bundle open jquery-rails
This opens the gem with the text editor defined by our shell’s BUNDLER_EDITOR or EDITOR environment variables. If we look at the gem’s files we’ll see a vendor/asset/javascripts directory containing a number of jQuery files that we can load through the asset pipeline.
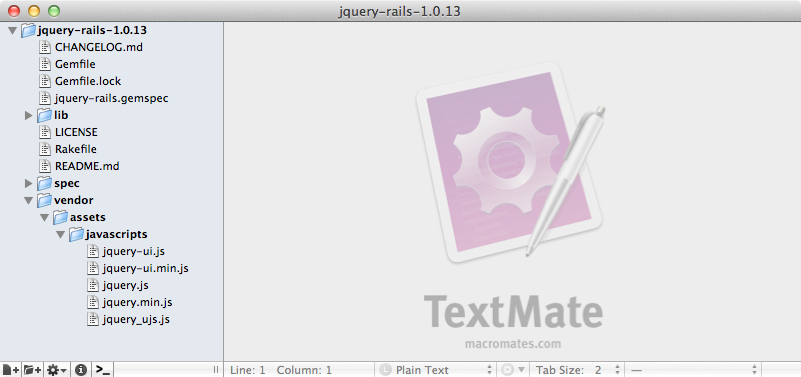
As you might expect we can access any of these files in a browser under the assets path as the directory they’re in is in the asset pipeline’s loadpath.
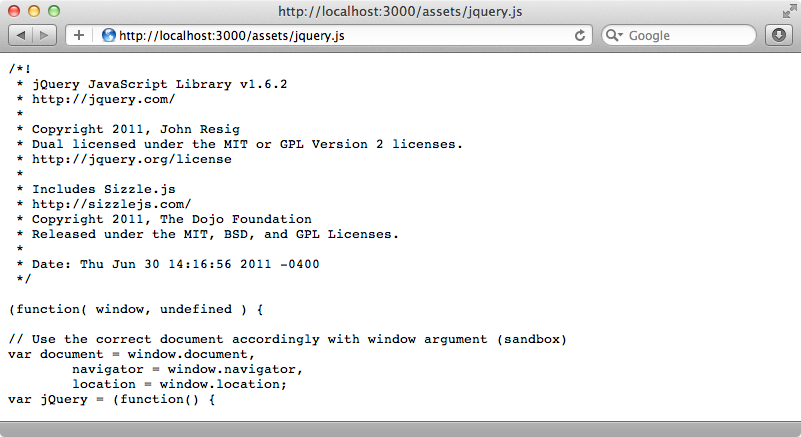
This is interesting because it means that Ruby gems are no longer just about managing Ruby code. We can use them to manage Javascript and any other assets in them as well. It’s likely that we’ll soon see more JavaScript libraries being distributed as Ruby gems so that they can have all of the benefits of Bundler and the dependency management it provides.
Managing Assets With Sprockets
Let’s go back to our application’s application.js file now and take a look at it.
// This is a manifest file that'll be compiled into including all the files listed below.
// Add new JavaScript/Coffee code in separate files in this directory and they'll automatically
// be included in the compiled file accessible from http://example.com/assets/application.js
// It's not advisable to add code directly here, but if you do, it'll appear at the bottom of the
// the compiled file.
//
//= require jquery
//= require jquery_ujs
//= require_tree .
The file only contains comments but some of these are significant. This type of file is known as a manifest and it’s managed internally by Sprockets. When a request comes in for this file Sprockets looks at the manifest and compiles together every file that is mentioned in it and includes their contents before any code in this file.
The loadpath works here as well. We have require jquery in this file (the extension .js is optional and can be left off). Sprockets will search the loadpath for this file and, in this case, load it from the jquery-rails engine’s vendor/asset/javascripts directory.
We can add any JavaScript file that’s in the loadpath here. So if we add require jquery-ui to the file the gem’s jquery-ui.js file will be included. This applies to CoffeeScript files too; if we include require home the /app/assets/javascripts/home.js.coffee file will be parsed and included.
Including that home file isn’t necessary, however, as at the bottom of the file we have require_tree . and the dot here represents the current directory. This means that every JavaScript or CoffeeScript file in that directory and its subdirectories will be included.
If we want to exclude certain files from the tree we can do so. Let’s say that we have some admin pages on the site and some JavaScript files that should only be included when we’re viewing one of those pages. By default these files will be included on all of the site’s pages.
If we want to see the files that are included we can add a debug_assets=1 parameter to the URL. This will stop the JavaScript files from being combined and when we view the page’s source we’ll see all of the files that Sprockets would include, including the file in the admin directory.
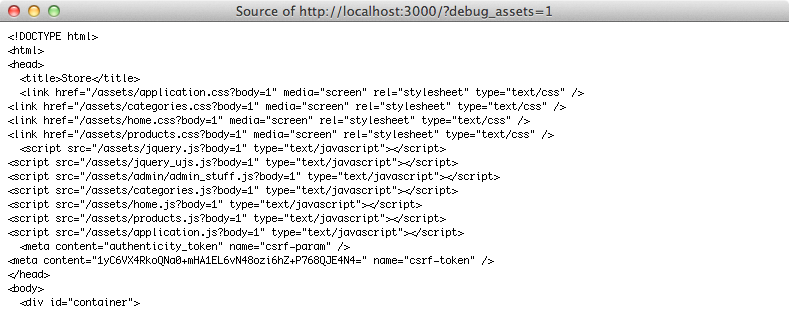
There are a couple of ways that we can get around this problem. We could use require_directory instead of require_tree as this will only load the files in the current directory and not in subdirectories. If we want more control over the included files we can require them separately instead of including the whole directory. Alternatively we could move the JavaScript files that we want to be included on all pages into a public subdirectory. We can then use require_tree ./public to include just those files.
You might be wondering what commands can be passed into the Sprockets manifest. There isn’t a good source of documentation yet but within the directive_processor.rb file in the source code are comments that explain how it works and the various commands that can be passed in.
Preprocessing
The asset pipeline also handles preprocessing. To show how this works we’ll create a file called greeting.txt in a new /app/assets/anything directory. As it stands this is just a static text file but we can add another extension to the file name and specify a processor, for example .erb. We can now add ERB code to this file and it will be processed.
hello world <%= 1 + 1 %>If we look at this file in a browser we’ll see that the ERB code has been processed. Note that we don’t include the preprocessor extension in the URL.
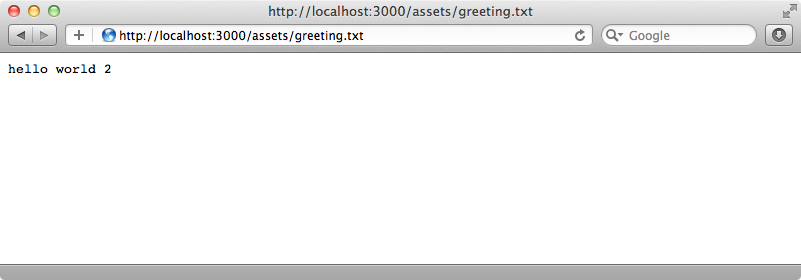
This is basically how SASS and CoffeeScript work. When a file has an .scss extension this is treated as a preprocessor extension and the file will be passed through the SASS processor. We can even chain the extensions and create a file with, for example, an .scss.erb extension. This file would first be passed through the ERB processor and then the SASS processor.
The preprocessor is very configurable. We can add our own processors or swap out the existing ones. This is all handled by the Tilt gem and there’s more information on how it works and the extensions you can use there.
Differences in Production Mode
That’s it for our quick walkthrough of the asset pipeline’s features. There are some differences in how the pipeline works in production mode and we’ll spend the rest of the episode covering these. First, we’ll start up the server in production mode.
$ rails s -e production
If we visit our application’s homepage now and view the source we’ll see that our assets are delivered differently.
<link href="/assets/application-412fe22651f4486c51e54176003a9f57.css" media="screen" rel="stylesheet" type="text/css" />
  <script src="/assets/application-3e3a5167191afa70c7b72440eee7dd40.js" type="text/javascript"></script>
The filenames now include a hash and this is done for caching purposes. This works much better than the old method of adding a querystring that Rails 3.0 uses as it actually changes the filename. Also, if we look at the file itself we’ll see that the JavaScript is minified, saving bandwidth.
These assets are automatically cached and served by the Rack Cache middleware so they’re pretty fast. If we want to have the webserver itself handle serving and hosting the assets instead we can precompile them by running
$ rake assets:precompile
This will precompile the assets into the /public directory so that they’re easy accessible by the web server.
That’s it for this episode on the asset pipeline. Don’t forget to checkout the Rails Guide for more information on it.


