#231 Routing Walkthrough Part 1
This week’s episode will be a little different. We’re going to dive into the internals of Rails 3 and take a look at some of its code, focussing on the code that handles routing. Below is the routes file for the Store application from the last episode. So that we can know what this routing code actually does we’re going to look at the Rails code that is called when it’s run.
Store::Application.routes.draw do
  resources :products do
    resources :reviews
  end
  root :to => "products#index"
end
You might wonder what the point of this is and if it’s worth browsing around other code, but in my opinion it is as reading Ruby code written by other people is a great way of improving your own Ruby skills. You’ll see tricks and techniques that other people use that you can use later in your own code. Reading the Rails source code is also a good way to learn how to use Rails better and in this case we may well find better ways to write the routes file. If you’re trying to debug a problem or optimize some code in one of your projects or if you’re even considering contributing to Rails then learning its internals is a great way to do so.
Getting Started
This episode covers some more advanced features so we’ll assume that you already know how routing works in Rails 3. If you don’t, or if you want to refresh your knowledge then you’re encouraged to watch or read episode 203 first as the routing syntax is quite different from Rails 2’s.
The Rails source code is hosted on Github and it’s easy to clone the repository so that you can browse through it. We just need to run
$ git clone git://github.com/rails/rails.git
The master branch of the repository we downloaded is for Rails 3.1, which is the version currently in development but we want to look at the same version that our application was written with. We can switch to the version tagged 3.0.0 by running
$ git checkout v3.0.0
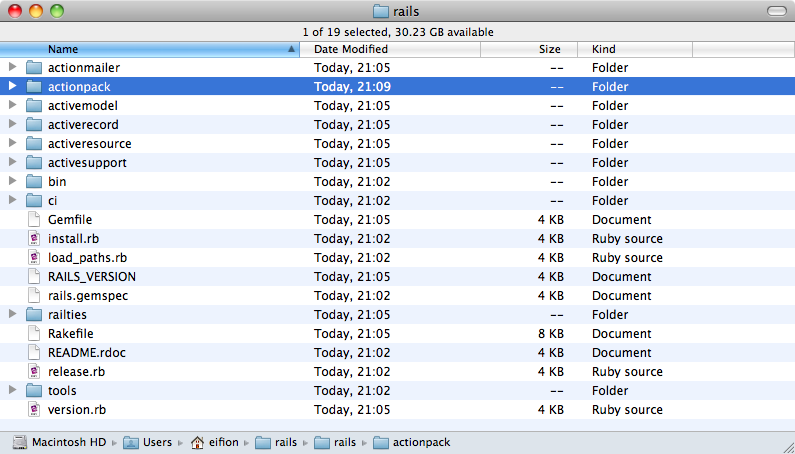
If we open up the Rails directory we’ll see that Rails is made up from many different parts. Anything related to controllers, views or routes is located in the actionpack directory so it’s this part of the code that we’re interested in.

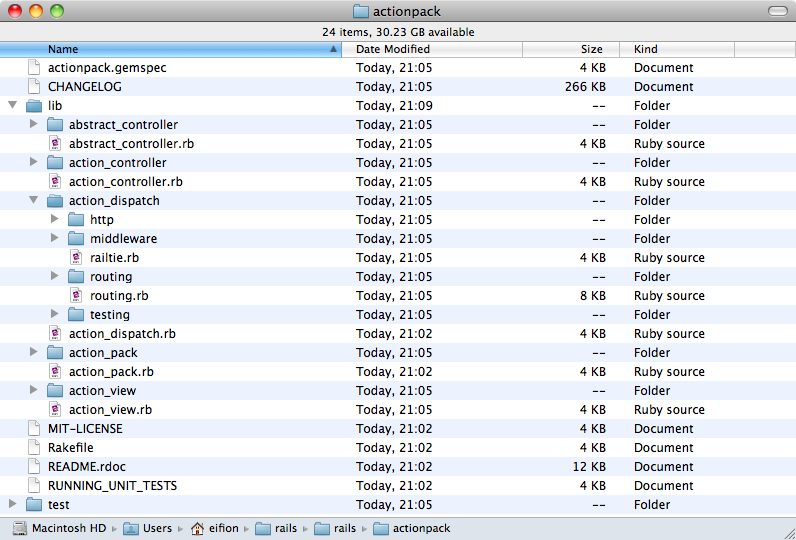
Under actionpack most of the code related to routing is under the lib/action_dispatch directory.

The routes and draw methods
Before we start looking at the Rails source code let’s go back to our application and look again at its routes file.
Store::Application.routes.draw do
  resources :products do
    resources :reviews
  end
  root :to => "products#index"
end
The first line of the code above calls a method called routes on Store::Application, where Store is the name of the application. If we look in the application’s application.rb file we’ll see that the application name is defined there.
require File.expand_path('../boot', __FILE__)

require 'rails/all'

# If you have a Gemfile, require the gems listed there, including any gems
# you've limited to :test, :development, or :production.
Bundler.require(:default, Rails.env) if defined?(Bundler)

module Store
  class Application < Rails::Application
     # Configure sensitive parameters which will be filtered from the log file.
    config.filter_parameters += [:password]
  end
end
The Store::Application class is where a lot of the application’s configuration takes place and it inherits from Rails::Application. Anything prefixed with the Rails namespace is usually defined in the railties directory in the Rails source code; the code for the Rails::Application class is defined in rails/railties/lib/rails/application.rb and in this file we’ll find the routes method.
def routes
  @routes ||= ActionDispatch::Routing::RouteSet.new
end
This is the method that’s called in our application’s routes file and all it does is create a new ActionDispatch::Routing::RouteSet. The routes method returns this new RouteSet and in the first line of our routes file we then call draw on that. Let’s see what the draw method does.
In the Rails source code a class can often be found in a file with a similar name and the RouteSet class is no exception. In the class we’ll find the draw method.
def draw(&block)
  clear! unless @disable_clear_and_finalize

  mapper = Mapper.new(self)
  if block.arity == 1
    mapper.instance_exec(DeprecatedMapper.new(self), &block)
  else
    mapper.instance_exec(&block)
  end

   finalize! unless @disable_clear_and_finalize

   nil
end
The draw method takes a block as an argument. First it clears any existing routes, then it creates a new Mapper object, passing self (the RouteSet) to it. (We’ll take a look at the Mapper class shortly.) The method then checks the arity of the block, that is how many arguments have been passed to it. If an argument has been passed then this means that the routing file is using the Rails 2 routing syntax. This is done so that the application can work with Rails 2 routes which had a map variable passed to the block like this:
Store::Application.routes.draw do |map|
  # Rails 2 routes...
end
Whether our application uses Rails 2 or Rails 3 style routing it calls instance_exec next. For Rails 3 routes the block is passed straight in as an argument, whereas if the application uses Rails 2 style routes a new DeprecatedMapper object is created first and this is passed in instead. This will execute the block as if it was inside the instance which means that inside the block in a routes file everything is called against a Mapper object. This is what gives us the cool domain-specific language syntax in Rails 3 routes where we can just call methods such as resources and not have call them against a specific object as we did in Rails 2 when we’d use map.resources.
The last thing that the draw method does is call finalize! which is defined lower down in the RouteSet class and which freezes the set of routes.
How a Route is Mapped
Now we know that everything inside a Rails 3 routes file is called against a Mapper object let’s use a simple route as an example and see how it is processed.
Store::Application.routes.draw do
  match 'products', :to => 'products#index'
end
Let’s take a look at the Mapper class to see what the match method does. There are a number of methods called match in the class; the one we’re interested in is in the Base module.
module Base
  def initialize(set) #:nodoc:
    @set = set
  end

  def root(options = {})
    match '/', options.reverse_merge(:as => :root)
  end

  def match(path, options=nil)
    mapping = Mapping.new(@set, @scope, path, options || {}).to_route
    @set.add_route(*mapping)
    self
  end

  # other methods

end
To create a new Mapper object we need to pass in a RouteSet. When the match method is called in the routes file to create a new route this new route is added to the set. This is done by creating a new Mapping object and then calling to_route on it. Note also the root method, which is really simple. All it does is call match, passing in the root URL and then adding the :as => :root option so that it’s a named route. When you create a root URL in your routes, it’s just calling match behind the scenes.
Next we’ll take a look at the Mapping class, which is contained in the same mapper.rb file.
class Mapping #:nodoc:
  IGNORE_OPTIONS = [:to, :as, :via, :on, :constraints, :defaults, :only, :except, :anchor, :shallow, :shallow_path, :shallow_prefix]

  def initialize(set, scope, path, options)
    @set, @scope = set, scope
    @options = (@scope[:options] || {}).merge(options)
    @path = normalize_path(path)
    normalize_options!
  end

  def to_route
    [ app, conditions, requirements, defaults, @options[:as], @options[:anchor] ]
  end

  private

  def normalize_options!
    path_without_format = @path.sub(/\(\.:format\)$/, '')

    if using_match_shorthand?(path_without_format, @options)
      to_shorthand    = @options[:to].blank?
      @options[:to] ||= path_without_format[1..-1].sub(%r{/([^/]*)$}, '#\1')
      @options[:as] ||= Mapper.normalize_name(path_without_format)
    end

    @options.merge!(default_controller_and_action(to_shorthand))
  end

  # other private methods omitted.

end
When the a Mapper is initialized some instance variables are set from the parameters that are passed in and then normalize_options! is called. The normalize_options! method checks to see if we’re using a certain shorthand syntax in the route and in the using_match_shorthand? method that’s called we pick up an interesting tip. There is a shorthand way of defining controller actions where we separate the controller and action names with a slash.
# match "account/overview"
def using_match_shorthand?(path, options)
  path && options.except(:via, :anchor, :to, :as).empty? && path =~ %r{^/[\w\/]+$}
end
If we have defined our route this way then the :to and :as options will be set for us depending on the name of the URL. Let’s demonstrate this back in our application’s routes file by adding another route that uses this shorthand syntax.
Store::Application.routes.draw do
  match 'products', :to => 'products#index'
  match 'products/recent', :to => 'products#recent'
end
We have supplied a :to parameter to this new route but it is filled in automatically if we miss it out. The shortcut method will also automatically create an :as parameter as if we had added :as => :products_recent.
How Rack is Used in Routing
Back in the match method, once we’ve created a new Mapping object we call to_route on it. This method returns an array of options that are used to make a new route.
def to_route
  [ app, conditions, requirements, defaults, @options[:as], @options[:anchor] ]
end
The first four elements in the array above are values returned from calls to methods in the Mapper class.
def app
  Constraints.new(
    to.respond_to?(:call) ? to : Routing::RouteSet::Dispatcher.new(:defaults => defaults),
    blocks,
    @set.request_class
  )
end

def conditions
  { :path_info => @path }.merge(constraints).merge(request_method_condition)
end

def requirements
  @requirements ||= (@options[:constraints].is_a?(Hash) ? @options[:constraints] : {}).tap do |requirements|
    requirements.reverse_merge!(@scope[:constraints]) if @scope[:constraints]
    @options.each { |k, v| requirements[k] = v if v.is_a?(Regexp) }
   end
end

def defaults
  @defaults ||= (@options[:defaults] || {}).tap do |defaults|
    defaults.reverse_merge!(@scope[:defaults]) if @scope[:defaults]
    @options.each { |k, v| defaults[k] = v unless v.is_a?(Regexp) || IGNORE_OPTIONS.include?(k.to_sym) }
  end
end
The first option is app and whenever you see something called app in the Rails source code the chances are that it refers to a Rack application. This app method returns a new Constraints object so let’s see if that is a Rack application.
The Constraints class is defined in the same mapper.rb file. It takes has a number of methods, one of which is called call and takes an environment as a parameter.
def call(env)
  req = @request.new(env)

  @constraints.each { |constraint|
    if constraint.respond_to?(:matches?) && !constraint.matches?(req)
      return [ 404, {'X-Cascade' => 'pass'}, [] ]
    elsif constraint.respond_to?(:call) && !constraint.call(*constraint_args(constraint, req))
      return [ 404, {'X-Cascade' => 'pass'}, [] ]
    end
  }

  @app.call(env)
end
The Constraints class does indeed look like a Rack application. An interesting thing about the Constraints class is that it overrides the self.new method and you might wonder why a class would do that when it has its own initialize method.
def self.new(app, constraints, request = Rack::Request)
  if constraints.any?
    super(app, constraints, request)
  else
    app
  end
end

attr_reader :app

def initialize(app, constraints, request)
  @app, @constraints, @request = app, constraints, request
end
The reason for this is performance. Constraints is a piece of Rack middleware, in other words it wraps another Rack application. The first argument passed to self.new is app, which is a Rack app and when the call method’s called, if any of the constraints are triggered it will return a 404, otherwise it will trigger the Rack application that it’s wrapping. The self.new method is a piece of performance tuning so that when it’s called Rails won’t allocate another object in memory, wrap it and use it, instead it will just return the initial Rack application itself.
Now back to the code that calls this. Note that the first two arguments are a Rack application and an array of constraints. This is called in the app method of the Mapping class. When creating a new constraint here we check to see that the to method responds to call. (The to method simply returns the :to option that was defined for the route.) If it does it’s a Rack application and we pass it in; if not then it passes in a new RouteSet::Dispatcher object with some default options.
def app
  Constraints.new(
    to.respond_to?(:call) ? to : Routing::RouteSet::Dispatcher.new(:defaults => defaults),
    blocks,
    @set.request_class
  )
end
It’s this code that gives us the ability to pass a Rack application to a route like this:
root :to => proc { |env| [200, {}, ["Welcome"]] }
There’s more about using Rack in routes in episode 222 [watch, read]. Being able to use it in routes gives us a lot of flexibility.
If we don’t pass a Rack application to the :to option then a new RouteSet::Dispatcher object is created. We’ll take a look at how that’s handled now.
The Dispatcher class handles passing a request to the correct controller. In its controller_reference method you can see the code where the correct controller is determined.
def controller_reference(controller_param)
  unless controller = @controllers[controller_param]
    controller_name = "#{controller_param.camelize}Controller"
    controller = @controllers[controller_param] =
       ActiveSupport::Dependencies.ref(controller_name)
  end
  controller.get
end
This class also has methods to do things like setting the default action to index if one hasn’t been specified and a dispatch method which calls the action itself and which returns a Rack application. What this means is that we can take any of our application’s controllers, call action on it passing in the name of the action and have a Rack application returned.
ruby-1.9.2-p0 > ProductsController.action("index")
 => #<Proc:0x00000100ec56c0@/Users/eifion/.rvm/gems/ruby-1.9.2-p0/gems/actionpack-3.0.0/lib/action_controller/metal.rb:172>
This is what happens behind the scenes when we pass in a route like this.
match 'products', :to => 'products#index'
The string products#index is converted to ProductsController.action("index") and that returns a Rack application. The string syntax is merely a shortcut way of doing the same thing.
There’s a lot more about routing we could cover here but this is a good place to stop. There are the resources methods that generate a number of routes, there are various methods that allow us to scope conditions and pass blocks to them so that we can cascade scopes but hopefully there’s enough here to encourage you to look into the routing code yourself.
Routing is one of the more complicated areas of Rails so if you’re a little intimidated by the complexity of the code here the don’t worry, it is difficult. Start with the some of the other parts of the Rails code first and get up to speed with that before tackling the more complex parts.


