#162 Tree Based Navigation
- Download:
- source codeProject Files in Zip (111 KB)
- mp4Full Size H.264 Video (15.5 MB)
- m4vSmaller H.264 Video (11 MB)
- webmFull Size VP8 Video (27.5 MB)
- ogvFull Size Theora Video (21.3 MB)
In questo episodio scriveremo un basilare sistema di gestione contenuti che ha una gerarchia di pagine. Creeremo una nuova applicazione Rails da zero e useremo acts_as_tree per aiutarci a definire le relazioni tra le pagine. Il plugin acts_as_tree è in giro da un po’ di tempo, ma è ancora utile se si vogliono creare strutture ad albero omogenee con un singolo modello.
Configurazione dell’ applicazione
Creiamo un nuovo progetto Rails, che chiamiamo navigator.
rails navigator
Fatto ciò, andiamo dentro alla cartella radice del progetto appena generato e installiamo il plugin dalla sua pagina Github.
cd navigator
script/plugin install git://github.com/rails/acts_as_tree.git
Ora creiamo un layout per il nostro sito. Per generare i file di layout, usiamo uno dei nifty generators di Ryan Bates. Se non avete già installato il gem per tali generatori, lo potete installare con
sudo gem install nifty-generators
Possiamo ora lanciare il generatore di layout per creare i file di layout dell’applicazione, gli stylesheet e un helper di layout.
script/generate nifty_layout
Creare il modello di pagina
Ora che la nostra applicazione ha un layout e apparirà un po’ più carina, possiamo concentrarci sulla creazione del modello per le pagine. Vogliamo creare una risorsa chiamata Page che può avere un comportamento simil-albero e avere sottopagine. Un modello che utilizza acts_as_tree necessita di un campo di tipo integer chiamato parent_id, inoltre il modello Page dovrà avere un campo string chiamato name e un campo text chiamato content. Per rendere la creazione della risorsa Page più semplice potremmo usare un’altro generatore nifty per creare uno scaffold
script/generate nifty_scaffold page parent_id:integer name:string content:text
We now have a model, a controller, view files and all of the related items we need for our Page resource. To finish setting it up we’ll need to run the database migration that the scaffold created.
rake db:migrate
Among the view files generated by the scaffold will be a form to create or edit a Page. This form will have textboxes for each of the string or integer fields in the Page model, but a page’s parent_id will always be the id of another page, so we’ll replace the textbox for that field with a dropdown list that contains all of the pages.
The relevant section of /app/views/pages/_form.html.erb looks like this.
<%= f.label :parent_id %><br />
    <%= f.text_field :parent_id %>
The text_field can be replaced by a collection_select. This is generally what you want to use if you’re defining a belongs_to relationship, as we are here, where each Page belongs to another Page.
<%= f.label :parent_id %><br />
  <%= f.collection_select :parent_id, Page.all(:order => "name"), :id, :name, :include_blank => true %>
The collection_select method takes a number of parameters. We need to pass it the name of the field; the collection of Page models, ordered by date; the fields from Page it should use for the value and text for each item and finally we’ll tell it to include a blank item at the top of the list.
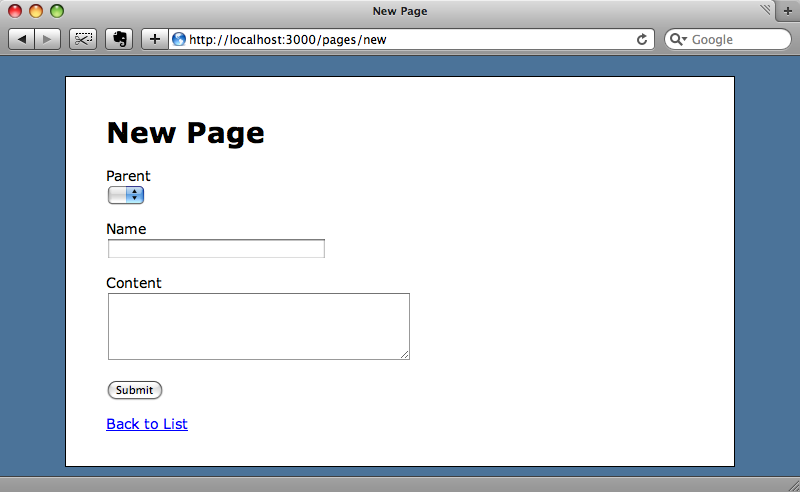
The form now has a dropdown for the parent page. Obviously as we don’t have any pages yet it will be empty, but as we create pages it will fill up.
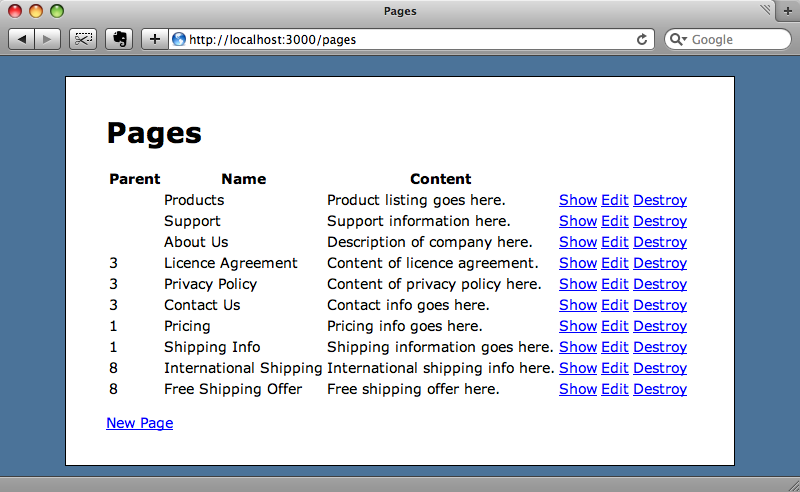
And here is the list page after we’ve added some pages. The first three pages have no parent_id so are root nodes, while the other ones are child nodes.
Creating a Menu Structure
We’ll use this data to create a menu system for our application. We want the root notes to appear in a horizontal menu across the top of each page and the child nodes for the page we’re on to appear down the left-hand side. To start we’ll have to update our Page model. Although we’ve defined a parent_id column we haven’t added the functionality to the model to enable a Page to know what its parents and children are. Adding acts_as_tree to the model will do this.
class Page < ActiveRecord::Base
  acts_as_tree
end
The root menu will be the same on every page so we’ll put it in the application’s layout file.
<ul id="menu">
  <% for page in Page.roots %>
    <li><%= link_to h(page.name), page %></li>
  <% end %>
</ul>
In the code above we call the class method roots on Page which is one of the methods that acts_as_tree provides and which will return an array of all of the pages that have no parent_id. We can then loop through this array to create an unordered list of links. Each link will show the page’s name and link to the show action for that page.
A list of bulleted links doesn’t look too pretty so we’ll add some CSS to style the menu.
#menu { list-style: none; margin: 0; padding: 0; float: left; width: 100%; }
#menu li { margin: 0 2px; padding: 0; float: left; }
#menu li a { display: block; padding: 4px 8px; text-decoration: none; border: solid 1px black; color: black; background-color: #AEBBE2; }
#menu li a:hover { color: white; background-color: #4A63B8; }
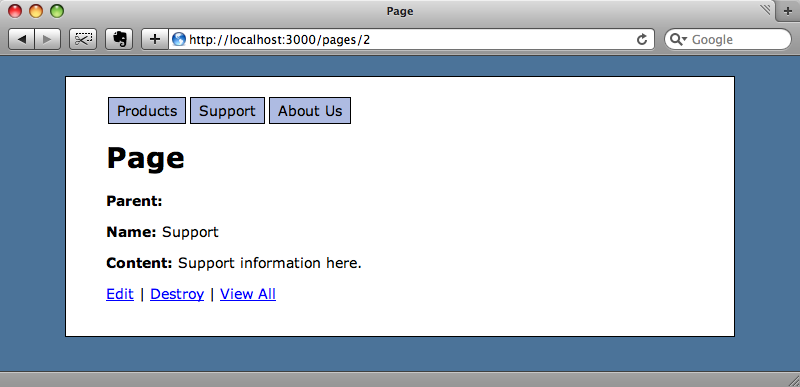
We now have a menu at the top of each page that will take us to a root page when we click on a link.
Tidying Up The View
By default the show view lists all of the fields for a model, but we only really want to show the content field. We’ll tidy up the view code before we carry on.
<% title @page.name %>
<%= simple_format(@page.content) %>
<p>
  <%= link_to "Edit", edit_page_path(@page) %> |
  <%= link_to "Destroy", @page, :confirm => 'Are you sure?', :method => :delete %> |
  <%= link_to "View All", pages_path %>
</p>
The simple_format method will add basic formatting to the content by turning single line breaks into <br/> elements and wrapping text separated by double line breaks in paragraph tags. Note that we’ve updated the page’s title so that the name is shown rather than the word “Page”.
Writing The Sub Menu
Having tidied the view up a little we can now create the sub menu. Like the main menu it will be rendered as an unordered list.
<ul id="submenu">
  <% for page in @page.children %>
  <li><%= link_to h(page.name), page %></li>
  <% end %>
</ul>
The difference with this menu is that instead of rendering the all of the root pages, it uses the children method to find the immediate children of the current page.
As we’re using the nifty_layout generated code the menu will appear below the page’s title, which we don’t want. We can pass false as a second argument to the title method to stop it adding the title to the layout file and then manually re-add the title below the menu. The show code will now look like this:
<% title @page.name, false %>
<ul id="submenu">
  <% for page in @page.children %>
  <li><%= link_to h(page.name), page %></li>
  <% end %>
</ul>
<h1><%= @page.name %></h1>
<%= simple_format(@page.content) %>
<p>
  <%= link_to "Edit", edit_page_path(@page) %> |
  <%= link_to "Destroy", @page, :confirm => 'Are you sure?', :method => :delete %> |
  <%= link_to "View All", pages_path %>
</p>
To finish the submenu off we’ll add a dash of CSS so that the links appear on the left of the page.
#submenu { float: left; list-style: none; border: solid 1px black; padding: 15px 14px; margin: 0 20px 0 0; }When we reload the page now we’ll see both menus, with the root pages at the top and the children of the current page on the left.
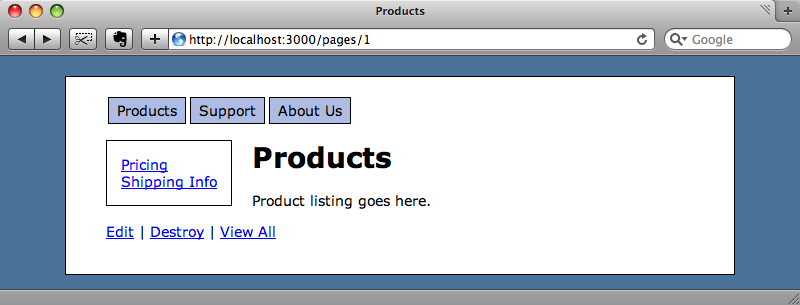
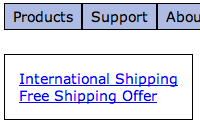
It looks like we’re nearly there, but there’s one other thing that needs tidying up. If we visit a page that doesn’t have child pages the empty menu will still appear on the left.
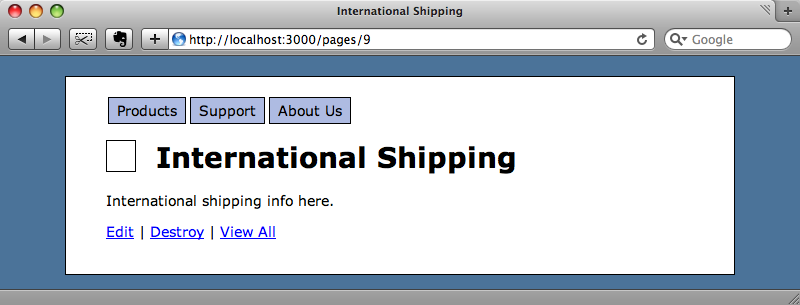
We can fix this by hiding the menu if the page has no children. A small change to the view code will sort this out.
<% unless @page.children.empty? %>
<ul id="submenu">
  <% for page in @page.children %>
  <li><%= link_to h(page.name), page %></li>
  <% end %>
</ul>
<% end %>
Adding a Breadcrumb Trail
Although we can now navigate down through the hierarchy of pages, there’s no way that anyone using our application can see where the page they’re on is relative to other pages or navigate back up the tree, except by going straight back to the root nodes. To fix this we’ll add a breadcrumb trail to each page. Again, this is done by modifying the show action’s view code. We’ll add the breadcrumb trail between the main menu and the page’s title.
<div> <% for page in @page.ancestors.reverse %> <%= link_to h(page.name), page %> > <% end %> </div>
To find the path back up to the root node we’re using the ancestors method, which returns an array. The first element is the page’s parent, the second the grandparent and so on until a root page is found. We want our breadcrumb to start at the root so we’ve reversed the array and then looped through it creating a link to each page separated by a greater than sign.
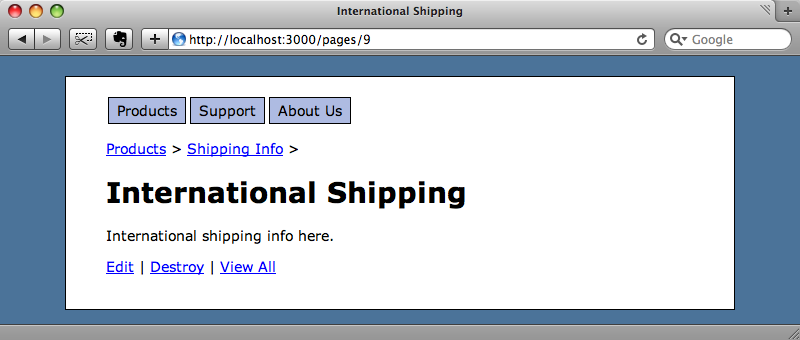
We now have a useful way of navigating up and down the hierarchy of pages.
A More General Use
We’ve shown a fairly specific use for acts_as_tree here, and most Rails apps aren’t content management systems but a more complex set of controllers and actions. This technique can still be used create a menu system for an application, however. We can still create a Page model, but instead of the content field have a url field that contains the path to that page. The links can then use that url field to direct to the correct page in the application.
If we were using this in a production app it would be a good idea to cache the menus. Menu systems are an ideal candidate for fragment caching as once the menu structure has been defined for your application it will rarely change. Fragment caching was covered back in Railscast 90, which is well worth a look for more information.


